Posts by The Pink Whisk:
Afternoon Tea – Mini Cheesecakes with Rosé Syllabub
May 24th, 2011Vanilla Cheesecakes with Rosé Syllabub
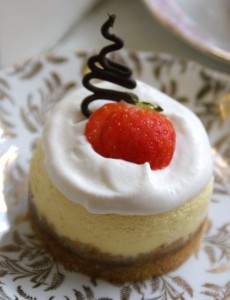
I have to admit I don’t get on well with baked cheesecakes – that is until I cracked it with this one. Perfect for my Afternoon Tea served individually on vintage saucers but makes an equally fabulous large 8″ cheesecake.
Ingredients:
Base
300g digestive biscuits, crushed
100g butter, melted
Cheesecake
500g full fat soft cheese
200ml soured cream
3 eggs, large
175g caster sugar
1 tbsp vanilla bean paste (1 tsp of vanilla extract if not available)
Syllabub
75ml rosé wine (you get to drink the rest of course!)
35g caster sugar
150ml double cream
Strawberries and Chocolate Squiggles to decorate
Makes 12 x 2½” individual cheesecakes or 1 x 8″ cheesecake
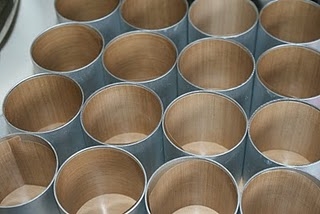
I’m making individual cheesecakes in these cake moulds but they work just as well in cupcake cases. Alternatively make one large cheesecake in an 8″ springform tin.
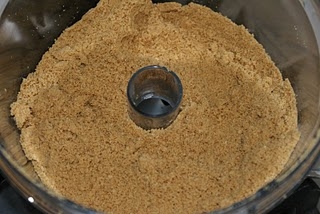
Crush up the digestives in a plastic bag with a rolling pin or in the food processor. Keep blitzing and bashing until they’re in tiny crumbs. Eat a digestive or two as you go along for sustenance.
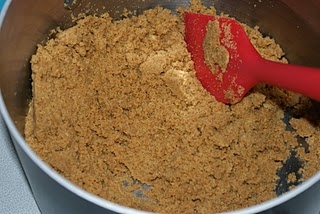
Melt the butter, in the microwave or a pan and then add to the crushed biscuits. Mix well – you’re looking for the consistency of wet sand.
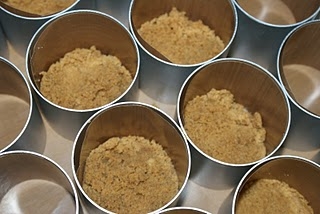
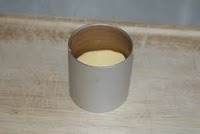
Add a tablespoon of the mixture to the base of the cake moulds, cupcake cases or tip it all into the base of a large tin.
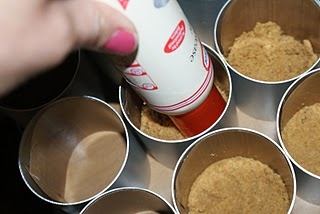
Flatten it down with the back of a spoon. If you can’t get a spoon in the cake moulds, use the flat lid of a bottle.
Place in the fridge to chill whilst we do the cheesecake bit.
Preheat the oven to 150c Fan/170c/Gas Mark 3.
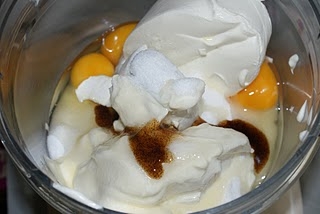
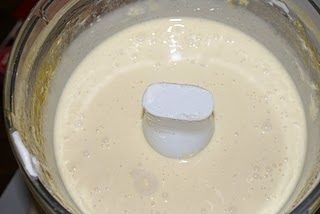
In the food processor blitz together the cream cheese, soured cream, eggs, sugar and vanilla bean paste. It should be a nice smooth liquid.
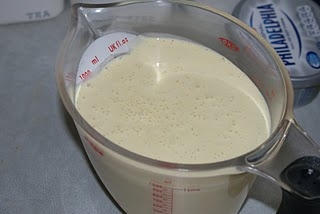
For the individual cheesecakes transfer this mixture into a jug, makes it a whole lot easier.
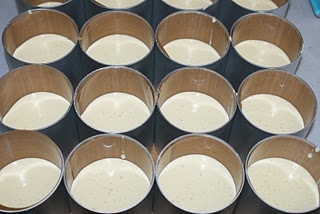
Divide the mixture between the 12 cheesecakes.
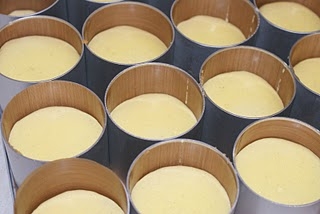
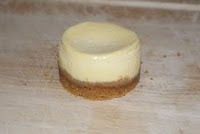
Bake in the oven for 20 minutes. Once baking time is up they should still have a slight wobble in the centre. (For one large cheese cake bake for 45-50 minutes).
Allow to cool, cover with foil and chill in the fridge for 4 hours or overnight if you have time.
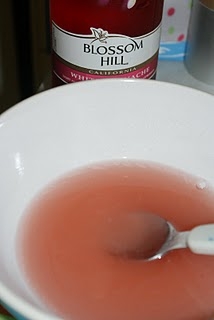
Prepare the wine and sugar now for the syllabub so it has time to combine. Add the rosé and caster sugar to a small bowl, stir, cover with clingfilm and leave to one side.
Once the cheesecakes have been chilled and the wine and sugar infused we’re ready to go.
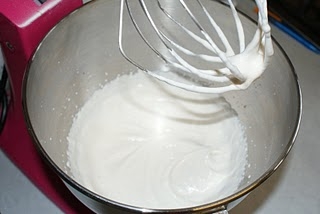
In a large bowl add the double cream, wine and sugar mixture. Whip the cream to a softly whipped stage.
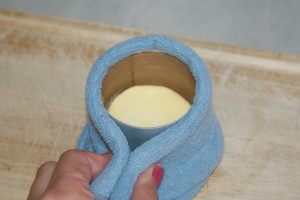
Remove the cheesecakes from the moulds if using by wrapping each in turn in a hot damp cloth.
Tap them firmly on the work surface and they should drop straight out.
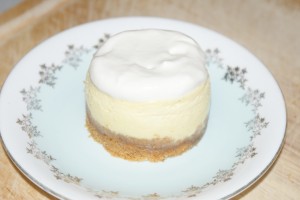
Add a couple of teaspoons of syllabub to the top of each and spread using the back of the spoon.
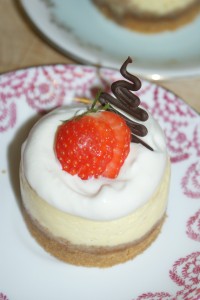
Top each cheesecake with half a sliced strawberry and a chocolate squiggle – yes that’s the technical name for it.
To make choccie squiggles you just need to melt a small amount of chocolate and then squiggle onto greaseproof paper using a small piping bag or a squeezy bottle and then leave to set.
My top tip for getting set chocolate out of a squeezy bottle once finished is to drop it in the freezer to freeze the chocolate. Squeeze the bottle and it should just crack off the sides and out the neck of the bottle then it’s easy to wash out.
And just before you go….The Pink Whisk blog is now available to download to your Kindle (if you’re lucky enough to have one!) Still working on ipad/iphone/epub versions and will keep you posted in due course.
Vanilla Cheesecakes with Rosé Syllabub
 Ruth Clemens, Baker Extraordinaire
Finalist on BBC2 The Great British Bake Off
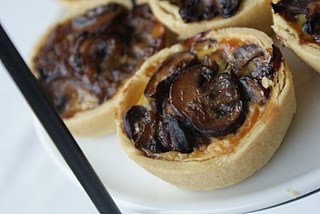
Afternoon Tea – Caramelised Onion and Mushroom Tarts
May 17th, 2011So this week, as a Birthday celebration and the fact that I am 21 again I’m hosting an Afternoon Tea for some of my lovely Mummy friends. I’ve spent a week cleaning (yes it was that bad) and now it’s on to the fun bit – baking!
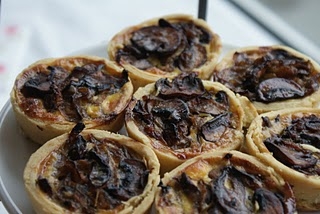
First on my menu is some little savoury tarts – Caramelised Onion and Mushroom.
Ingredients:
Pastry
225g plain flour
50g lard
50g butter
1 egg yolk, large
2-3 tbsps water (approx)
Filling
2tbsp olive oil
500g onions, sliced (about 3 large)
300g mixed mushrooms – take your pick, chestnut, portobellini, shitake, sliced
2 cloves garlic, crushed or finely chopped
2tbsp balsamic vinegar
1tbsp sugar
125ml single cream (250ml for large 8″ tart)
1 egg, large (2 eggs for large 8″ tart)
salt and pepper
Makes 12 mini tarts or 1 x 8″ Tart.
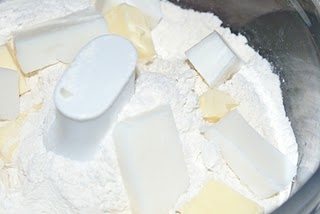
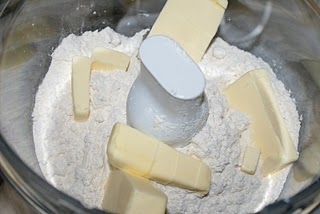
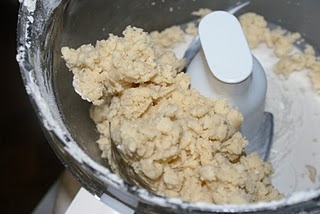
To make the pastry rub the lard and butter into the flour in a large bowl until the mixture resembles fine breadcrumbs. Alternatively you can make it in the food processor – blitz together the flour, butter and lard.
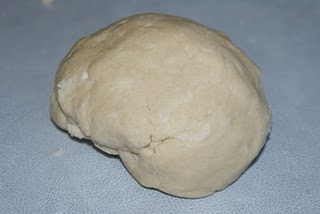
Add the egg yolk and enough water to bring the pastry together.
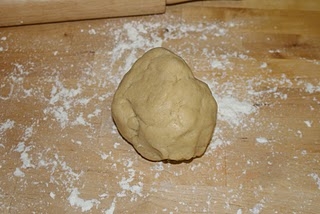
Knead lightly till smooth, wrap in clingfilm and chill for half an hour.
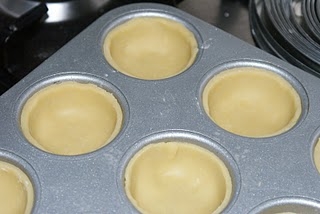
Grease well the recesses of a 12 hole cupcake pan.
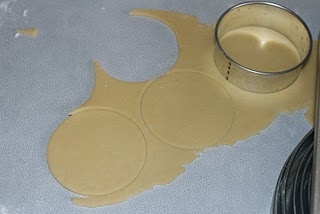
Roll the pastry out onto a well floured surface and cut out circles large enough to line each hole. If you have space bob these in the fridge to chill whilst we make the filling.
Preheat the oven to 180c Fan/200c/Gas Mark 5.
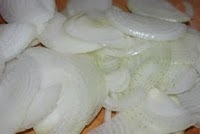
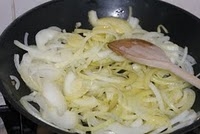
Over a medium heat, heat the oil in a large frying or saucepan. Add the sliced onions and fry until nicely softened.
Are you crying yet? I am. I saw a pair of pink onion goggles in John Lewis the other day but resisted the urge as I knew I’d look like a plonker – now with tears streaming down my face and the fact that no-one else in the house can bear to be downstairs maybe I should have succumbed!
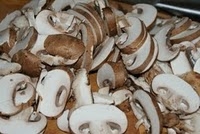
Add the mushrooms to the pan and continue to cook until they are softened.
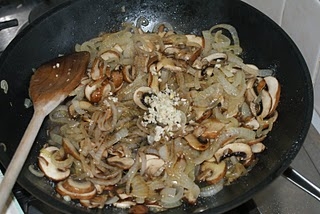
Add to the mushrooms and onions the balsamic vinegar, sugar and garlic.
Turn the heat up to high and fry until the majority of the vinegar is evaporated and the onions start to caramelise. This should take about five minutes.
Remove from the heat and set to one side.
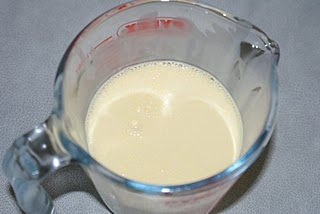
In a jug whisk together the cream, egg and a good dash of salt and pepper.
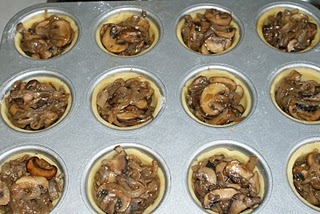
Fill each pastry case with a good helping of the mushroom and onion mixture.
Pouring slowly from the jug top up the tarts with the cream mixture. Go slowly and allow the liquid to fill around the mushrooms and onions. Fill them up just below the rim of the pastry, we don’t want them to overflow.
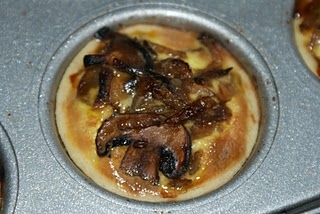
Now into the oven for 25 minutes until golden brown and puffy on top.
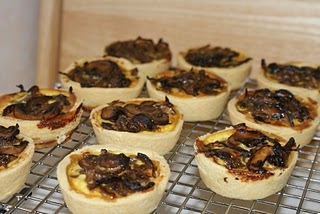
Remove from the oven and allow to cool in the tin, whilst still warm run a sharp knife around the tops of the tarts just in case a little bit has overflowed. If you don’t release these bits whilst still warm they will weld to the tin and you won’t get the tarts out!
Once fully cooled, remove from the tin and serve.
If you would like to serve them warm you will need to refresh them in the oven for 5-10 minutes.
These freeze easily in an airtight container or they can be kept in the fridge until you need them.
 Ruth Clemens, Baker Extraordinaire
Finalist on BBC2 The Great British Bake Off
How to make Sugar Roses
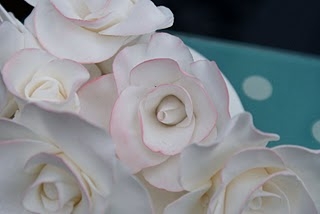
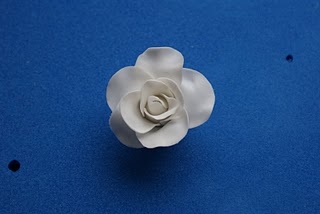
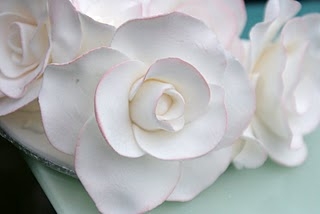
May 9th, 2011I know a fair few of you wanted me to blog how to make the blush roses I used on my traditional cake in The Great British Wedding cake, so here it it….. how to make sugar roses.
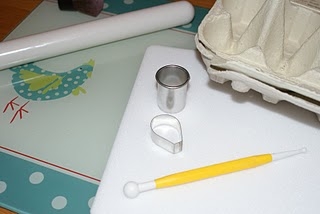
You will need:
White Sugar Florist Paste (SFP)
White fat such as Trex
Small rolling pin
Rose petal cutters or a small round cutter
Ball tool
Foam pad
Water and paintbrush
Empty egg box
Sugarflair blossom tint powder – Rose
Large powder brush
Here are some handy product links:
Sugar Florist Paste (SFP) is the key to really great sugar roses. It is extra strong when dry, dries out quickly and can be rolled out super thinly without breaking. You can of course make roses from regular sugarpaste but they will have to be much thicker and because it takes an age to dry out it is difficult to keep the rose petals in shape.
When working with SFP I like to work on a glass worktop protector as the surface is glass it is super smooth, and I can sit at the table to work too instead of hunched over the worktop in the kitchen! It’s entirely optional but you can pick them up fairly cheaply from most of the larger supermarkets – just make sure it’s smooth and not a bobbly one!
Instead of using icing sugar I always use Trex with SFP, it helps it stay moist whilst you’re working with it and makes it shiny too.
Grease the board with a little smear of trex, apply a little to your hands too.
Take a small amount of SFP and knead it in your hand until it’s smooth and ready to work with.
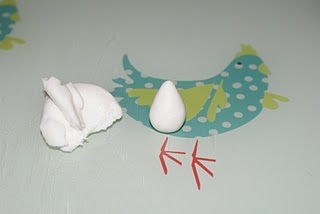
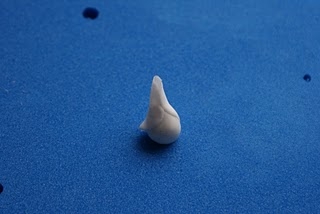
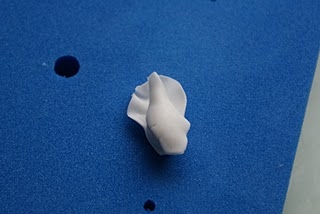
Make a small ball and then taper one side to make a cone. This will form the base of the rose.
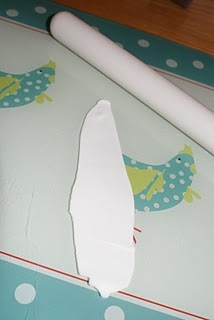
Roll out a small amount of SFP on your board, nice and thinly 1-2mm.
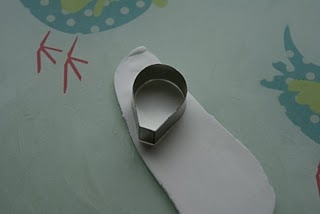
Working with just one petal at a time, cut out one petal using your cutter. If you’re investing it is best to buy a set of graduated sizes. The larger the petal cutter the larger the rose.
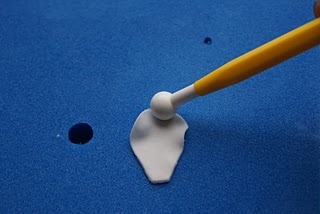
Transfer the petal to your foam pad. Take the large end of the ball tool and rub it over the very top edge of the petal. This thins the edge of the petal and creates a look of the natural movement in rose petals.
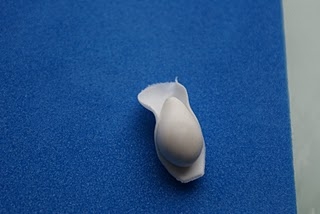
Add a dab of water with the paintbrush to the back of the petal. Position the cone on top of the petal and draw the edges together to form a point for the inside of the rose.
Now repeat the process cutting out a petal and shaping with the ball tool on the foam pad. A small dab of water at the base of the petal before sticking into pace. The second petal should go on the opposite side of the first.
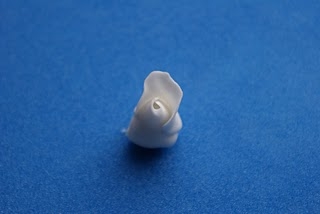
Encourage the edge of the petal to curl outwards. Don’t worry about the base of the rose being messy for now, the larger petals will cover it over. If they don’t you can easily pinch of the excess at the base and smooth it with your fingers.
Add another petal, again opposite the last one.
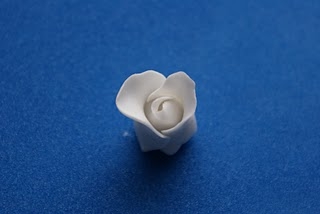
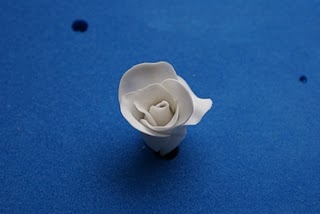
Repeat, adding petals overlapping them as they go around the rose until you reach the desired look. Remember to encourage the petals outwards otherwise the rose will appear too tight.
The average number of petals per rose is 10-12 but you can do more if you prefer!If you want to create a bud stop after the first three or four petals.
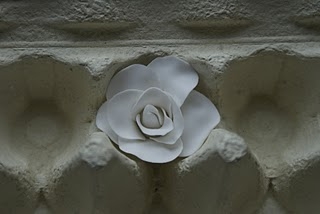
Now place the rose in a recess in the empty egg box and let it dry. This will take a couple of hours.
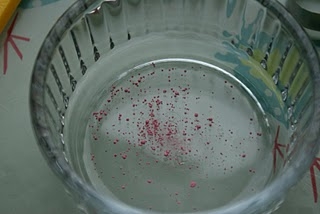
Roses can of course be made in any colour you like but I like white roses with a blush of colour. To add in the blush tinge add a tiny amount of blossom tint powder in your chosen colour to a small bowl.
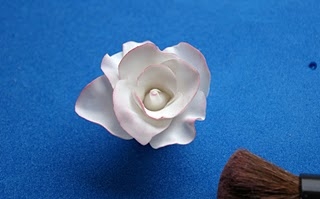
Use a large dusting brush. I use powder brushes, new and clean obviously and not taken straight from my make up bag!
Swirl the brush in the blossom dust and rub gently over the now dry rose. The edges of the petals pick up the colour beautifully and you can build the colour up to the intensity you prefer.
Blush Sugar Roses
Ruth Clemens, Baker Extraordinaire
Finalist on BBC2 The Great British Bake Off
Royal Red Velvet Cupcakes and Perfect Cream Cheese Frosting
April 26th, 2011
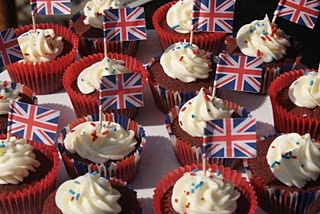
Red Velvet Cupcakes with Cream Cheese Frosting – perfect for a right royal knees up!
Ingredients:
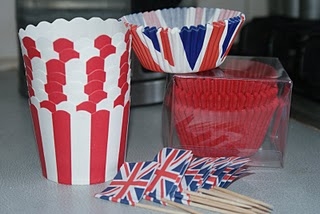
Selection of royal cupcake cases
Cake
165g butter,softened
300g caster sugar
2 tsp vanilla extract
3 eggs, large
200g plain flour
70g self raising flour
1 tsp bicarbonate of soda
20g cocoapowder
225ml milk
25ml vinegar
Red gel colour paste
Perfectly Pipeable Cream Cheese Frosting
70g butter, softened
200g Philadelphia
400g icing sugar, sifted
Red white and blue sprinkles
Union jack mini flags
Makes 24 cupcakes – enough for a knees up!
Don’t let my photos confuse you I’m making a bigger batch for my Royal Wedding Street Party! I think its a combination made in heaven – red velvet cakes and cream cheese frosting – red velvet cupcakes are basically a devils food cake recipe with the amount of cocoa powder significantly reduced – just a hint of chocolatey taste with a strikingly vibrant colour.
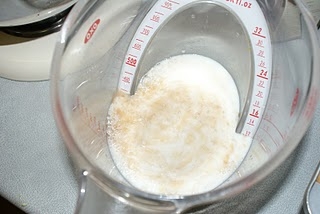
Start off by measuring out the milk in a jug, add the 25ml of malt vinegar, give it a quick stir and leave it to stand until later.
Preheat the oven to 160c Fan/180c/Gas Mark 4.
Line cupcake pans with the cases.
Cream together the butter and the sugar.
Add the eggs and vanilla and beat well.
Weigh out all the dry ingredients into a bowl together.
Now add the milk/vinegar and give the whole lot a good mix up.
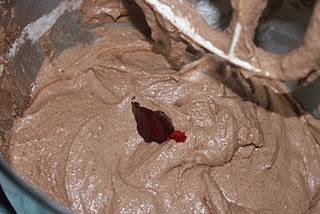
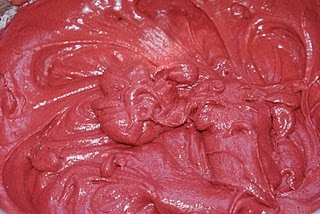
Add some red food colouring to get the mixture nice and red, you will need a fair bit. I’m using gel colour which is much more economical. If you’re using bottled liquid colour you may need up to three bottles!
Fill the cupcake cases 2/3rds full and bake in the oven for 20 -25 minutes until lightly browned on the tops (if you can tell because its red!)
Remove from the oven and place on a wire rack to cool.
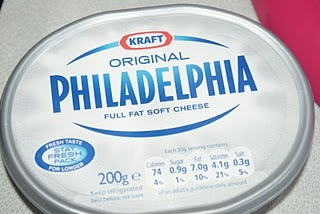
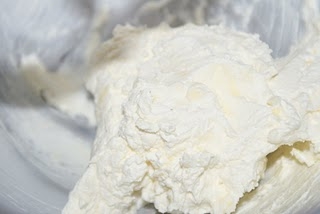
Now for the cream cheese frosting, this is the perfect recipe for frosting that is pipeable and certainly not running all over the place but there are a few things to remember. I only ever work with Philadelphia Cream Cheese and full fat too. Other cheeses are available and may be cheaper however they don’t perform quite the same when you work with them.
The Philadelphia needs to be super cold, chilled in the fridge or placed in the freezer for ten minutes.
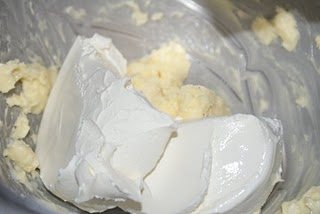
Drain off the liquid from the pack and discard it.
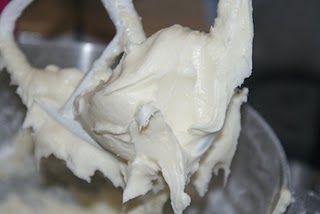
Beat the butter so it is super soft and ready to go. Add the Philadelphia and beat them together until combined. Don’t over beat – Cream cheese loosens and becomes more liquidy the more you beat it so less is best.
Sift in half the icing sugar and beat together, add the remaining half and mix again.
Now you should have perfectly pipeable delicious cream cheese frosting.
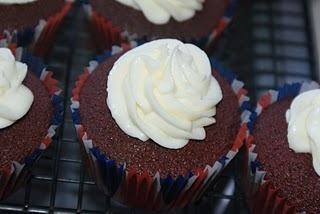
Pipe swirls using a piping bag and a large closed star tip onto the tops of the cooled red velvet cupcakes.
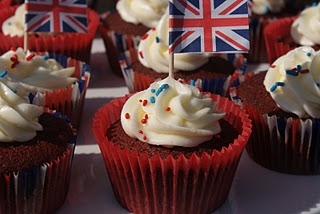
Add a swoosh of red white and blue sprinkles and top with a mini union jack.
Royal Red Velvet and Cream Cheese Frosting
Ruth Clemens, Baker Extraordinaire
Finalist on BBC2 The Great British Bake Off
Wedding Baking – Sweet Treat Kebabs
April 23rd, 2011
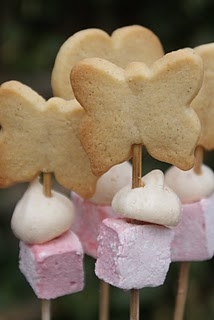
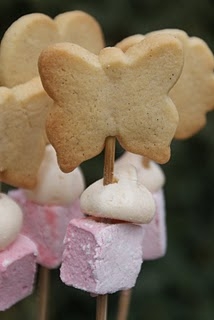
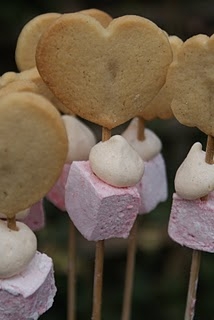
Biscuit, marshmallow and meringue – all in one go! These sweet treat kebabs are perfect wedding treats with brilliant wow factor – ideal for dipping in a chocolate fountain. This idea came from a Martha Stewart project and of course has the Pink Whisk twist with Raspberry Sherbet Marshmallows. Fear not if pink isn’t your colour , the marshmallows can be coloured with gel colour paste to match your theme.
Ingredients:
One batch of Vanilla Sugar Cookie dough (recipe here)
Wooden skewers
One batch of Raspberry Sherbet Marshmallows (recipe here)
Meringues
4 large egg whites
115g caster sugar
115g icing sugar
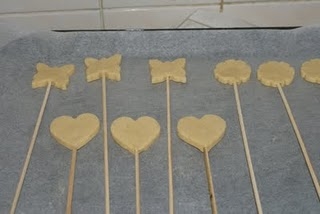
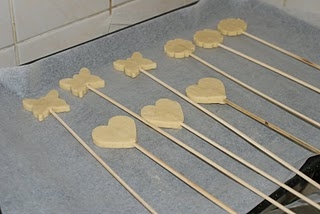
Prepare the sugar cookie dough so it is rolled out between sheets of greaseproof paper and nicely chilled. Choose a cookie cutter that ties in with your theme – hearts, stars or butterflies. A 1″ cookie cutter is the best size to use.
Leave the cut outs still they start to soften and then insert a skewer blunt end first into the cookie about half way through.
Lay the skewered biscuits onto a lined baking tray and place in the fridge to chill until firm again.
Preheat the oven to 160c Fan/180c/Gas Mark 4.
Bake in batches for approx 12-15 minutes until the cookies turn golden brown on the edges. Remove from the oven and allow to cool on the trays until they firm up.
Store them in an airtight container until you’re ready to assemble the skewers. The biscuits can be made up to a week in advance and will keep very well.
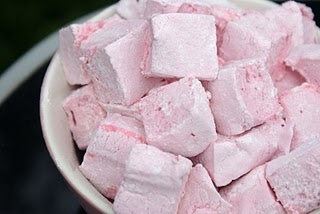
Make a batch of raspberry sherbet marshmallows (recipe here) and again keep in an airtight container.
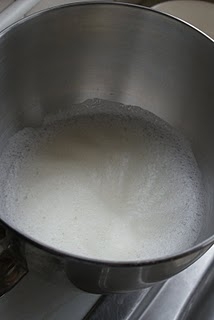
For the meringue buttons whisk the egg whites until they are fairly foamy.
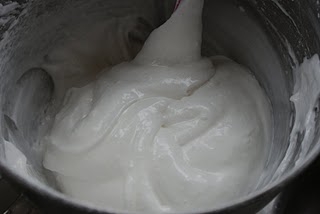
Continue whisking as you add the caster sugar a tablespoon at a time. Whisk until all the caster sugar is added and the meringue is smooth and glossy and stands in firm peaks.
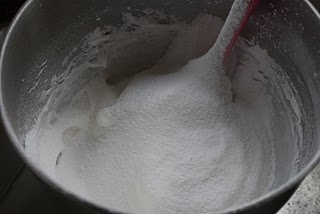
Sift over the meringue half of the icing sugar and then fold in carefully. Repeat with the remaining half.
Preheat the oven to 100c Fan/120c/Gas Mark 2.
Now it’s ready to go. Fill a piping bag, fitted with a star shaped large tip, with the meringue.
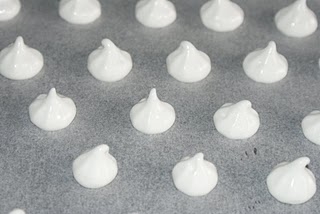
Pipe little buttons of meringue onto a tray lined with bake o glide or greaseproof paper.
Bake the meringues in the oven for approx 45 minutes. Because of the low temperature the timings may vary for your oven. Keep an eye on them and check when they’re done. The meringues should lift off the lining without squishing but should be still slightly moist and chewy on the inside.
Allow to cool on the tray before transferring to an airtight container. It’s important to store the meringues well if you’re not using them right away. Don’t place them alongside anything else (e.g. the skewered biscuits) as they will absorb the moisture and soften.
To assemble the sweet treat skewers take the biscuit skewers, pierce a meringue and slide it up towards the biscuit. It won’t hold firm but fear not the marshmallow will hold it in place.
Dust the skewer well with icing sugar using your fingertips and then pierce a cube of sherbet marshmallow. Slide it up the skewer. The icing sugar will stop the marshmallow sticking as you move it.
Position it in place and then gently squeeze the marshmallow cube to encourage it to stick to the skewer in the right place.
To serve stand these up in pots with polystyrene lining the base.

Ruth Clemens, Baker Extraordinaire
Finalist on BBC2 The Great British Bake Off
Raspberry Sherbert Marshmallows
April 23rd, 2011Marshmallows with a twist – Raspberry Sherbet!
Ingredients:450g caster sugar1 tbsp glucose200ml water
2 large egg whites
150ml raspberry puree (from approx 225g raspberries)
2 x sachet Dr Oetker gelatine powder½ tsp citric acid
To coat:50g icing sugar50g cornflour½ tsp citric acid
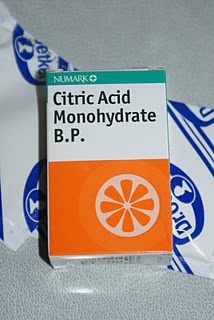
Citric acid seems like a strange ingredient but it’s what gives the marshmallows their sherbety kick! You can buy it from the chemists and is pretty cheap at around £1.00. If you don’t fancy the sherbet just leave it out.
Start by mixing up the coating so you’ve got it ready for later, sift together the icing sugar and cornflour and ½ tsp of citric acid. Place it in a bowl and set to one side.
Prepare the puree, the way I make it is to heat the raspberries up in a bowl in the microwave and once they’re warm and squishy I push them through a seive to remove all the seeds. You can alternatively blitz them in a blender or heat in a pan before seiving.
You will need 150ml of puree which can be made from approx 225g of raspberries, you may need slightly more or less raspberries depending on their juciness.
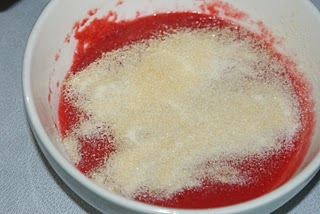
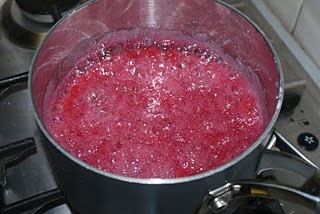
Once you have the puree ready to go, heat it up again, either in the microwave or a pan. Once nicely warm sprinkle in the sachets of gelatine a little at a time and stirring to dissolve. The heat encourages the powder to dissolve. If it’s not dissolving heat the puree again until it does. Add the ½ tsp of citric acid and stir. Put to one side.
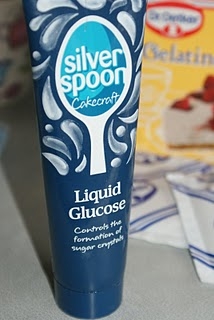
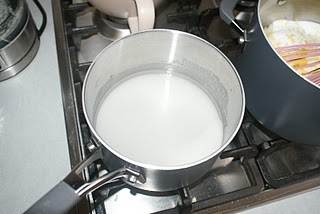
In a pan place the sugar, water and tablespoon of glucose. The glucose is not essential but it does control the sugars crystallisation so it is a help. Liquid glucose now comes in handy tubes. If you place the tube in a mug of hot water before measuring out it makes it far easier to work with!
Start heating the pan to dissolve the sugar and then let it bubble away. We need the syrup to reach 127c so you will need a sugar thermometer and it will take some time. Let it do its thing, keeping an eye on the temperature while we prepare the rest.
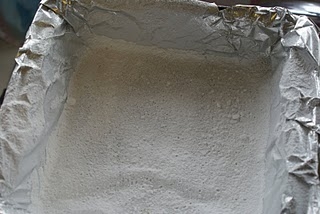
You will need 2 8″x8″ tins, or one large tin. Line them with foil, spray with a little spray oil and then dust liberally with the icing/cornflour coating we made earlier. Set them to one side.
When the temperature of sugar syrup is reaching 110c or thereabouts place the egg whites in a large bowl and start whisking. Whisk until the egg whites start to form stiff peaks and then stop.
Wait for the sugar syrup to reach 127c. Once it does remove the pan from the heat and then carefully because the syrup may bubble up add the raspberry puree/gelatine mixture. Swirl to combine.
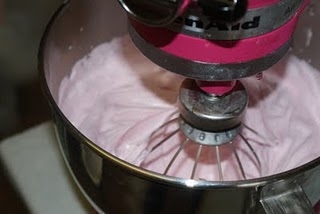
Turn on the egg whites to whisk again and very slowly and carefully begin to pour in the rapsberry syrup from the pan in a slow steady stream, avoiding the whisk attachment.
Continue whisking and pouring until all the syrup is into the whisking egg whites.
Leave the machine whisking for 7-10 minutes until the marshmallow is cooled and super thick glossy and sticky!
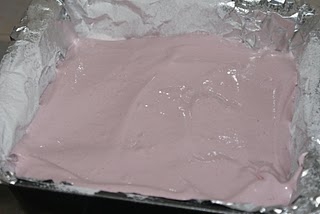
Divide the mixture between the tins and smooth the tops with a spatula or the back of a spoon.
Dust the top of the mixture liberally with the coating and now put to one side to set. The marshmallow needs to be at room temperature and never in the fridge. Leave to set ideally overnight.
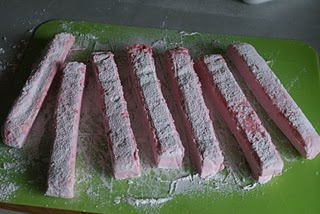
Once set the marshmallow is ready to be cut into chunks.
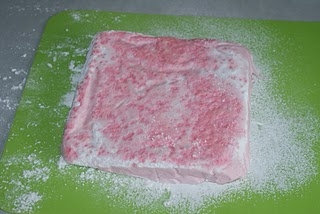
Dust a board with the coating mixture and tip out the sheet of marshmallow, removing the foil layer.
You will need a long sharp knife to cut it into strips. It helps to grease the knife which will stop the marshmallow sticking. You may also have to clean the knife fairly often. Turn the cut strips to coat the cut edge in the coating.
Repeat until all the marshmallow is cut into chunks and dusted.
The cubes will keep for 2-3 days in an airtight container at room temperature. If they get a little sticky just redust them as and when!
If you don’t fancy raspberry any fruit puree in the same quantity will work – or why not try lemon curd instead. Marshmallow can also be coloured using gel paste colours, just add a dash of colour once the syrup and egg whites have been combined.

Ruth Clemens, Baker Extraordinaire
Finalist on BBC2 The Great British Bake Off
Wedding Baking – Lemon Meringue Tower
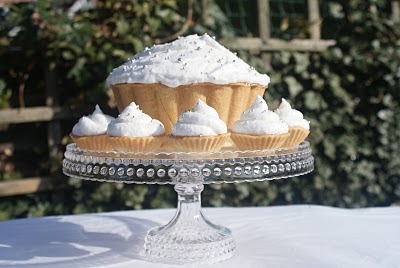
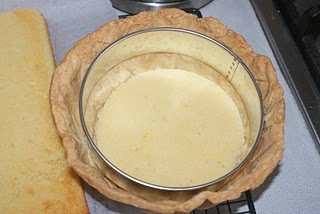
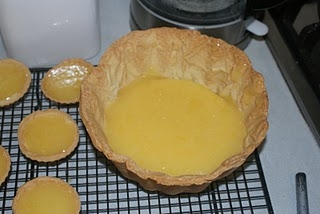
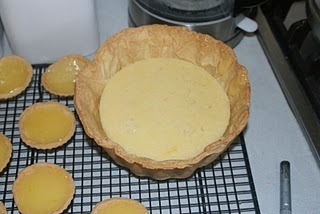
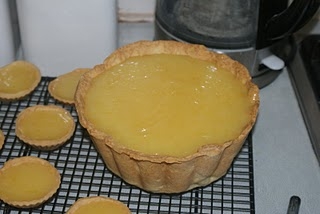
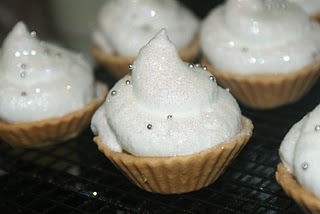
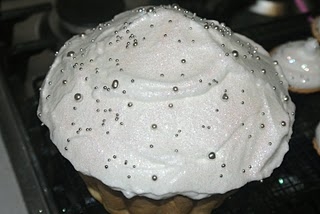
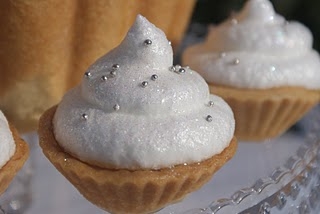
April 22nd, 2011Wanting something a little bit different from the traditional wedding bake? Why not have a Lemon Meringue Tower instead. If you watched The Great British Wedding Cake on BBC2 this week – here’s the full project in Pink Whisk step by step style. xx
Ingredients:
Pastry
225g plain flour
100g butter
25g caster sugar
1 egg yolk
35ml water, approx
Lemon Cake (of fit for the queen fame)
175g butter, softened
175g caster sugar
3 eggs, large
zest of 2 lemons
juice of 1 lemon
150g self raising flour
1 x Quantity of Ruth’s Super Zingy Lemon Curd
plus 1 x sachet of Dr Oetker powdered gelatine
Italian Meringue
5 large egg whites
250g caster sugar
100ml water
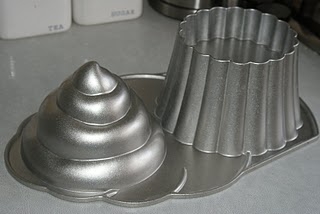
You will also need a large cupcake style cake mould, a sugar thermometer, baking beans/dried rice.
The quantities given will make one large lemon meringue centre piece and 9 miniature lemon meringue tarts. Obviously if you’re making a full tower you will need to double quantities of everything. Always make the Italian meringue in batches of 5 egg whites at a time, a standard kitchen stand mixer cannot cope with a greater capacity in one go!
Okay, first up pastry.
You know I’m a pastry food processor convert. Pulse together the flour, sugar and butter until the mixture resembles fine breadcrumbs. If you’re working byhand rub the butter in with your fingertips.
Add in the egg yolk and pulse again. The egg yolk adds richness to the pastry and seeing as we’re using a fair few egg whites it makes sense to use them up.
Then with the processor running add the water a little at a time down the processor chute until the pastry comes together. Turn off straight away and remove the ball of pastry.
Wrap in clingfilm or place in a food bag and chill in the fridge for 15 minutes.
The chilling of the pastry allows the moisture to be absorbed by the flour and relaxes the pastry after shocking it in the processor. It will be less likely to shrink and misbehave.
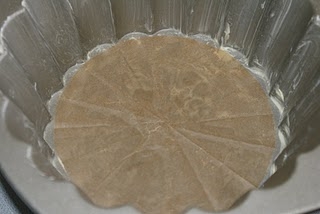
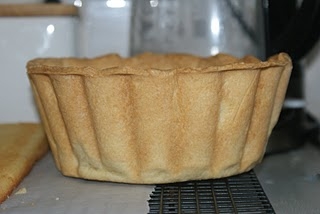
Prepare the base section of a large cupcake cake pan. Grease and add a small circle of baking paper to the base just to make sure you can get the pastry case out.
The best pan is the Nordicware Cupcake Pan which is what I have at home and practiced in. For the programme the mould was slightly different and a fair bit deeper. It’s not impossible to do, just a little bit tricky. If you have a silicone mould place it on a baking tray first just to secure it slightly.
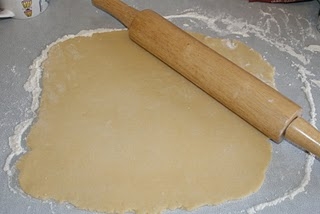
Once chilled roll out the pastry into a large round.
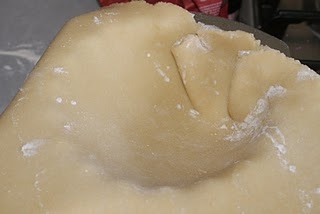
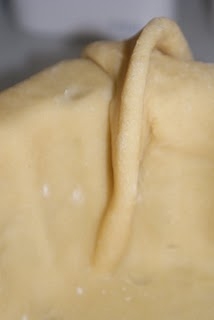
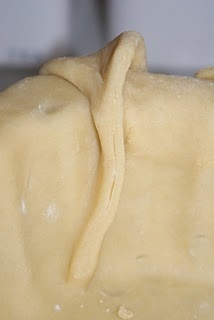
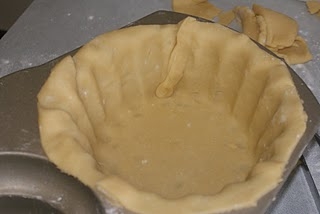
Lift the sheet of pastry with your rolling pin and drape it over the base part of the large cupcake. Ease it in gently with your fingers trying not to rip the pastry. Try to form a seam taking up the excess pastry in one point.
Cut off the extra with a pair of kitchen scissors and smooth the edges back together.
Once you have the base section lined you can patch up any rips or tears easing the pastry back together or adding in little pieces here and there. Try to leave enough of an overhang so you’re not scrabbling around trying to make a neat edge later.
Trim around the top leaving it about an inch wide, we’ll neaten it up later.
Place it in the fridge to chill for half an hour. You want the pastry to be hard, hard, hard.
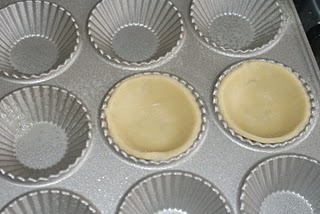
Re-roll the trimmings, cut into circles and use to line the recesses of a small bun tin, I’m using the fluted tins from Lakeland (any excuse to buy them…I think a TV project means I was allowed?) You can get the same effect by dropping fluted silicone cupcake cases into a 12 hole cupcake pan and using them to shape the pastry. Chill along with the large pastry case.
Preheat the oven to 160c Fan/180c/Gas Mark 4.
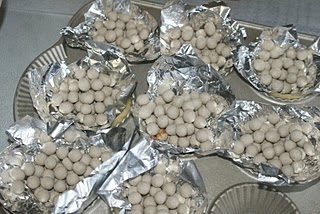
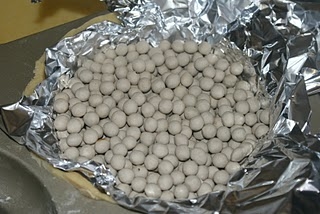
Once nicely chilled trim neatly around the top of the cupcake with a sharp knife. Line with a good generous piece of strong kitchen foil and fill with baking beans or dried rice. Repeat with the mini pastry cases.
Hopefully your pastry will still be nice and cold, if its not, back in the fridge for ten minutes or so.
Once the pastry is sufficiently hard place in the oven to bake. For the large 20 minutes before removing the baking beans (remove with a metal spoon, don’t try and lift it out in one go, once the majority of the beans are out ease the foil back from the pastry and lift out) and then a further 10 minutes until golden biscuit coloured and cooked through. For the miniatures 12 minutes before removing the beans and a further 4-5 minutes.
Allow the large pastry case to cool in the tin. It will be too fragile to remove before it has cooled properly and you don’t want to wreck it. The little ones can be placed on a wire rack to cool.
On to the lemon cake, this bit’s easy.
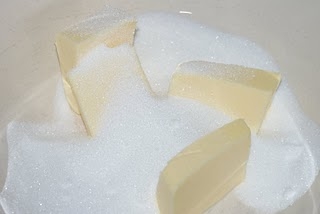
Cream together the butter and sugar.
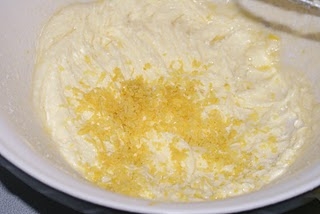
Add in the lemon zest and mix well.
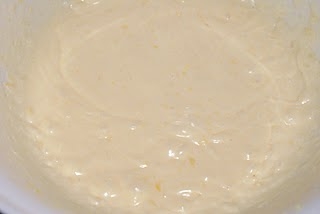
Eggs beaten in one at a time adding a little of the flour at any sign of curdling.
Fold in the remaining flour.
Lastly stir in the lemon juice.
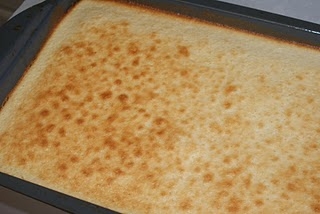
Place the mixture into a shallow large rectangular baking tin greased and lined with baking paper.
Bake in the oven for approx 15 minutes until baked and golden on the top.
Remove from the tray and cool on a wire rack.
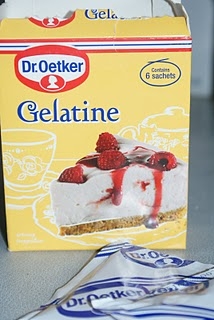
Now you’ll need a batch of Super Zingy Lemon Curd (recipe here). When you get to the finish sprinkle in one sachet of powdered gelatine. This is by far the easiest product to use and is available in most of the major supermarkets. If you want to use sheet gelatine you will need 4-5 sheets dissolved in 100ml of water. This amount of gelatine will just give a soft set and will stop the lemon curd splurging all over your guests (in my case Mary Berry and Paul Hollywood!)
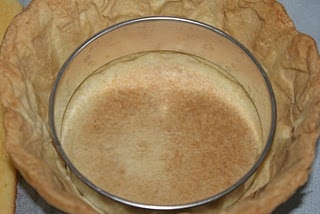
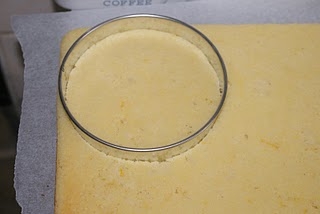
Measure the base of the inside of the large pastry case and cut out a circle of lemon cake to fit.
Place it in the base of the pastry case and measure the size of cake circle you will need to go on top of it.
Add a couple of large spoonfuls of lemon curd on top of the first sponge layer and then add the second sponge layer.
Fill the case up fully with the lemon curd and use the remainder to fill the mini pastry cases.
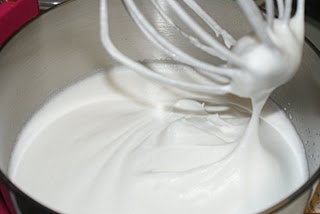
Italian meringue – place the egg white in a large bowl whisk them up to the soft peak stage. This means the peak formed when you lift out the whisk drops back over on to itself.
In a pan place the sugar and water. Bring up to the boil to dissolve the sugar in the water and then without stirring continue to boil until the sugar syrup reaches 121 C on a sugar thermometer.
At this point take the pan off the heat and turn on the stand mixer to whisk the egg whites further.
Slowly drizzle the syrup into the egg whites, avoiding the whisk attachment. You need to add the sugar slowly and gradually whilst whisking. Once all the sugar syrup is added the meringue should be thick and glossy and stand in stiff peaks for you.
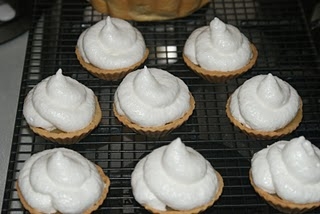
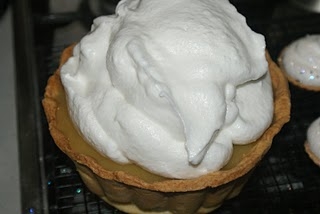
Add half of the italian meringue to a piping bag fitted with a large round open nozzle and pipe swirls on top of the lemon curd layer.
The remaining half will be used for the large centrepiece.
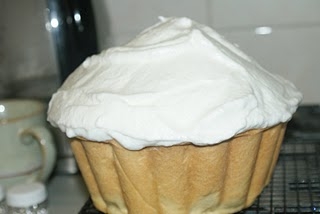
Place a good dollop of meringue onto the lemon curd and using a palette knife begin to spread and shape. You want to aim for a pointed meringue top, adding more meringue as you need it. Encourage the meringue to meet the top edge of the pastry case.
Once you’re happy with your piping and shaping add a good sprinkle of hologram glitter (wouldn’t be a Pink Whisk project without it) and some beautiful silver dragees.
These can be made a day in advance but I would advise you have a practice run! Sometimes if the sugar syrup has been added too quickly to the meringue then the meringue will ‘cry’ over time and give out a clear syrup so it’s something to check you can get right before the big day and heck we don’t mind eating the trial runs do we?
Ruth Clemens, Baker Extraordinaire
Finalist on BBC2 The Great British Bake Off 2010
Wedding Baking – Fruit Wedding Cake
April 20th, 2011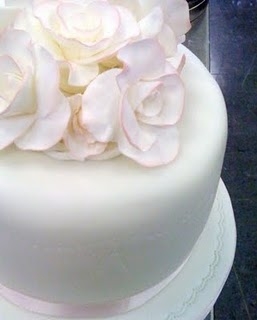
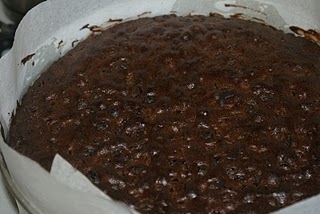
Here’s the recipe for my perfect wedding cake. Because sometimes you need a fruit cake that tastes great without maturing and one that cooks fairly quickly – like when you have 11 hours to make the whole darn thing…
I will be doing a separate tutorial for sugarpaste roses later on this week.
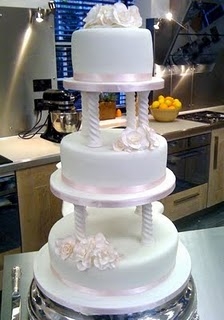
If you’re planning on baking your own wedding cake, or one for someone else you really need to think well in advance. Cakes can be made 3 to 6 months earlier and then wrapped well in baking paper and clingfilm and allowed to mature for the very best flavour. Wedding cakes are an expensive investment – the price reflects the amount of hard work and dedication that goes into it. But that’s no reason not to make your own – my top tip would be to practice it – check you are happy with the cakes and the design. Iron out any bits your not happy with. A lot of folks say they don’t like fruit cake – I’m adamant that’s because they’ve never found the right fruit cake. Find the recipe that’s right for you and you’ll be hooked!
So here it is, no nuts or cherries (because I’m not keen on them or rather the boys aren’t) but they can be added in if you like, don’t stress about the quantities add them however you like and judge it by eye. Three versions for you for a 6″, 9″ and 12″ cake.
Ingredients:
6″ 9″ 12″
Butter, softened 115g 250g 375g
Dark brown sugar 70g 150g 225g
Caster sugar 45g 100g 150g
Zest of orange ½ 1 1½
Eggs, large 3 8 12
Vanilla extract 2tsp 3tsp 4 tsp
Treacle 1 heaped desert spn 2 heaped desert spns 3 heaped desert spns
Self raising flour 140g 310g 465g
Bicarbonate of soda ½ tsp ¾ tsp 1 tsp
Ground cloves ½ tsp ¾ tsp 1 tsp
Cinnamon ½ tsp ¾ tsp 1 tsp
Currants 125g 275g 410g
Raisins 170g 375g 560g
Sultanas 255g 565g 850g
Baking Time 1 hour 20 mins 1 hour 45 mins 1 hour 45 mins
at 160c Fan/Gas Mark 4
Preheat the oven to 160c Fan/Gas Mark 4.
Line the sides and base of your chosen tin. (See notes on tins at the end of this post)
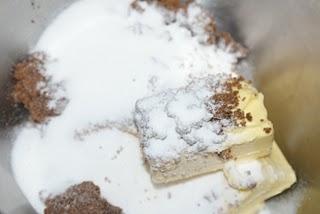
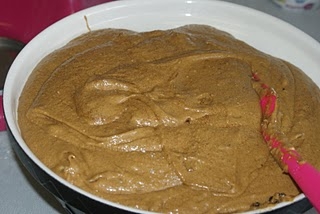
Cream together the butter and sugars
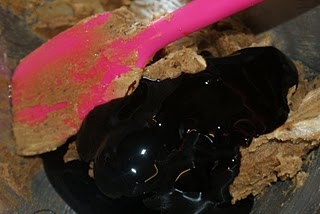
Add in the zest of orange and the treacle, beat well.
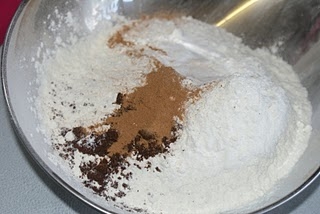
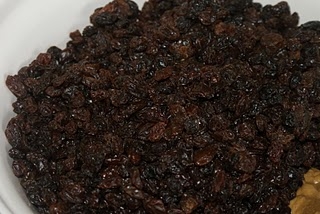
Measure out all the dry ingredients and all the fruit and place in two separate bowls. The fruit needs to be in the biggest bowl you’ve got! Sometimes when making a large fruit cake I use a big plastic box – you need room to mix without spilling it all over the place.
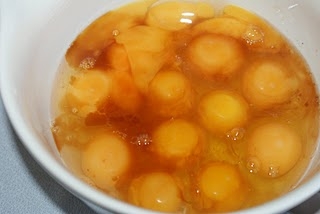
Crack the eggs into a jug add the vanilla extract and beat into the creamed butter mixture a little at a time, add in a couple of spoons of the flour mixture at any sign of curdling.
Once all the eggs are in add in the remaining dry ingredients and mix well again.
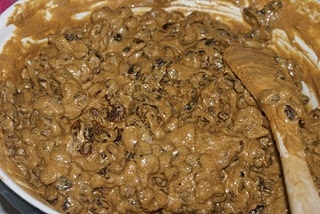
Now tip the cake mixture onto the fruit and using a good solid long handled spoon mix well. For large cakes you need muscles for this bit. Make sure all of the fruit is broken up and coated with cake mixture.
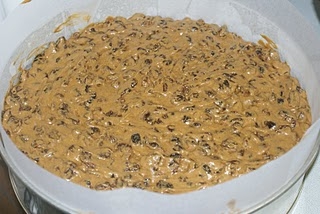
Now into the tin. Add the mixture carefully trying not to get any mix onto the lining of the tin. When the cake is cooking any smears on the baking paper will make it smell like the cake is burning and you will check it in a panic. The cake isn’t burning it’s those little bits of mixture on the baking paper.
Now into the oven for the times stated above, place the shelf one third of the way up from the floor of the oven. When the cake is done a skewer should come out clean when you test it. Keep your eye on it during baking especially if you have an electric oven with a top element that doesn’t turn off – this can burn the top of your cake so you may need to cover the top with baking paper to protect it.
Remove from the oven and allow to cool in the tin and then use any which way you choose. I’m going to turn these into another three tier wedding cake for our Royal Wedding Street Party (watch out for the pics over on facebook)
Tins – Good tins are essential when making fruit cakes. Fruit cakes have a longer bake time that sponges but need a good tin to conduct the heat evenly and thoroughly. They need good strong sides so that the crusts of the cake don’t go hard and dry. I recommend Silverwood and Invicta tins – once you’ve got them you’ve got them for life. x

Ruth Clemens, Baker Extraordinaire Finalist
on BBC2 The Great British Bake Off
Wedding Baking – White Chocolate and Raspberry Cakes
April 20th, 2011
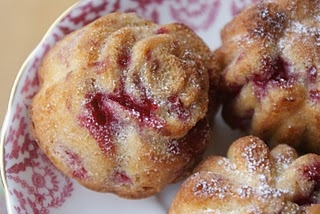
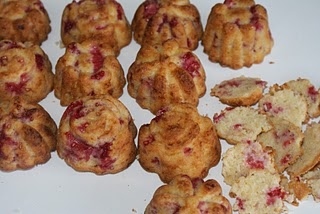
Little White Chocolate and Raspberry Cakes – another perfect little wedding treat – bag them up and tie with ribbon or place them in teeny tiny presentation boxes as cute little favours a little bit different!
These are baked in a silicone flower mould by Pampered Chef Silicone Flower Mould –
Lots of Pink Whiskers are Pampered Chef consultants so in the interest of fairness please visit www.pamperedchef.co.uk to find your own local consultant.
The silicone pan has beautiful flower shapes in three designs rose, daisy and sunflower. It has a metal rim to keep the mould sturdy and manageable when working with it. But what I love most about it is the fact that Pampered Chef advise you to grease the pan each time you use it which is key to getting the moulded cakes out cleanly without ruining the design.
So here we go, rose, daisy and sunflower shaped cakes…
Any shaped mould will do the trick and there’s loads available if you search online. The mixture will also bake as an 8″ cake if you’re not wedding/occasion baking.
Ingredients:
150g butter, melted115g caster sugar3 eggs, large1tsp vanilla extract170g self-raising flour, sifted75g white chocolate, grated150g frozen raspberries
Preheat oven to 180c/160c Fan/Gas Mark 4.
Grease the silicone cake mould with a spray oil such as fry light or some melted butter and a pastry brush.
Melt the butter and leave to stand until just lukewarm.
Whisk together the melted butter, sugar, vanilla extract and eggs.
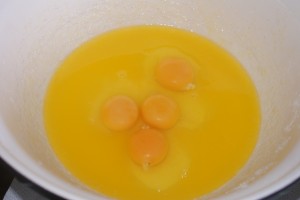
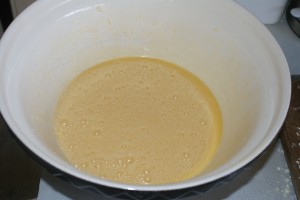
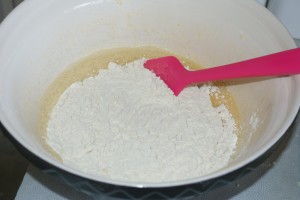
Add the sifted flour and fold in.
Grate the white chocolate. Using a box grater will stop the pieces of chocolate flying all over the kitchen. Obviously it gets tricky not to grate your fingers as you get down to the last little bits – save yourself injury and eat those!
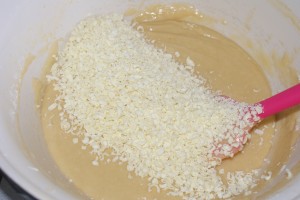
Add the chocolate to the cake mixture and mix in thoroughly.
Now take your raspberries from the freezer. Keeping them frozen hard until it’s time to use them means that they mix in easily without smashing into nothing and bleeding through the mixture.
Lay the raspberries on a chopping board and using a knife press the blade across the raspberries one by one. They will shatter into pieces – this is exactly what we want.
When they are all broken up add them to the cake mixture and fold in well.
The mixture may feel slightly frozen which is caused by the frozen raspberries. Don’t worry go ahead and fill each recess of your cake pan 2/3rds full and place in the oven to bake for approx. 25 minutes.
When baked to perfection remove from the oven and allow to cool in the pan for 15 minutes.
Loosen the edges of the cake away from the mould using your fingers. Place a cooling rack over the top of the pan and flip it over to release the cakes.
Leave to cool to room temperature then cut off the domed bases with a serrated knife so that they will sit straight on the plate. You get to eat these bits too.
Serve with a dusting of icing sugar – that’s all these little lovelies need!
Tip: Because of the moisture from the raspberries these cakes will only keep for a day or two if you’re making them in advance let them cool and then freeze, you can then defrost them just when you need them. Store in an airtight container.
And here’s the good news – I have two Pampered Chef flower moulds to give away! To be in for the winning you need to do two things:
Sign up to receive Pink Whisk updates via email Updates via Email(if you’re already subscribed you don’t need to do it again)
AND
email your name and address to
pamperedchefgiveaway@thepinkwhisk.co.uk with PAMPERED CHEF in the subject line
The competition will close at 4pm Wednesday 27th April 2011 and 2 lucky winners will be chosen at random from the entries received.
The RulesCompetition is only open to residents of the UK.To qualify you must be signed up to Pink Whisk updates via email and send an email with your name and address.One entry per person, multiple entries will not be counted.Two winners will be chosen at random from the entries received after closing at 4pm 27th April 2011 and the winners will be notified by email.
Visit Pampered Chef for more information and to find your local consultant.
Ruth Clemens, Baker Extraordinaire
Finalist BBC2 The Great British Bake Off 2010
Wedding Baking – Tea Cup Biscuits
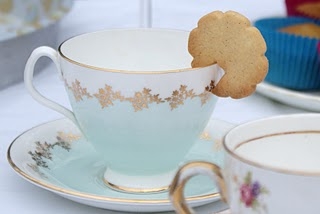
April 19th, 2011I thought we’d start off with a project that is really simple but definitely one of those finishing touches that will be ooh’d and aah’d over. By no means limited to weddings these tea cup biscuits can be done for any special occasion including having the girls round for a brew and a slice of cake!
You will need:
1 quantity of sugar cookie dough recipe here rolled out and chilled.
If you fancy a change from vanilla biscuits you can replace the vanilla bean paste for 2 tsp of rose, lemon or orange blossom extract.
1″ cookie cutter in the shape of your choice
small sharp knife
(see I said it was easy didn’t I?)
Cookies can be made in advance and frozen but will also keep for a couple of weeks in an airtight container. One batch of dough will make you 50 x 1″ biscuits.
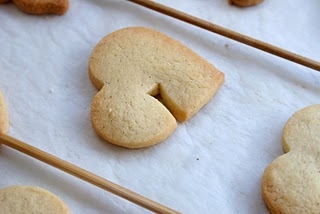
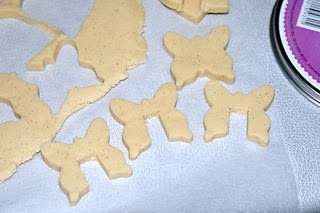
Choose a cookie cutter that reflects the theme of your wedding – butterflies, stars, hearts the list is endless. Circles will work just as well too.
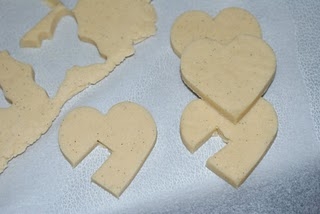
Cut out all the dough using the cutter.
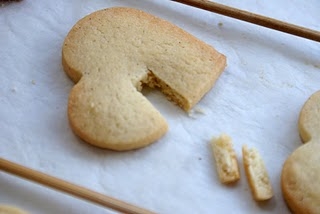
With a sharp knife cut out a 1/2cm rectangle from the side of each cookie.
Place them onto lined baking trays and chill until hard again in the fridge, this stops them spreading considerably in the oven.
Preheat the oven to 160c Fan/180c/Gas Mark 4.
Bake the cookies one tray at a time in the oven for approx 10 minutes until golden brown on the edges.
Once baked remove from the oven and using the sharp knife again re-trim the rectangular cut out shape. It will have closed up slightly in the oven and will need to be neatened.
The cookies are soft when taken out of the oven but soon harden up. If you haven’t got them all trimmed in time pop them in the oven for another minute to soften again.
Cool on the tray for ten minutes before transferring to a wire rack to cool completely.
Get Ahead: You can make the cookie dough and freeze it if you want to get ahead. Once baked they will keep for a week in an airtight container.
Job done. Provide the tea cup biscuits to the venue and ask them to serve them with the tea and coffee.
Ruth Clemens, Baker Extraordinaire
Finalist on BBC2 The Great British Bake Off
