Posts by The Pink Whisk:
Wedding Baking…let’s DIY
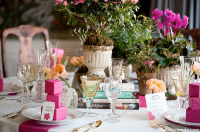
April 18th, 2011Taking part in The Great British Wedding Cake got me thinking about baking for your own wedding which is well within the realms of possibility for all you Pink Whiskers. It doesn’t have to be the cake, there’s lots of wedding treats we can bake up too so I’m kicking off this week with a few little treat ideas and of course the projects from the programme.
With wedding costs spiralling to the astronomical many of us reign it back with a spot of DIY. My own wedding (12 years ago -eek!) was a complete DIY project and probably one of the best and most enjoyable of them all. Mum made my dress, fifty million bridesmaid dresses, waistcoats and the odd cravat here and there, not least her own outfit. My Mother in law made the cake and I did…. well I did a lot of stuff…oh yes, party bags, flowers and table decorations (I think I got off quite lightly there actually).
My little sister Charlotte gets married next year and yes you guessed it I’ll be doing the cake! I won’t say publicly that I have visions of still trying to finish it the morning of the wedding in full bridesmaid regalia otherwise she might worry, oops that would be too late then.
So until tomorrow’s project here’s some words of advice from multi award winning Wedding Planner, author and thoroughly lovely lady – Tamryn Kirby.
Wedding season is nearly upon us and this year of course, we’ve also got a Royal Wedding to look forward to so even if you’ve not been invited to someone’s big day, there’s no escaping brides, grooms, bouquets, buttonholes and of course, cakes and bakes.
In my opinion, the best weddings are ones that have lots of personal touches – where the couple in question have spent time, and not just money, on their wedding day. Let’s face it, anyone can go out and buy coloured co-ordinated favour boxes and decorations but that doesn’t really say anything. It’s far better to inject a little of yourself into the event and getting a bit creative with some wedding DIY is a perfect way to do this. And really, do DIY details come any sweeter than ones that are edible? Absolutely not…
Edible treats are totally fabulous – guests love them and you can make them personal to you and your day. A few years ago, wedding favours were limited to rather dusty sugared almonds or rather boring sweets – all bought en-masse with no real thought or care. Now, we’ve got so much more creative with biscuits & cookies, cupcakes, macarons, cake pops, jams, handmade chocolates, pies, mini cakes and fruity tarts, either as favours or served together in a gorgeous dessert buffet table.
But the best thing about all of this is that so many more brides, grooms, families and friends are now baking their own treats and even cakes, for their weddings and I absolutely love this. I bake because I just adore making things that make people smile and imagine how that feeling is magnified when you’re making gorgeously tasty delights to share with the people you love the most on such an incredibly special day? My goodness, it doesn’t get much better than that. So, throw away thoughts of bog standard, bought in wedding treats, read Ruth’s yummy recipes (complete with perfect step-by-step instructions), get into the kitchen and bake some love into your wedding day…
Order ‘Unveiled: Confessions of a Wedding Planner’ on Amazon now!
Follow me on Twitter – http://twitter.com/tamrynkirby
Read my Blog – http://tamrynkirby.blogspot.com
If you’re planning a wedding do head over to Tamryn’s blog where there’s a wealth of ideas and advice and I’ll meet you back here tomorrow fo the first Pink Whisk Wedding Project x

Ruth Clemens, Baker Extraordinaire
Finalist on BBC2 The Great British Bake Off 2010
The Great British Wedding Cake BBC2
April 16th, 2011Just a quick post to let you all know that I will be appearing in the one off special
The Great British Wedding Cake – Wednesday 20th April 8pm BBC2
alongside Edd Kimber and Miranda Gore-Browne, just like old bake off times!
Hope you’ll tune in and set your sky plus boxes to record.

‘Renowned baking writer Mary Berry and professional baker Paul Hollywood explore the history of the Great British wedding cake. They look at its dramatic change through the eras, from the earliest Tudor creation and the extravagant Victorian period, to wartime Britain, the affluent eighties and the present day.Mary and Paul also set the ultimate challenge to the three finalists from 2010’s Bake Off, to make and bake two spectacular wedding cakes each, one traditional and one contemporary, in just 16 hours.’BBC

Ruth Clemens, Baker Extraordinaire
Finalist on BBC2 The Great British Bake Off 2010
Sunkissed Tomato & Parmesan Rolls
April 6th, 2011
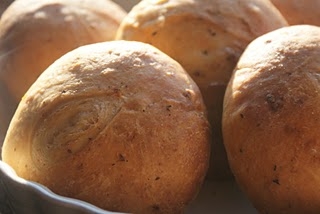
Sunkissed Tomato & Parmesan Rolls – a little taste of sunshine!
Makes 6 Rolls
Ingredients:
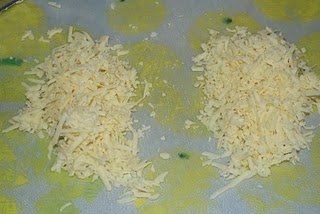
450g strong plain white flour1 tsp salt1 tsp caster sugar1 tsp dried yeast280ml water, tepid1tbsp oil from the jar of tomatoes100g sunkissed tomatoes40g grated parmesan
Method
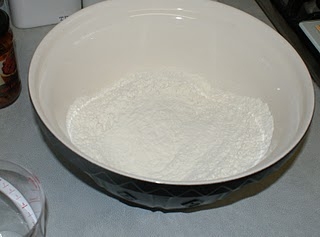
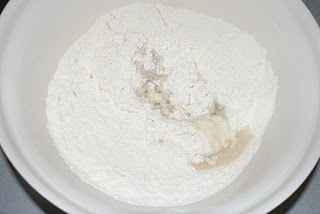
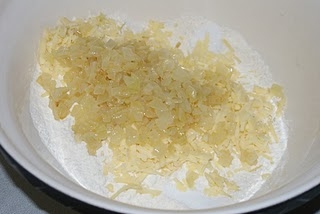
In a large bowl combine the flour, salt, sugar.
Measure out the water (it needs to be tepid to help the yeast activate) add a tablespoon of oil from the jar of tomatoes.
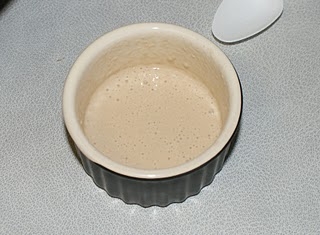
In a small bowl place the dried yeast. Add a little of the liquid and mix well. This gets the dried yeast started and helps you along the way!
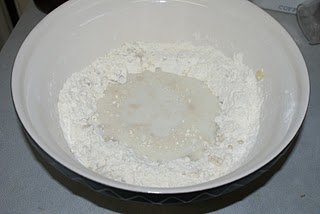
Make a well in the centre and add the water and yeast.
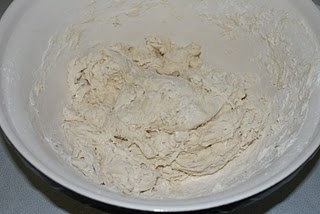
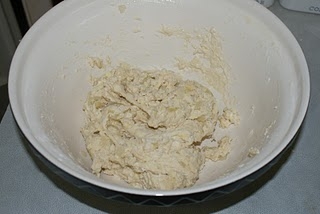
Work together with your hands to form a rough dough.
Knead the dough well on your work surface for ten minutes if making by hand. Adding a little flour to the surface if the dough appears too sticky.
Alternatively you can knead in a stand mixer for 6 minutes or use the dough setting on a breadmaker.
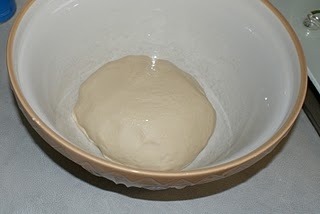
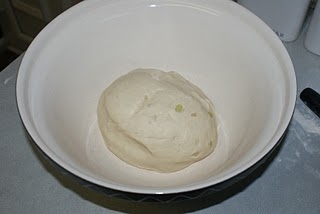
Once the dough is smooth and elastic place in a lightly oiled bowl, cover with clingfilm and leave to prove in a warm draught free place for an hour or until doubled in size.
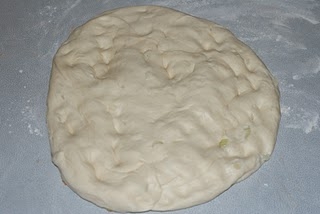
Once nicely risen and puffy tip the dough onto the worksurface and knead lightly to knock back.
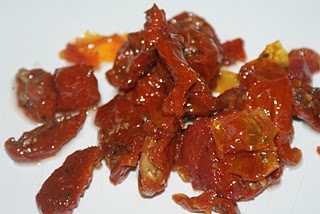
Roughly chop the sunkissed tomatoes.
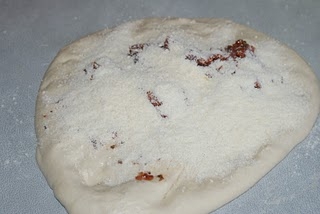
Flatten out the dough and add the tomatoes and grated parmesan.
Work the dough well kneading through the tomato and parmesan until well distributed. To begin with it will seem quite difficult due to the oil from the tomatoes and the cheese but keep going it will smooth out again!
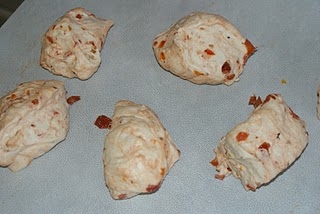
Divide the dough into 6 equal pieces.
And before you say there’s only five – there’s one hiding out of shot!
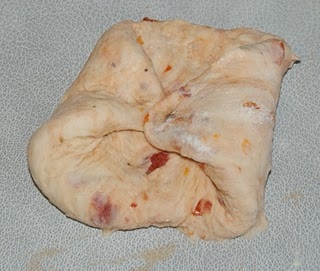
Shape into rolls – there’s a bit of knack to this if you want them to rise upwards and not just outwards.
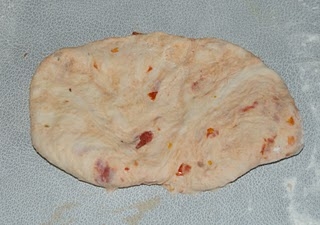
Take each piece and flatten out on the work surface.
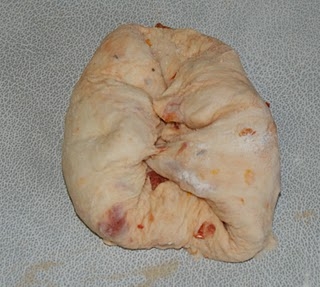
take the edges and fold in pressing into the centre
Keep repeating the folding in until you can’t fold in any more! This folding creates a spine for the roll which helps with the upward action rather than flowing outwards.
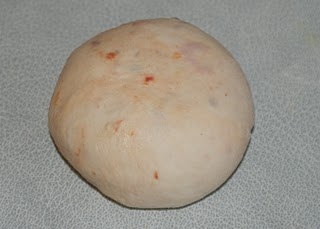
Flip the roll over and coax gently into more of a round shape if necessary.
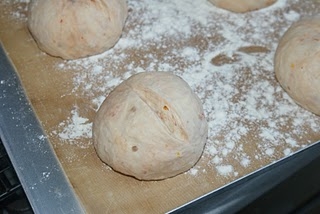
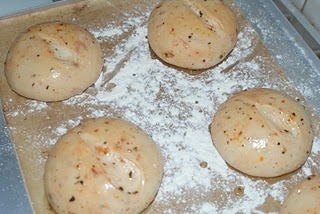
Place on a well floured baking tray, I’m also using a sheet of bake o glide as I can be sure then that they won’t stick!
Slash the tops of the rolls with a really sharp knife.
Cover again with a clean tea towel and allow to rise in a warm spot until risen and puffy (30 mins-1 hour).
Preheat the oven to 200c Fan/220c/Gas Mark 7.
Brush the tops of the rolls with oil from the jar of tomatoes
Bake in the oven for 18-20 minutes until golden.
Serve warm fresh from the oven or allow to cool on a wire rack.

Ruth Clemens, Baker Extraordinaire
Finalist on BBC2 The Great British Bake Off
How to make a Cupcake Bouquet
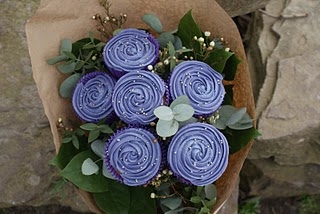
March 28th, 2011The perfect gift for Mothers Day – making a cupcake bouquet is really easy….let me show you how.
You will need:
Cardboard
6 x 12″ cake dowels – Squires Kitchen Dowels – Squires Kitchen
Scissors
Hot glue gun
Greenery for the bouquet
Wire, string or ribbon
Brown paper
5 or 6 x Cupcakes decorated with your choice of design Recipe here
How To:
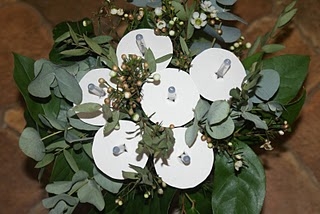
Start by preparing your cupcake supports.
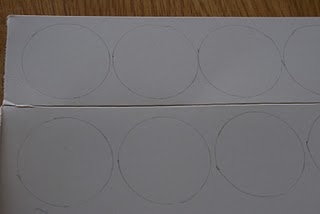
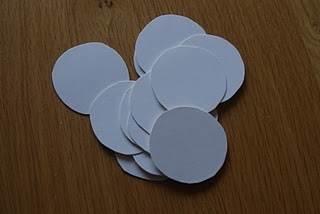
Take the piece of card and draw 6 circles each 2″ in diameter.
Cut them out.
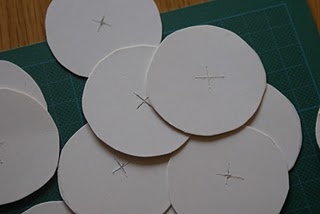
Mark the centres of the discs and using a craft knife and cutting mat cut a small X where you placed your marks.
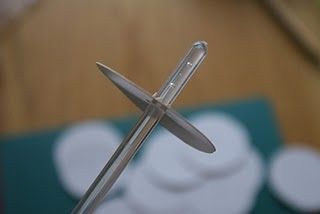
Push each disc onto the dowel. Position 1″ down from the top of the dowel.
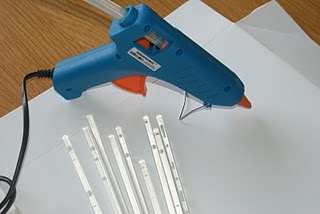
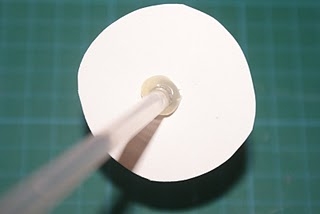
Using the hot glue gun, glue the underside of the discs to the dowel. Allow the glue to set and hold the discs firmly.
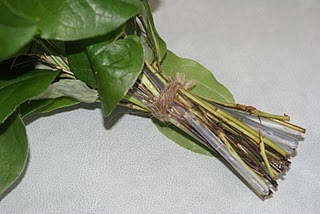
Now to create the bouquet. I had a bit of a stumbling block here, not being the most green fingered of characters there was no suitable greenery in the garden (weeds were not going to cut it here). I’m hoping you won’t have that problem. So this busy girl hot footed it down to the florists, with my cardboard discs and sticks!
Fortunately one of my Mummy friends, Kate, from school works down there. After being chronically teased for my bizarre request Kate fashioned me 2 bouquets from greenery and my sticks.
Actually they only cost £4 – £5.00 each to have made up. Handmade gifts are never a cheap option as I’m sure you know but they do mean so much more to the recipient.
Anyhow, enough rambling. If you’re giving it a go there is a great video tutorial here on how to make a hand tied bouquet.
Follow the steps creating a bouquet from greenery and the cupcake supports – 5 or 6 is perfect.
Because of the weight of the cupcakes when they go on, it is best to wrap the bouquet in brown paper or cellophane. It will help to keep the right shape.
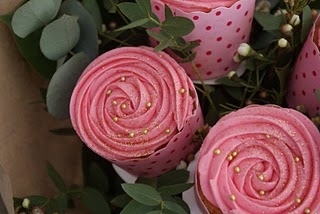
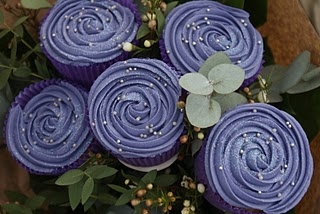
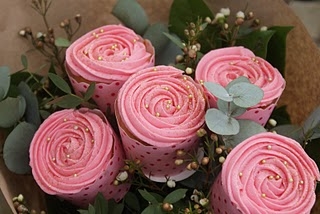
Before decorating the cupcakes take a sharp knife and pierce a small hole through the base of the cupcake case. Decorate your cupcakes any which way you choose. I like the rose effect piping and of course it wouldn’t be a Ruth cupcake without a sprinkle of glitter! You can see how to pipe like this here.
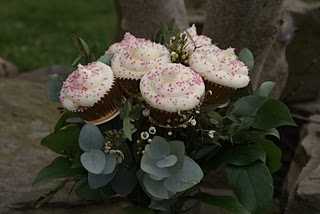
Stand the bouquet in a vase or glass making sure it is well supported. Place your cupcakes one onto each support in the bouquet pushing the dowel through the hole in the base of the wrapper until they sit neatly on the cardboard discs.
Now all that’s left is to find a worthy recipient – these are off to my Mum, earlier than Mothers Day but she’s poorly so I’m hoping they will cheer her up!
If you do give this project a go – please post your pictures on The Pink Whisk facebook page for us all to take a look!
Have fun
Ruth x
PS. The cute pink cupcake cups are by Paper Eskimo they are expensive and can be difficult to get hold of but The Cake Decorating Company has a selection here
Ruth Clemens, Baker Extraordinaire
Finalist on BBC2 The Great British Bake Off
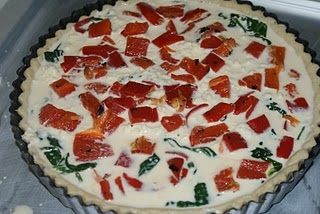
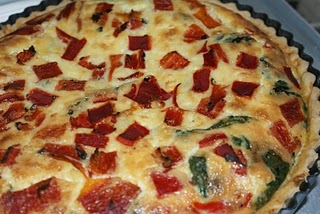
Roasted Red Pepper Tart
March 25th, 2011
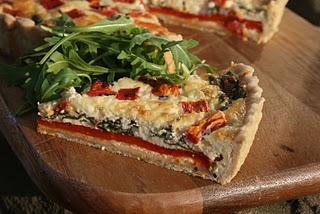
So it finally feels like spring has sprung and with Mother’s Day just around the corner this Roasted Red Pepper Tart is perfect for a special lunch!
Makes 1 x 9” Tart or 4 x 4” Tartlets
Ingredients:
Pastry225g plain flour, sifted50g lard50g butter, salted1 egg yolk2-3 tbsp cold water
Filling1 x jar of whole Roasted Red Peppers (320g drained weight)80g spinach1 tbsp olive oil120ml milk120ml double cream2 egg yolks2 eggsSalt and pepper60g Lancashire or mature cheddar cheese
Method
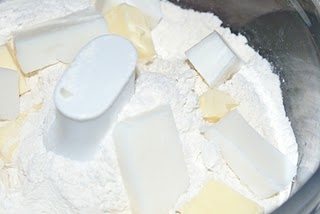
To make the pastry rub the lard and butter into the flour in a large bowl until the mixture resembles fine breadcrumbs. Alternatively you can make it in the food processor – blitz together the flour, butter and lard. If you struggle making pastry then the food processor method is your best bet as it doesn’t overwork the dough.
Add the egg yolk and enough water to bring the pastry together.
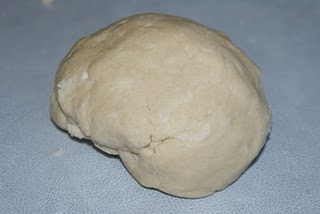
Knead lightly till smooth, wrap in clingfilm and chill for half an hour.
Grease the base and sides of a 9” tart pan with a removable base.
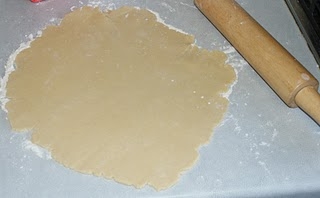
Roll the pastry out onto a well floured surface.
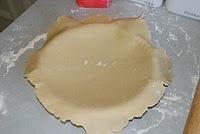
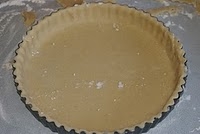
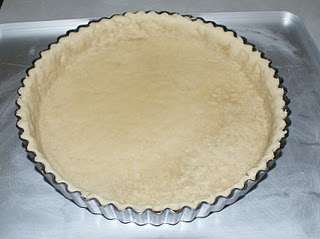
Line the tart pan and trim any excess. I just roll the rolling pin across the top and it will trim it perfectly for you.
Place in the fridge to chill until firm, approx 30 minutes.
Preheat the oven to 160c Fan/180c/Gas Mark 4.
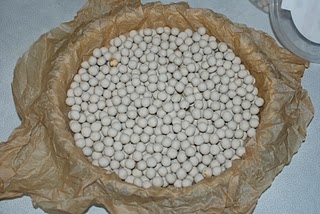
Line the chilled tart with greaseproof paper and fill with baking beans. If you have no ceramic baking beans then you can use dried rice or beans. Ceramic beans distribute the heat evenly and have a good weight to them to stop the pastry bubbling up.
Bake in the oven for 15 minutes. Remove the baking beans and greaseproof paper and bake for a further 5 minutes.
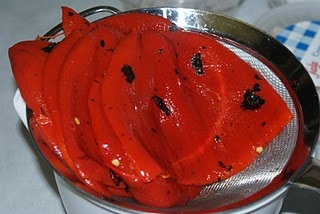
Drain the jar of red peppers and cut each in half to open them out flat. Set one pepper aside for later.
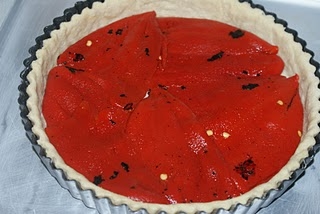
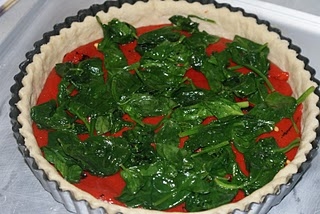
Line the base of the pastry case with a complete layer of red peppers.
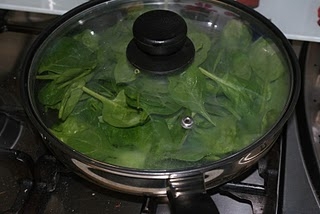
Place the spinach in a pan with a tablespoon of olive oil, season well with salt and pepper, cover and allow the spinach to cook until just wilted (about 3-4 mins).
Add the wilted spinach to the tart spreading it over the red pepper layer.
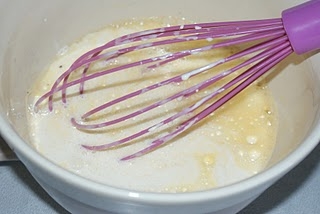
Whisk together the eggs, egg yolks, milk and cream. Season well with salt and pepper.
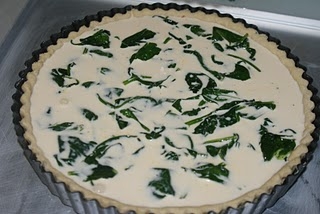
Pour into the tart carefully.
Roughly chop the pepper set aside earlier and crumble the cheese into small pieces.
Sprinkle the pepper and cheese evenly over the tart. I prefer to do it this way round so that each portion gets and even spread of ingredients.
Increase the heat of the oven to 180c Fan/200c/Gas Mark 5.
Bake the tart for 40 minutes until puffy and golden.
Serve hot or cold.
 Ruth Clemens, Baker Extraordinaire
Finalist on BBC2 The Great British Bake Off
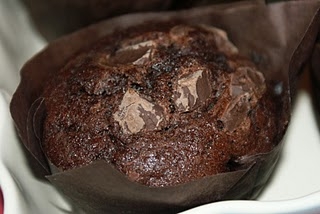
Chocolate Muffins (and the perfect chocolate cake recipe)
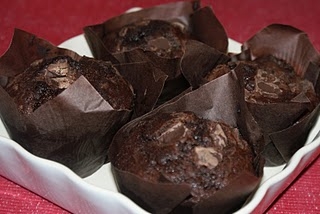
March 14th, 2011So here is my recipe for huge chocolate muffins with a surprise chocolate sauce filling – you know the kind you can buy in coffee shops and bakery chains up and down the country. They are twice the size of your average cupcake but take some beating! This is also my go to chocolate cake recipe and the quantity will be perfect for splitting between two 8″ tins.
Ingredients:
165g butter, softened
300g caster sugar
2 tsp vanilla extract
3 eggs, large
70g self raising flour
200g plain flour
1tsp bicarbonate of soda
70g cocoa powder
225ml milk
25ml malt vinegar
100g chocolate chunks of your choice to top the muffins
Filling
150ml double cream
150g dark chocolate (Bournville)
Makes 12.
Don’t let my photos confuse you I’m making a bigger batch for my hungry boys!
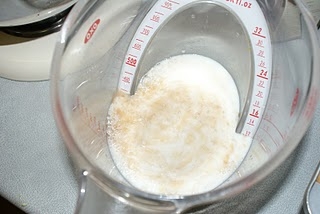
Start off by measuring out the milk in a jug, add the 25ml of malt vinegar, give it a quick stir and leave it to stand until later.
Preheat the oven to 160c Fan/180c/Gas Mark 4.
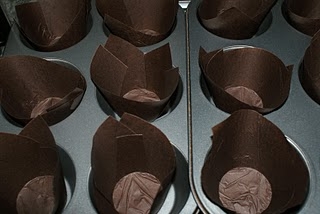
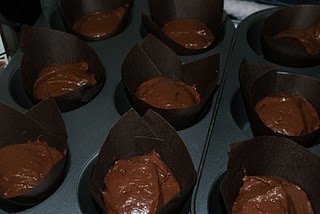
One of the keys to big muffins is these tulip type cases. You can make them yourself but I find it fiddly and hard to do so I buy them!
Add the tulip cases to a 12 hole cupcake tin.
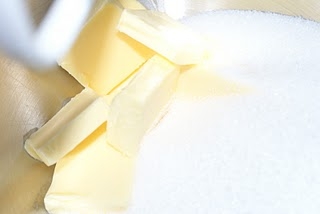
Cream together the butter and the sugar.
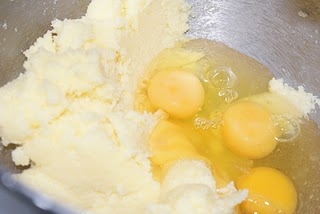
Add the vanilla extract and eggs and beat together well.
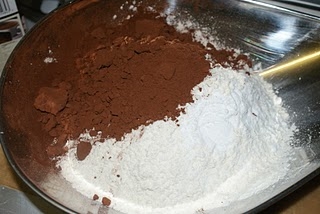
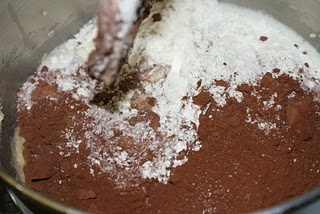
Weigh out all the dry ingredients into a bowl together, I don’t sift them it doesn’t seem to make a difference with this recipe – add them all to the mix.
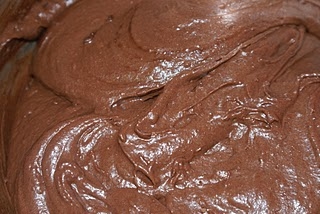
Now add the milk/vinegar combo and give the whole lot a really good mix up.
How easy is this recipe – and it works every time!
Add the mixture to the tulip cases about 2/3rds full.
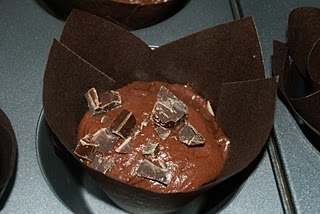
Chop some extra chocolate and sprinkle the chunks on the top. Sometimes I’ll use chocolate chips but these do tend to drop into the cake rather than stay on the top like good big chunks do.
Bake them in the oven for around 25 minutes until perfectly cooked.
Remove from the oven and allow to cool for a couple of minutes before taking a sharp knife and piercing a whole in the muffin. Wriggle the knife around inside a little to make space where you will add the filling. If you put the knife in through one of the cracks in the top no-one will see it later.
Now leave the muffins to cool completely.
To make the filling chop the 150g chocolate into small pieces. I’m using chocolate chips as it saves me having to chop it by hand – lazy? me? no just time saving!
Heat the cream in a pan until nearly boiling.
Remove from the heat and add the chocolate.
Allow the mixture to stand for a couple of minutes and then mix until you have a smooth glossy ganache.
You now need to leave this to stand for about 15 minutes until it has cooled down slightly.
To get the filling into the muffin you will need a piping bag and a metal icing tip. You have two options here – one of these long needle type tips designed for filling the likes of jam doughnuts. I have a Masterclass Flavour Injector (which they sell in Lakeland). The needles screw onto a syringe but I just fit them to a piping bag.
You can also do it with a regular icing tip (PME no 43) which is wide enough for the filling to squeeze through.
Fit the tip to the piping bag and fill with your cooled ganache.
Place the tip into the top of the muffin through the knife slit you made earlier and squeeze in the filling. If your ganache is difficult to squeeze in it has cooled too much so you will need to warm it up a little first.
As the muffin fills with ganache you will see it plump up the top and when it is full it will start to ooze through the whole you made so now’s the time to stop squeezing.
Fill all your muffins and then serve!
Chocolate Muffins

Ruth Clemens, Baker Extraordinaire
Finalist on BBC2 The Great British Bake Off
Perfect Pancake – How To….
March 4th, 2011
It’s very nearly Shrove Tuesday and with it comes the necessity to make pancakes! It’s always good to have a fool proof batter recipe and instructions and here it is…
Ingredients:
200g plain flour
pinch of salt
2 eggs, large
600ml milk
The batter will make approx 12 x 20cm pancakes depending on the thickness you prefer them.
My recipe comes from a well used copy of this BeRo book – my Grandma got this book for me many many years ago and it’s brilliant – actually Morrisons sell a remodelled version for just 99p on the home bake aisle.
Sift the flour into a bowl or batter jug. I prefer to use the jug as it’s easier to pour into your frying pan.
Add the pinch of salt and make a well in the centre.
Crack the eggs into the well in the flour and using a fork beat them slightly.
Add in the milk a little at a time keep beating with the fork incorporating the flour slowly.
Keep adding and beating until all the milk has been added. The batter should be the consistency of single cream – and without any lumps!
I remember my Mum letting us in the kitchen to fry and flip pancakes – she must have had nerves of steel. My children and frying pans is a fraught experience to say the least!
But here we go!
I’m lucky enough to be using a Swiss Diamond pan which needs no fat adding (amazing but true!). Otherwise I would normally add a teaspoon of lard. Butter or veg oil will work fine too.
Heat the pan till it is nice and hot – not full pelt on the hob but about three quarters power. Okay that’s not specific but you’ll know what I mean!
Pour a small amount of batter into the frying pan. Swirling the batter around gently to fill the pan. I like my pancakes quite thick and not wafer thin – but go with whatever floats your boat.
Now leave it alone – the temptation is very great to start poking with a spatula but don’t.
The pancake will start to change colour as it cooks through – from milky pale to an opaque yellowy white (my descriptions in this post are making me laugh already – you don’t get this in cook books do you?)
Wait wait wait until only the middle is still the orignal batter colour – about the size of a fifty pence piece. Now loosen the edges of the pancake using a thin spatula.
You should be able to swish the pancake back and forth in the pan. Now your ready to flip – be brave and go for it. Once flipped they only need about a minute in the pan to brown nicely and finish cooking through.
Unfortunately I can’t make pancakes, photograph and flip at the same time, but trust me I did – even in the kitchen on my own with no audience to whoop and clap!
I make pancakes during the day when the boys are out and then let them heat them up and flip them in the pan after tea on pancake day. Once cooled pancakes keep perfectly in the fridge and can even be frozen.
Cut up some squares of greaseproof paper and use them between the pancakes as you cook and stack.
Keep pancaking until all the batter is used up, adding extra oil or butter as necessary to grease the pan. I bet you your last pancake will be the best of the bunch so make sure that one’s yours.
Lemon juice and sugar, orange or my favourite cherry pie filling and vanilla ice cream – how do you like yours? (not stuck to the ceiling is a good start)
For more info on the pans visit http://www.swissdiamond.com/ and for a printable recipe you can find it here Printable Recipe – Perfect Pancakes

Ruth Clemens, Baker Extraordinaire
Finalist on BBC2 The Great British Bake Off
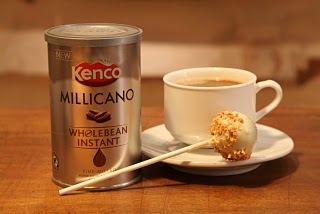
Choc Cherry Cake Pops & Kenco Millicano
February 23rd, 2011
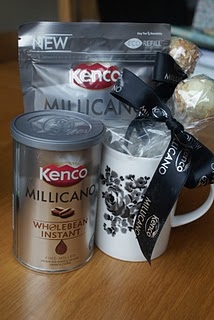
I was lucky enough recently to be invited along to the launch of a fab new instant coffee – Kenco Millicano – Kenco’s first ever Wholebean Instant coffee! It’s the closest thing to ‘proper’ coffee you’ll get in an instant. Available in supermarkets from the 1st March 2011.
Part of the launch was a demo by super duo Eric Lanlard and Patrick Cox of Cox Cookies and Cake fame.
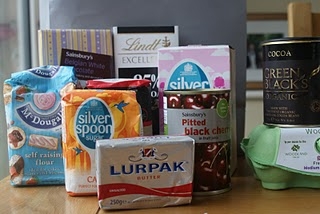
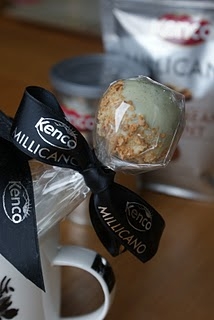
Eric and Patrick showed us how to make seriously delicious choc cherry cake pops – perfect for dipping in your cup of coffee. The lovely folks at Kenco also sent us all home with all the ingredients needed for these little gems – heck it’d be rude not to give them a go!
The cake pops are best made with cake that’s not ‘fresh from the oven’ so if you can, try and make the cake bit a day in advance.
These are the Kenco cake pops – but I’m going a bit more Pink Whisky with mine. The design is up to you – unleash your creative side!
Ingredients:
Cake
425g tin of pitted cherries (sweet) in juice
100g dark chocolate
165g unsalted butter
295g caster sugar
60ml cherry brandy (optional)
150g plain flour
2tbsps self-raising flour
2tbsp cocoa powder
1 egg, large
Coating and decoration
Lollipop sticks
75g icing sugar
100g unsalted butter
50g cocoa powder
250g melted white chocolate
Edible glitter (optional – but not in my opinion!)
Chocolate heart decorations (optional)
(I have included some links for sticks and glitter at the end of this post)
Preheat the oven to 160c Fan/180c/Gas Mark 4.
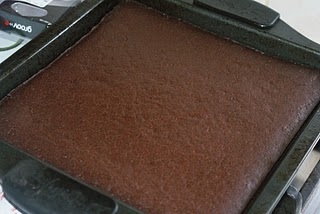
Grease and line an 8″ square tray.
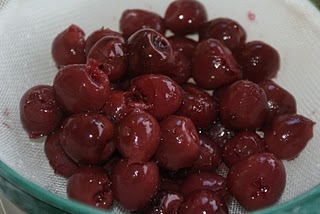
Drain the cherries and set aside the juice.
Measured 120ml of juice, add it to the cherries and blitz in a food processor or mash them down well with a fork if you don’t have one.
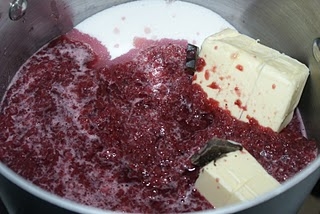
Place the chocolate, butter, sugar, brandy (if using) and cherry puree in a pan.
Over a low heat stir until the butter and chocolate is melted.
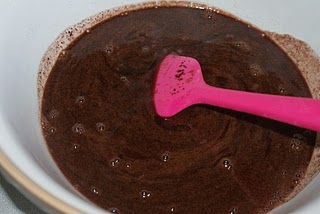
Pour into a large bowl and allow to cool slightly.
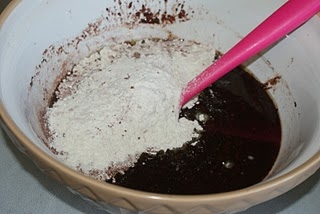
Whisk in the sifted flours, cocoa powder and egg. Don’t worry the mixture is supposed to be runny!
Pour the mixture into the tin (square approx 8 x 8″) and then bake for 40-45 mins until firm to the touch.
Allow to cool for a couple of minutes before transferring to a cooling rack.
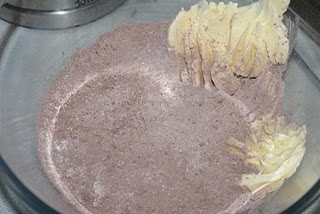
In a large bowl beat together the butter, cocoa and icing sugar until you have a lovely smooth frosting.
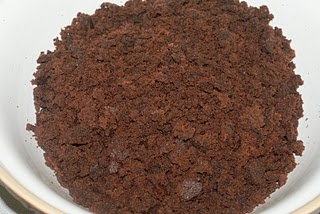
Split the cake in half. You will only need half the cake to make 20 cake pops. You can eat the rest whilst you work! Crumble up the cake into nice fine crumbs.
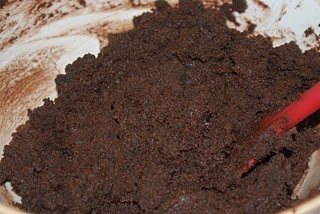
Rub in the chocolate frosting until you have the consitency of a paste.
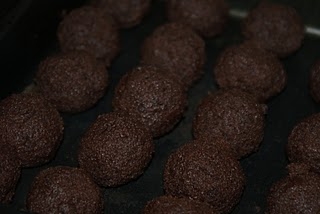
Using your hands roll the mixture into balls approx 1″ in diameter and place them on a tray. If the mixture is sticking to your hands too much try dusting them with a little cocoa powder.
Chill the balls to firm them up in the fridge for half an hour.
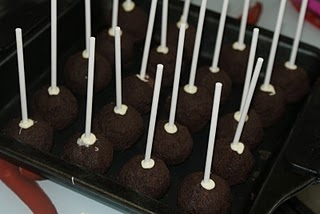
Melt the white chocolate. Take your lolly stick and dip the end into the melted chocolate. Push the stick into a ball about halfway through.
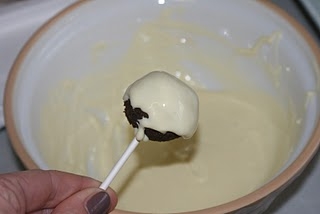
Now dip the entire ball into the chocolate to coat. Turn the stick allowing the excess chocolate to drip off.
I’m using a block of polystyrene to stab the sticks into so that they can dry upright – rummage around and see what you can find to use – improvisation is the key here! Add a good dose of glitter whilst the chocolate is still liquid.
It is important here to get the glitter all over yourself, all over any passing family members and of course all over the kitchen.
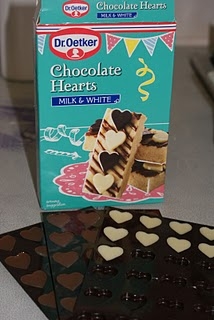
Add a small chocolate heart decoration, glueing them on with a dab of melted chocolate. These ones here are by Dr Oetker.
Allow the chocolate to set and then enjoy with your favourite cup of coffee.
Watch out for Kenco Millicano – it hits the shops on the 1st March 2011.
If you’ve been inspired by the cake pops please see Bakerella’s website – she’s the cake pop queen!
Oh and just so’s you know, this is not a sponsored post but Kenco have provided the ingredients! xx
Ruth Clemens, Baker Extraordinaire
Finalist on BBC2 The Great British Bake Off 2010
Victoria Sponge Cake with Cardamom, Rose Cream & Rhubarb
February 18th, 2011
I have met a thoroughly lovely lady through Twitter – Vanessa Kimbell. One heck of an inspirational lady she gave up work in May 2010 with a plan – to write a cookery book in one year and so Prepped! was born.
The philosophy behind Prepped! is a recipe book for the time short food lover, delicious food for real life. The whole picture is like a jigsaw. The recipes link together to create a new, practical and workable collection of linked recipes.
Anyway to cut to the chase, Vanessa was looking for folks to help test the recipes for the book and I was more than willing to oblige with a little cake!
You can read more of Vanessa’s adventures on her website here www.prepped.co.uk …and of course you can pre-order the book from Amazon.
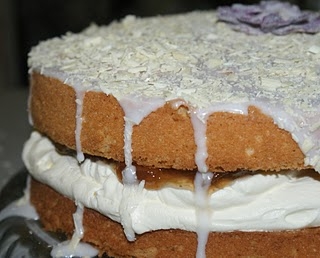
Victoria Sponge Cake with Cardamom, Rose Cream & Rhubarb
Serves 8 – 10Prep time 35Cooking time 25 minutes
Suitable for freezing? Yes before filling or decorating
IngredientsCake250g butter250g caster sugar
10 cardamom pods250g self-raising flour4 large eggs
For the filling 400ml double cream3 drops of rose essence80g icing sugar (sifted) 200g of rhubarb jam
To decorate100g icing sugar (sifted) 50g white chocolate curls
(Note – The book also gives recipes to make your own cardamom sugar and rhubarb jam. As I don’t have these to hand I’m improvising!)
Preheat the oven to 160?c Fan/180?c/Gas Mark 4.
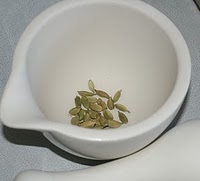
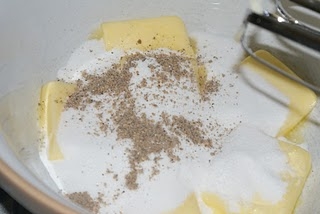
Add the cardamom pods to a pestle and mortar and give them a bash to split the green husks. Shake out the seeds and discard the husks. Grind the pods using the pestle and mortar (or alternatively the end of a rolling pin in a mug!)
Using a hand mixer or food mixer, cream together the butter, sugar and cardamom. Beat well until light and fluffy.
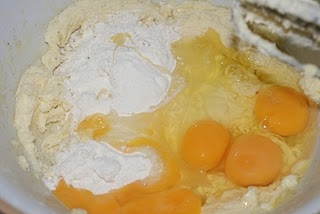
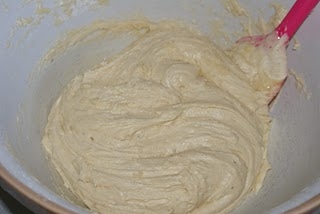
Add 3–4 tablespoons of flour to the mixture, then add the eggs. Adding the flour like this prevents the mixture from curdling. If it does, just keep adding flour a little at a time, beating the mixture to ensure it is evenly distributed.
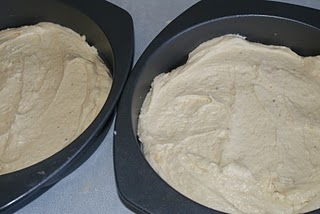
Divide the mixture between 23cm (8″) round cake tins.
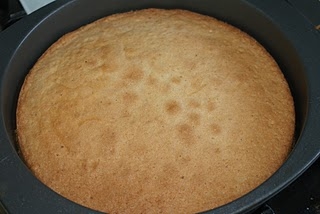
Bake in the oven for 25–30 minutes, until firm to the touch.
Cool on a wire rack.
Once fully cooled whip the cream, rose essence and icing sugar until thick. You can get rose essence from Waitrose and Lakeland. Using the essence as opposed to rose water means you will only need a few drops which gives the full flavour without affecting the consistency.
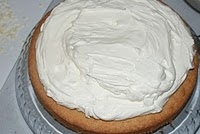
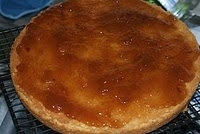
Spread the jam on the base of one cake and the cream on the other and sandwich together.
There is a bit of trick to getting the lovely cream bulge when sandwiching cakes – when spreading the filling don’t take it right to the edges. Leave one centimetre of cake showing. The weight of the top layer will push out the filling putting it in just the right spot for you.
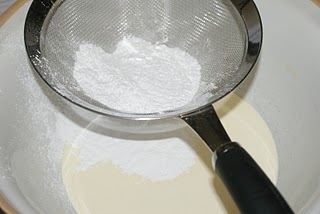
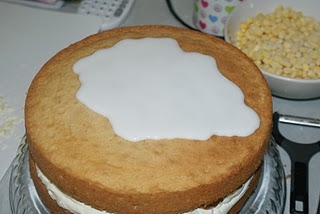
Mix the icing sugar and make into a viscous mix about the consistency of custard. Pour this over the top of the cake and allow to spread.
(and don’t ask what the peeler and bowl of sweetcorn are doing in the background – I obviously wasn’t paying attention!)
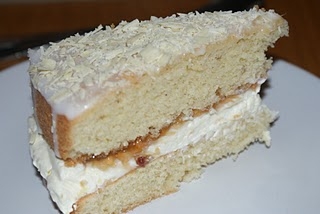
Sprinkle the top with the white chocolate curls – see now I remember what the peeler was for. I made the chocolate curls myself just peeling them off the bar of white chocolate. Still no explanation for the sweetcorn…
If you want to add some further decoration add some crystallised rose petals. Could be tricky to get at this time of year but if you can my how to make your own is here.
Beautiful Victoria Sponge with Cardamom, Rose Cream and Rhubarb
Ruth Clemens, Baker Extraordinaire
Finalist on BBC2 The Great British Bake Off 2010
Cheese & Onion Bread
February 11th, 2011There’s nothing more my boys love than a steaming bowl of hearty homemade soup with a good helping of bread for dipping in it. This cheese and onion bread is delicious dunked, on it’s own or made into a butty!
Ingredients:
1 onion, diced
25g butter (1 knob)
450g strong white plain flour
200g mature cheese, grated
1tsp salt
1tsp caster sugar
1tsp fast acting dried yeast
200ml milk
100ml water
25g butter, melted
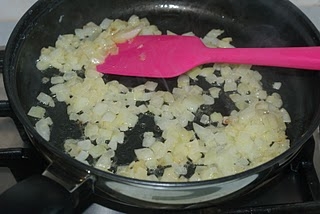
Sautee the chopped onion gently in the pan with the butter until soft.
Place the cooked onion in a bowl to cool to room temperature.
Grate the cheese and split in half.
To a large bowl add the flour, salt, and sugar.
Measure out the liquids, it needs to be tepid so I use milk straight from the fridge and then top up with water from the boiled kettle. It’s always just boiled the amount of cups of tea I drink.
In a small bowl place the dried yeast, add a couple of tablespoons of liquid from the jug and mix them together. This gets the yeast activated and helps you along the way to success.
To the flour mixture add 100g of the cheese and the cooled onion.
Give it a good stir.
Make a well in the centre and add the liquid and the yeast.
Now’s where it gets messy. Get your hands in and work it all together until it forms a rough dough. As per usual you can do this in the breadmaker on the dough setting just adding everything in or in a stand mixer with the dough hook attached.
Something funny has come over me recently and I have been doing a lot of things by hand (must have had a blow to the head). So I am very proud to say that I kneaded my dough by hand for a full ten minutes. Alternatively I would have given it 5 minutes in the mixer. Like I say, I don’t know what’s come over me!
You shouldn’t need any extra flour on the work surface, the dough may seem a little sticky to begin with but as you work it together it will stop sticking to you and form a smooth dough.
After kneading the dough will be much smoother and elastic.
Place the dough in a lightly oiled bowl, cover with clingfilm and leave to rise for an hour or until doubled in size. It will need to be somewhere fairly warm otherwise it will take longer than an hour.
After it has doubled nicely in size tip the dough out onto your worksurface and knock it back. A quick pummel with your fists and fingers does the job nicely and you will feel the air puff out of it. Knead the bread for a couple of minutes.
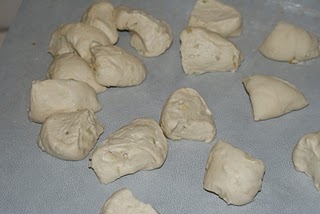
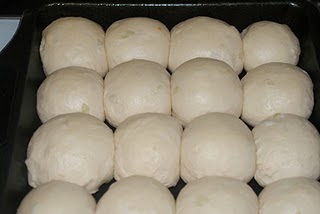
Split the dough into 16 equal pieces. Roll each piece into a smooth ball.
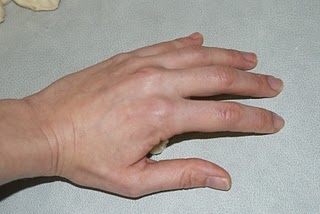
Once in a ball place the dough on the worksurface and your hand over it like a cage.
Work your hand in a circular motion keeping your fingertips stuck to the worksurface and use your fingers to keep the ball of dough inside them. This will make you perfect balls of dough.
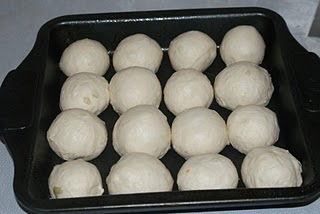
Take a square shallow baking tray, approx 9″ square is ideal, and grease well.
Place all the balls of dough into the tray.
Cover with a tea towel and leave to rise again somewhere warm for an hour or until the balls are nice and puffed up.
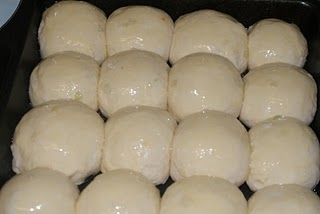
Preheat the oven to 200c Fan/220c/Gas Mark 7.
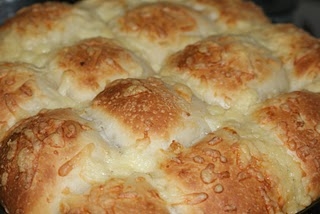
Melt 25g of butter and brush liberally over the dough.
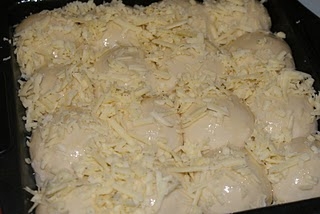
Sprinkle with the remaining 100g of grated cheese.
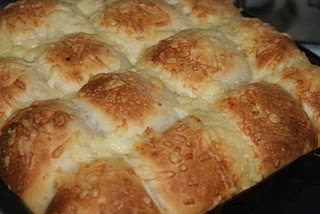
Bake in the oven for 25-30 minutes until beautifully golden and cooked through.
Cheese & Onion Bread

Ruth Clemens, Baker Extraordinaire
Finalist on BBC2 The Great British Bake Off
 " width="477" height="261" border="0">