Posts by The Pink Whisk:
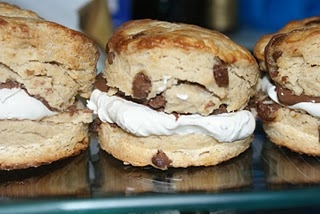
Baileys & Choc Chip Scones
February 4th, 2011This lovely idea came from a chance discussion on Facebook and is courtesy of my gorgeous friend Kate. They work brilliantly and if you’re a Baileys lover then these are for you! – Thanks Kate xx
Ingredients:
225g self raising flour
Pinch of salt
50g butter
25g caster sugar
120ml Baileys or other cream liquer
75g milk chocolate chips
2 tbsps milk to glaze
To serve:
Whipped Cream
Chocolate Spread
Preheat the oven to 220c/200c Fan/425F/Gas Mark 7.
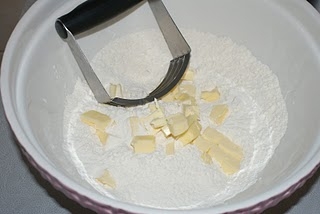
Place the flour and salt in a large bowl. Cube the butter and work into the flour using a pastry blender or your fingertips until the mixture resembles fine breadcrumbs.
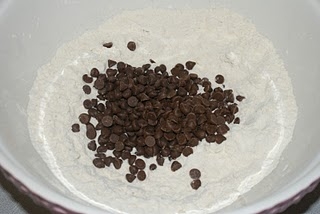
Add in the sugar and chocolate chips and mix well.
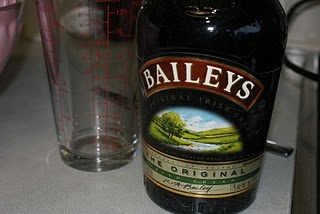
Measure out the Baileys (no cheeky tasting!).
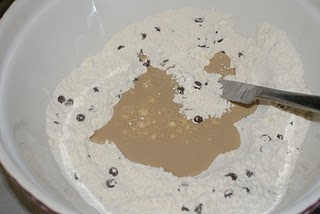
Make a well in the centre and add all of the Baileys.
Mix together roughly to a dough using a table knife. If the mixture appears too dry add a further tablespoon or two of milk to bring it together.
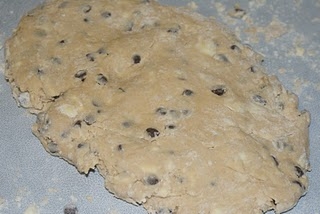
Tip out this rough dough onto your work surface and using your hands bring together lightly into a more consistent dough.
Don’t use a rolling pin on your dough just pat it down into a rectangular shape about 1″ thick.
Prepare a baking tray by greasing or use a non-stick liner.
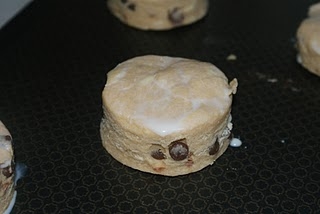
Cut out your scones using a sharp metal cutter, remembering not to twist just press straight down. The size of cutter you are using will decide how many scones you can get from the dough. 6 x 2″ Scones, 9 x 1 1/2″ Scones.
Add 2 tablespoons of milk to the jug you used to measure the liqueur in and use it to brush the tops of the scones.
Bake them in the oven for 12-14 minutes.
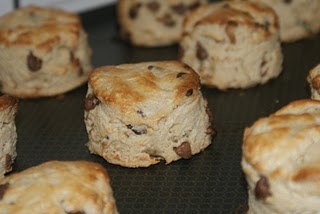
Remove from the oven and allow to cool on a wire rack.
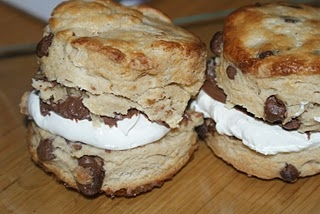
Serve with whipped cream (you can add a splash of Baileys to this too!) and Chocolate Spread.
Baileys & Milk Chocolate Chip Scones
Ruth Clemens, Baker Extraordinaire
Finalist on BBC2 The Great British Bake Off
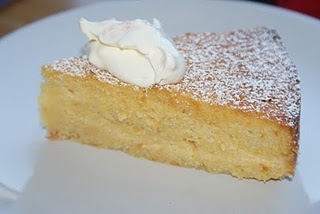
Free-From Clementine Polenta Cake
February 1st, 2011Not here but over there! A taste of sunshine from me to you on the Hello Magazine Free From Kitchen.

Ruth Clemens, Baker Extraordinaire
Finalist on BBC2 The Great British Bake Off
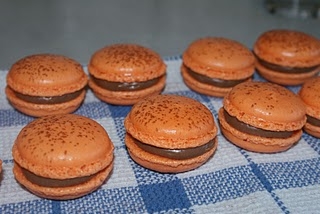
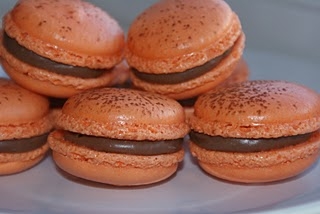
Chocolate Orange Macaroons
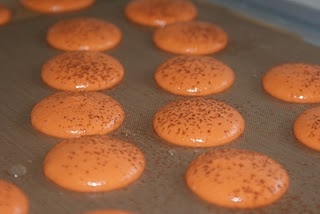
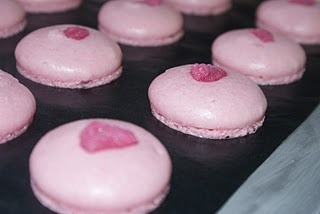
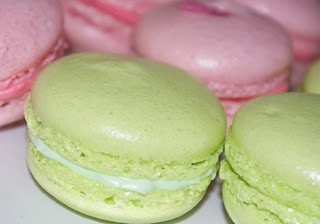
January 28th, 2011Another fab flavour Mac for you – Chocolate Orange they’re not Terry’s they’re mine!
You will need:
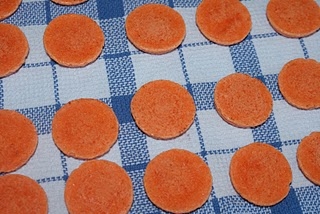
1 batch of Macaroons dyed bright orange (recipe here)
Dust them lightly with cocoa powder as soon as they have been piped.
Orange Ganache
100g milk chocolate
100ml double cream
1 tsp orange extract
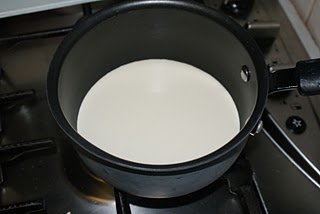
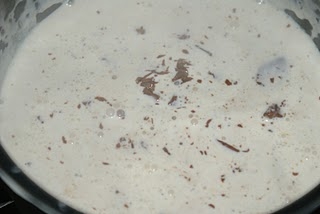
Make up the ganache by placing the cream in a pan.
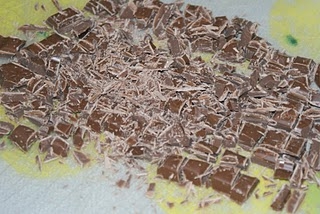
Chop the chocolate into small pieces.
Heat the cream to just below boiling point.
Take from the heat and add the chopped chocolate. Allow it to stand for a couple of minutes.
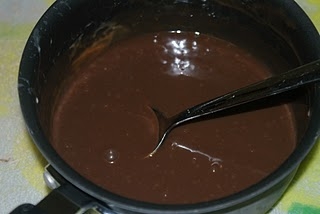
Now stir through until lovely and glossy.
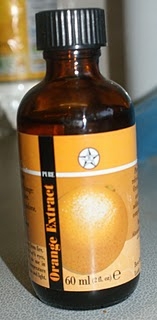
Add a teaspoon of orange essence and stir well. I’m using this one here which is available from Lakeland but I have been using a Taste The Difference one from Sainsburys recently which is absolutely fabulous and a complete bargain too!
Transfer the ganache to a bowl and allow to cool to room temperature.
Once cooled add to a piping bag with a large round tip.
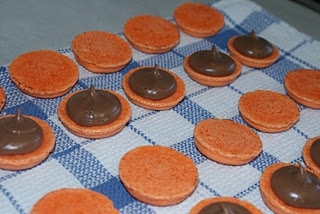
Match up the Mac’s with a similar sized top and bottom on a clean tea towel folded in half.
Pipe a blob of ganache onto each bottom.
Sandwich the tops on carefully – don’t press too hard otherwise you’ll break them and then be forced to eat the rejects!
These are the favourites in our house at the moment scoring higher than the White Choc and Raspberry. I was quite pleased that they didn’t actually remind me of anything they shouldn’t until my eldest came home from school and announced that they looked like mini-burgers – aaarghhhh!
Chocolate Orange Macaroons
Ruth Clemens, Baker Extraordinaire
Finalist on BBC2 The Great British Bake Off
Raspberry & White Chocolate Macaroons
January 26th, 2011As promised here’s an ultimately delicious Macaroon – Raspberry and White Chocolate.
You will need:
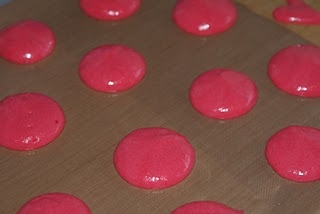
1 batch of Macaroons coloured a deep raspberry pink (recipe here)
White Chocolate Buttercream
75g butter, softened
150g icing sugar
50g good quality white chocolate
1 tbsp double cream
Raspberry Filling
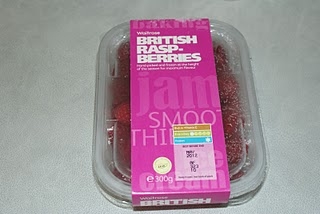
300g raspberries (fresh or frozen)
100g caster sugar
2 tbsp water
1tbsp cornflour
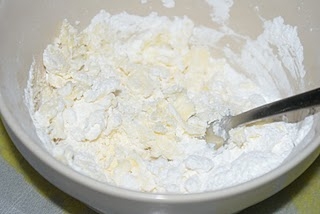
Make up the white chocolate buttercream. Beat the softened butter.
Sift in the icing sugar and beat together well (without covering everything in a cloud of icing!)
See I’m making mine by hand – that must be a first.
Add in the tablespoon of double cream to help it come together.
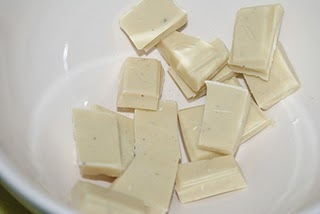
Take the white chocolate, break into small pieces and melt.
A microwave will do the trick if you don’t fancy doing it over a pan of hot water. Short 30 second bursts on half power for white chocolate, stirring in between to make sure it doesn’t overheat and burn.
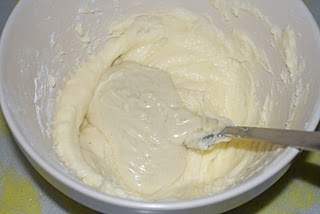
Add the melted chocolate to the buttercream and mix well.
Leave to stand at room temperature for a couple of hours or half an hour in the fridge and the mixture will thicken as the chocolate cools.
Now to make the raspberry filling.
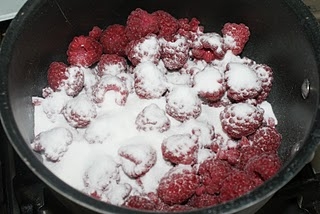
Add the raspberries to a pan. If you’re using frozen berries there’s no need to defrost them first.
Add the sugar and the water and place over a low heat.
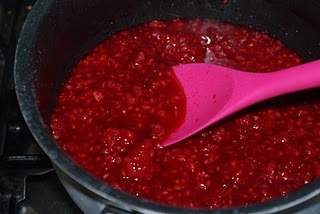
Stir regularly and as the raspberries soften mash them down with your spoon.
Continue heating until the mixture is very mashed up and liquid.
Place the cornflour in a small bowl. Take a couple of spoonfuls of liquid from the pan and add to the cornflour.
Mix to a smooth paste.
Add the cornflour mixture back to the pan and stir well- this will stop you getting any lumps.
Continue to heat until the mixture thickens nicely, this will probably take about five minutes.
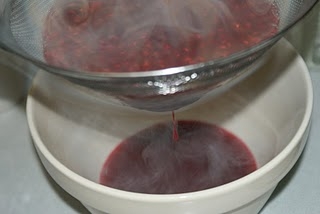
Now you will need to sieve the raspberry sauce to remove the seeds. Take off the heat and mash through the sieve to get as much raspberry sauce as possible. Be careful it’s hot!
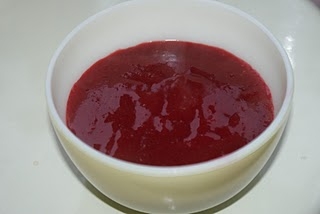
The sauce will thicken as it cools down but if you feel it is too thin place it back in the pan and heat for a little longer until you achieve the right consistency.
And last but not least if you’re still not happy repeat the cornflour process adding another tablespoon to help it along the way.
Place in a bowl and allow to cool.
Now its time to fill, fill, fill.
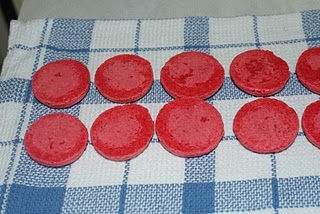
Place a clean tea towel on your worksurface, folded in half. This will give the Mac’s something soft to sit on.
Match them up in similar sizes with a top and a bottom.
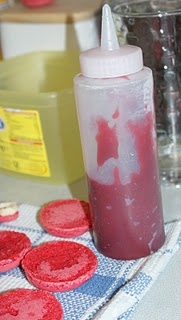
Prepare the fillings. I like to pipe the buttercream using a piping bag and an icing nozzle, the raspberry sauce is going in a squeezy bottle.
These things are purely aesthetic (and probably me being a bit daft) the taste is exactly the same no matter how the fillings get inside.
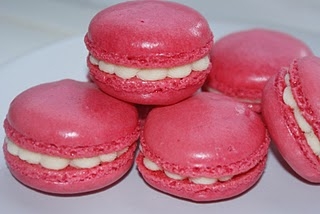
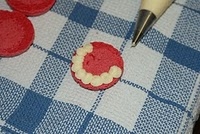
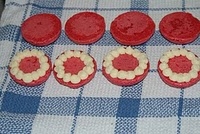
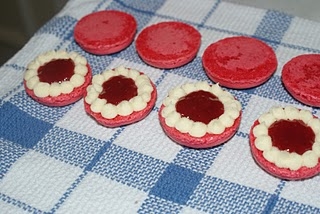
Pipe small balls of buttercream around the outside edge. I’m using an icing tip no. 43, a small star tip will do the same job. It’s wide enough for the buttercream to come through and gives a lovely lined effect.
Fill the centre of the buttercream with raspberry sauce.
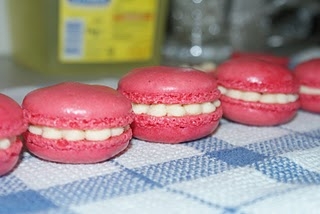
Add the tops, pressing them on carefully.
Beautiful Raspberry and White Chocolate Macaroons
(I have to say I can’t look at these without thinking they look like pairs of false teeth – what with that and the last pale pink ones looking like boobs I really don’t know what’s going on inside my head!)

Ruth Clemens, Baker Extraordinaire
Finalist on BBC2 The Great British Bake Off
How to Make Perfect Macaroons… (Macarons)
January 22nd, 2011Macaroons – The French type, (said with a French accent of course) are notoriously tricky little blighters and reduce lots of us to tears.
You might have seen me make them on The Great British Bake Off for the Petit Four Tower. That week practising at home will go down in history, and not in a good way. Meet fraught Manic Mummy Baker Extraordinaire – tears tantrums you name it the boys saw it all. I made enough Macaroons that week with the majority of them ending up in the bin!
So I’m going to save you from all that – follow the instructions to the letter and you’ll be well on the way to perfect macaroons. Prepare yourself to practise though, there are a lot of things that can go wrong and will given half the chance, practise practise practise.
Ingredients:
110g egg whites (whites from approx 3 large eggs)
75g caster sugar
125g ground almonds
175g icing sugar
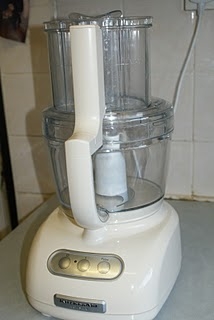
First off you will need one of these:
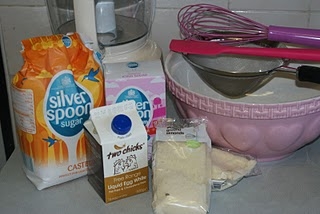
Trusty food processor – I will not make macaroons without it. Like I mentioned follow the instructions! You will also need, a large bowl, spatula, sieve and whisk.
Okay so I’m not going to whisk egg whites by hand you know me better than that, but it looks pretty!
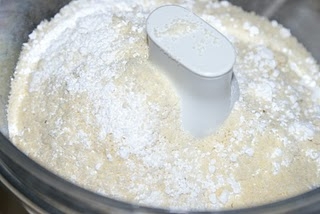
Measure out the ground almonds and icing sugar and put them into the food processor. Turn it on and leave it on…..have I gone mad? Nope, do as I say and it’ll be fine.
Okay so now I’m going to have to shout so you can hear me over the racket of the food processor.
Measure out the egg whites. I hate saying this, I am determined never to become an egg-weigher, life’s to short, but macaroons need special measures. Egg whites are measured in grams seems a bit silly to me as surely you measure them in ml’s as a liquid but hey ho 110g egg whites = 110ml egg whites.
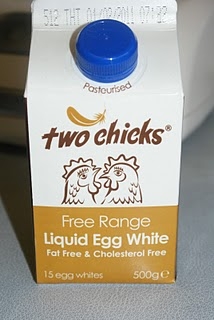
I’ve tried out these egg whites from Two Chicks and they are really good, it also means I don’t end up with 100 egg yolks and have to make a gallon of custard to use them up! The egg whites can be bought in Waitrose, Sainsburys, Tescos. (These would also be great to bake my Angel Food Cake – virtually fat free).
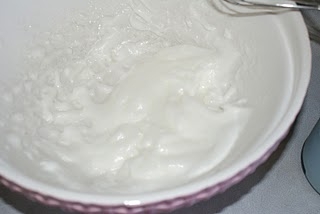
Place them into a large bowl and whisk like you would a meringue. As the mixture comes to soft peaks begin adding the caster sugar a third at a time until it’s all worked in and smooth and glossy.
You don’t need to whisk the egg whites to stiff peaks but they should be thick and glossy.
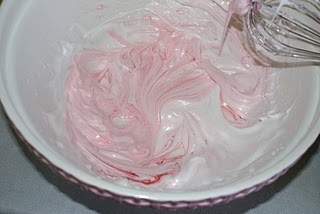
One of the wonderful things about macaroons are their fab colours – whatever takes your fancy. Using gel paste colours is the best way to colour the mixture without changing the consistency.
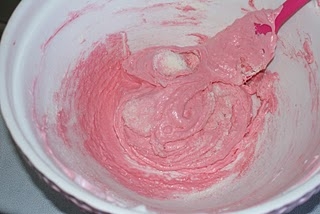
Add a small amount of colouring to the meringue and mix in well.
Now you can turn off the Food Processor (and take your ear defenders off).
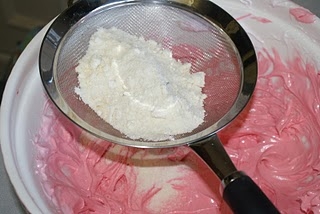
Sift into the meringue mixture half of the almond/icing sugar from the food processor.
Fold into the mixture using a spatula or metal spoon until it’s fully mixed in.
Sift in the final half.
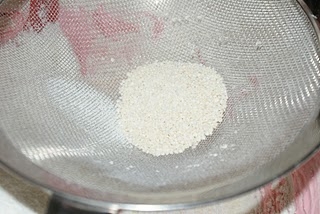
The residue left in the sieve can be very grainy and hard so don’t force it through the sieve just discard it.
Fold in as before.
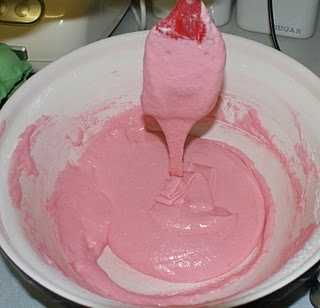
Now comes the tricky part, you need to keep folding the mixture until it goes smooth and glossy. By my reckoning this takes 1-2 minutes folding in a figure of 8. This loosens the mixture until it is the right consistency. You really don’t want to knock ten tons of air out of it but achieveing the right point is important.
Hold your spatula above the bowl. The mixture should run from it in a ribbon. If it’s jerky and breaking then it isn’t right yet. Just watch out though you want to stop right at this point and go no further, otherwise you’ll have hugely spreading macaroons.
Now we’re ready to go.
Add the mixture to a piping bag fitted with a plain wide round nozzle (1cm)
Prepare two baking sheets lined with Bake-o-glide. It is so disappointing making perfect looking macaroons and then not being able to get them off greaseproof paper. Believe me, it happens a lot. Sure fire method – stick with the bake-o-glide!
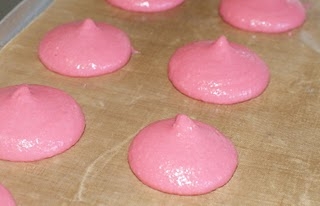
Pipe the macaroons onto the tray in small circles. To begin with they will have a small peak on the top. If you have the correct consistency that will soon flatten and you will have a tray full of perfectly smooth macaroons.
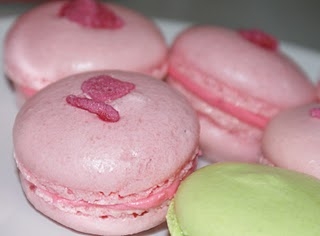
If you are adding crystallised rose petals or violets for decoration then now’s the time to pop them on the top.
Now you need to set the trays aside for 30 minutes. After this time they should have formed a slight ‘skin’ and you should be able to touch them with your fingertip.
Preheat the oven to 130c Fan/150c/Gas Mark 2.
Place the trays in the oven for 13 minutes.
Remove from the oven and allow to cool, still on the tray. Good macaroons should be smooth and glossy with a good foot and not flat. I have added some trouble shooting tips at the end of the post.
Sandwich together with a buttercream or ganache of your choice. I’m not giving recipes here in this how to but more macaroon recipes will follow this week.
For the violet macaroons I made in The Great British Bake Off I took a large packet of Parma Violets and ground them to dust in the food processor. I combined these will icing sugar to make buttercream.
Parma Violet Buttercream
1 large pkt of Parma Violets, ground plus icing sugar to weigh a total of 125g
250g butter, softened
1 tbsp milk
Troubleshooting:
Macaroons are lumpy and grainy – mixture not loosened to correct consistencyMacaroons have cracked in the oven – oven temperature is too hotMacaroons are flat – mixture was overworked and too much air knocked out of the meringue when folding.
Equipment:
John Lewis – Bake O Glide

Ruth Clemens, Baker Extraordinaire
Finalist on BBC2 The Great British Bake Off
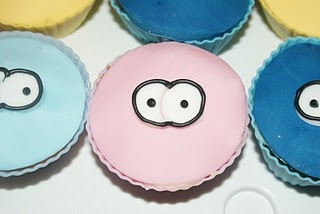
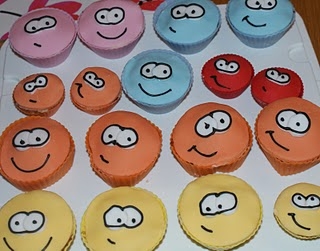
Puffle Cupcakes – Club Penguin – A How To…
January 19th, 2011
My boys are Club Penguin crazy and it seems quite a few of you have Puffle Mad kids too! My apologies if you have absolutely no interest in the latest Children’s craze, you can switch off now but make sure you come back on Friday when I’ve something nice and grown up.
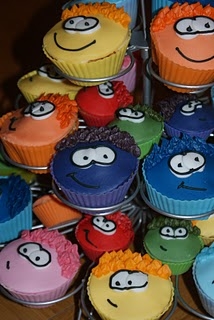
Here’s my really easy Puffle Cupcake how to…
You will need:
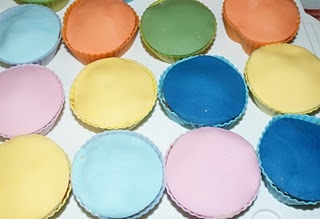
1 x batch of Vanilla Cupcakes (recipe here) baked in bright silicone cupcake cases.
1 x batch of buttercream made with 250g butter, 500g icing sugar and 1 tbsp milk beaten together
Sugarpaste, coloured to match the silicone cases.
Small amount of Royal Icing, coloured black
1 x circular pastry cutter the same size as the top of the cupcakes.
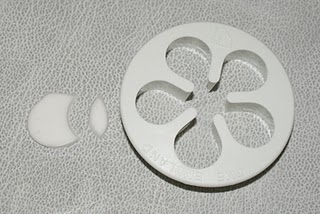
1 x medium 5-petal cutter for the eyes, alternatively I have been known to use lids of pens to cut out miniature circles.
(As usual I have included some links to equipment throughout and at the end of this post. It is not to say that these are the best places to buy them from but if you know what you are looking out for you’ll be able to pick up bits as and when you see them x)
The hardest part has been finding brightly coloured silicone cases, at short notice (ie the day I was going to make them!) If you’re organised in advance there are lots of places you can get hold of them.
Asda – set of 12 in red, yellow and bright blue – only available in store £2.47John Lewis – Robot Brights – red, yellow, orange and blue £6.50Amazon – Miniamo Brights Blue, green, yellow and red £6.99Lakeland – miniature cases (5cm diam.) in red, purple, blue, yellow and orange £5.99
You can be a bit more sensible than I was and limit the colours you’re making to three or four, otherwise you’ll be colouring sugarpaste and buttercream until the early hours of the morning!
When the cupcakes have been baked and cooled colour sugarpaste in matching colours, you will only need a small amount for each.
If you’re into creative baking it’s time you invested in a set of gel paste colours – these are pots of magic and only take a tiny bit to colour sugarpaste, buttercream and icing vividly.
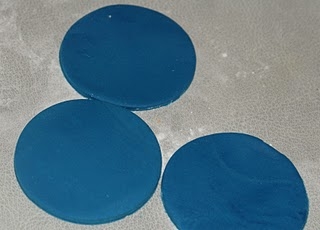
Working with one colour puffle at a time, roll out the sugarpaste to approx 3mm thick on a work surface dusted with icing sugar to stop it from sticking.
Using a circular pastry cutter cut out sugarpaste circles.
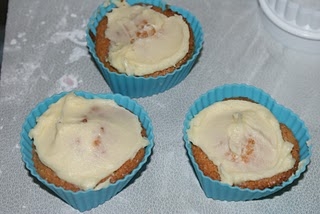
Apply a dab of buttercream to the top of the cakes and position the sugarpaste circles in place.
Repeat until all cupcakes are covered.
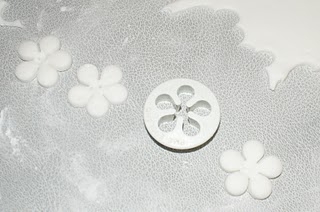
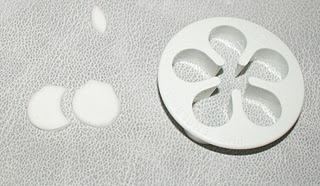
Roll out some white sugar paste and using a 5-petal cutter cut out several pieces – you will need 2 cutouts per 10 cupcakes. Alternatively have a rummage around and find something that will cut out small circles – pen lids thoroughly cleaned are a good option if you can find the right size.
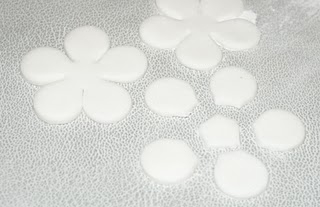
Cut off each petal with a knife.
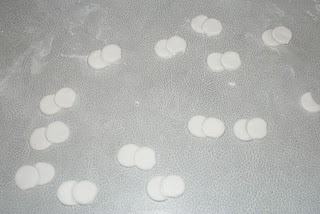
To fit the two eyes together in a pair take the petal cutter and cut out a small piece of one eye.
Align it with the second eye and round off the cut edges using your finger.
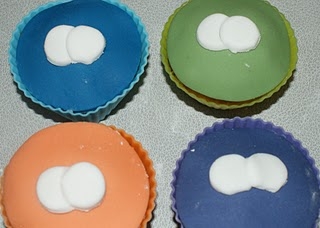
Allow the pairs of eyes to dry off slightly for a couple of minutes before lifting with a knife into place on the tops of the cakes. Secure the eyes using a little water brushed on.
These water brushes are excellent for sticking sugarpaste if you play with sugarpaste regularly.

Mix up a small amount of royal icing and dye black with gel paste colour. It is easier to get a good black colour if you dye the royal icing dark brown first, then add the black gel paste.
Add to a small disposable piping bag fitted with a no.1 tip (small and round).
Pipe slowly and carefully around the white eyes and add a dot to each eye as a pupil.
Add in comedy smiles.
Now split your buttercream into the number of colour puffles you are making.
Use the gel colour paste once again colour each the right colours.
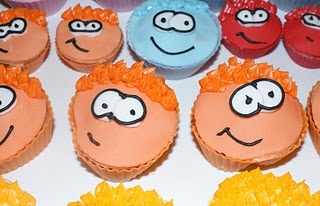
Using a piping bag fitted with a leaf piping nozzle (No.67), pipe on the Puffle’s hair. The leaf tip will form the spiky shape for you – magic.
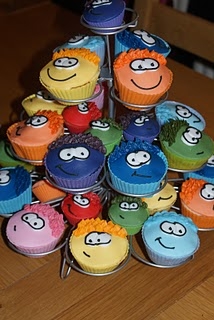
Puffle Cupcakes – Club Penguin – Done!

Ruth Clemens, Baker Extraordinaire
Finalist on BBC2 The Great British Bake Off 2010
Slow cooked Beef Cobbler
January 15th, 2011January is traditionally the time that minds turn to expanding waistlines post-Christmas and for many baking treats is off the cards. However if you love baking it’s a tough one so why not incorporate baking into mealtimes? This good ‘ole beef cobbler is perfect for that! The recipe given is for a basic beef casserole but the cobbles can be added to your favourite casserole just the same.
Ingredients:
Casserole
600g braising steak/casserole beef cubed
2 tbsps plain flour
2 x Beef stock cubes (I use the Knorr stock pots)
1 tbsp brown sauce
500ml boiling water
salt and pepper to season
Cobbles
225g self raising flour
good pinch of salt
1 tsp mustard powder
50g butter, cubed
1 egg, beaten
3 tbsp milk plus extra for glazing
Serves 4.
Preheat the oven to 140c Fan/160c/Gas Mark 3.
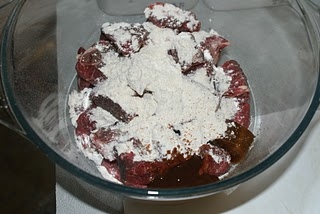
To a large lidded casserole dish add the meat, salt and pepper, flour, stock cubes, brown sauce and stir well to combine.
Add the water and stir again.
Place the lid on the dish and into the oven it goes. When cooking braising steak it is important that it is cooked very slowly so that it tenderises to perfection. It also means that you can pop it in the oven and forget about it for the afternoon. (My kind of cooking)
Bake in the oven for four hours, stirring occasionally. You could also cook it in your slow cooker if you have one, allow 6-8hrs if doing it this way. You will need to transfer it to the oven to bake off the cobbles at the higher heat.
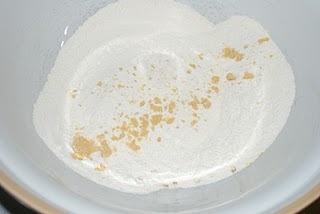
Half an hour before serving time prepare the cobbles. Add the flour to a large bowl and stir through the salt and mustard powder.
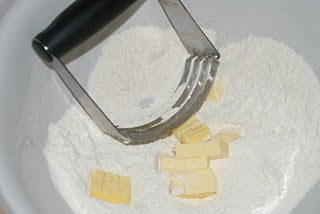
Add the cubed butter and rub into the flour using your fingertips or a trusty pastry blender until the mixture resembles fine breadcrumbs. (Really, I couldn’t manage without mine, if you don’t have one it’s time to invest!)
Kitchen Craft Pastry Blender – Amazon
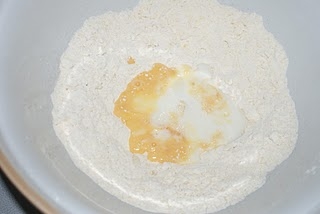
Make a well in the centre and add in the beaten egg and 3 tbsps milk.
Work the liquid into the flour using a knife until roughly combined.
Tip out onto your worksurface and knead lightly until a soft dough is formed.
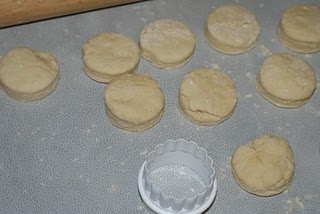
Pat out the dough with your hands until it is about 1cm thick. Cut out your cobbles using a small round cutter – using a 1 7/8″ (48mm) cutter. You should get 12 cobbles from this.
Remove the casserole from the oven and turn up the heat to 180c Fan/200c/Gas Mark 5.
I have had to transfer the casserole to a wider shallower dish so that I can get all the cobbles in to feed my hungry lot!
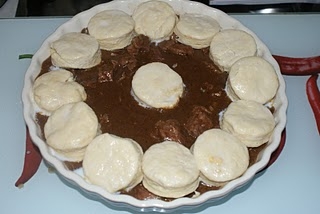
Lay the cobbles around the top outside edge of the casserole (and one in the middle, if they won’t all fit).
Brush the tops of the cobbles with additional milk. For a more golden finish you can use beaten egg to glaze instead.
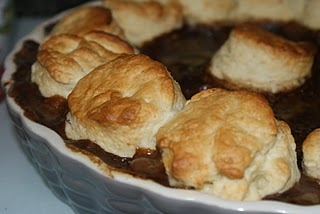
Return to the oven for 15 minutes until golden brown and well risen. Serve immediately with your favourite choice of veg and no fighting over the cobbles!
Slow Cooked Beef Cobbler
Ruth Clemens, Baker Extraordinaire
Finalist on BBC2 The Great British Bake Off 2010
Flapjack – All kinds of ways!
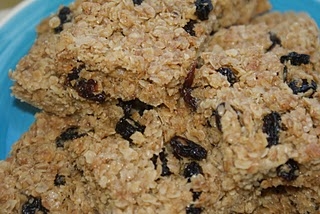
January 12th, 2011It’s good to have some fail safe recipes you can refer back to when you need to bake but don’t have much time. This flapjack recipe comes from my Great Grandmothers recipe book – just to prove that the old ones are sometimes the best!
Ingredients:
160g butter
115g demerara sugar
1 tsbsp golden syrup
240g porridge oats
115g extras (optional)
raisins or any combination you fancy – nuts, raisins, dried cranberries – mix it up and use your imagination, see what’s lurking in the cupboard and use it up.
Preheat the oven to 160c Fan/180c/Gas Mark 4.
Grease a 7 x 7″ baking tin. Don’t worry too much if you don’t have the right size tin, I’ll show you one of my little tricks in a minute!
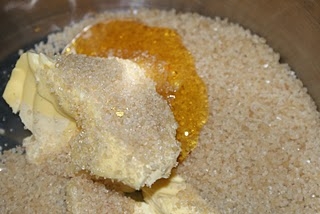
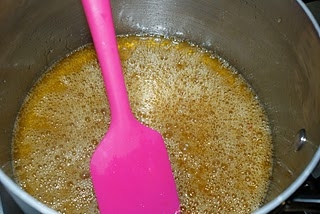
Add the butter, demerara sugar and syrup to a pan and heat gently until all the sugar has dissolved.
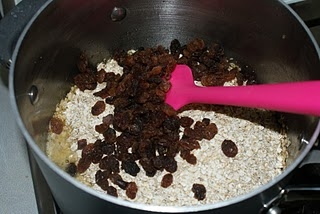
Remove from the heat and add to the pan the oats and any fruit/nut/extras you are using, give it a good stir. You will need a solid wooden spoon as the mixture is fairly stiff.
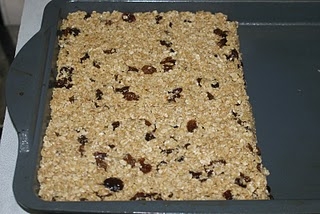
Tip the mixture into your prepared tin and flatten down with the back of spoon to level.
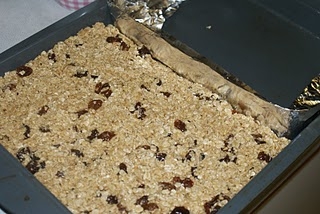
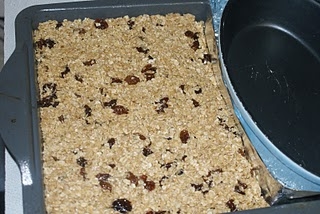
You can see here I couldn’t find the right size tin so I’ve used a larger baking tray. Take a piece of foil and fold it into a long thin strip. Fold it so that it sits against the edge of the flapjack in the tin.
Then using a suitable size oven proof dish use it to weight down the foil and keep it in place.
This little trick works with firm recipes like flapjacks and biscuit bars that aren’t going to ooze everywhere.
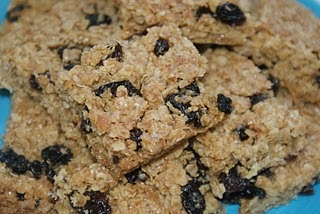
Bake in the oven for 20 minutes. The top will be barely coloured and will still look very soft but don’t worry it will firm up as it cools. Don’t be tempted to bake it a bit longer as the flapjack will go hard and tough on the old teeth!
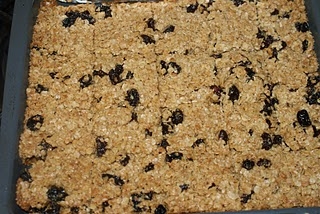
Remove from the oven and allow to cool for a couple of minutes, after which you will need to carefully cut it into pieces.
Leave in the tin to cool completely.

Ruth Clemens, Baker Extraordinaire
Finalist on BBC2 The Great British Bake Off 2010
The Great British Bake Off needs YOU!
January 9th, 2011Do you love home baking and fancy putting your skills to the test? BBC Two is looking for amateur bakers across the country to take part in The Great British Bake Off series two.
If you’re interested and would like to find out more, email baking@loveproductions.co.uk or call 020 7067 4879.

TERMS AND CONDITIONS. To apply you must be over 16 on 1 April 2011. As an ‘amateur baker’ your main source of income cannot come from commercial baking in a professional environment and you cannot have ever worked full-time as a baker or chef. You cannot have acquired any formal NVQ or other professional catering qualifications in the past 10 years.
Well then, what are you waiting for…? You’ll have a ball!

Ruth Clemens, Baker Extraordinaire
Finalist on BBC2 The Great British Bake Off 2010
Happy New Year! Not a recipe, just a bit of chat…
January 3rd, 20112010 has been a whirlwind of a year and 2011 looks set to be just as good!
My deepest thanks goes to all you Pink Whiskers who have made the past six months an unbeatable experience, as we start 2011 there are already over 3,000 of you who read and enjoy the blog (well I’m presuming you’re enjoying it otherwise I guess you wouldn’t keep coming back) – that’s a pretty good gang of bakers by any standards!
As soon as I get rid of this flu bug I’ll be back to baking and blogging, at the moment in the throes of a body which will not regulate it’s own temperature and joints which have forgotten how to work I can’t stand up in the kitchen long enough to come up with anything sensible let alone blog it so forgive me for the late start in January. Whilst post-Christmas minds turn to thoughts of dieting maybe a baking break is in order anyway?
So to look forward to 2011 I am going to write my own baking book, even if no-one wants to print it I will write it anyway! I am hoping to finalise a deal to publish a book but more along cake decorating lines. I have some projects lined up with a couple of big name brands and I hope to be able to tell you more about these as they are signed and sealed. Of course the blog will continue until I run out of ideas – nope can’t see that ever happening!
So here’s to all the Pink Whiskers – may 2011 bring you everything you ever dared to dream of.
Ruth
xx

Ruth Clemens, Baker Extraordinaire
Finalist on BBC2 The Great British Bake Off 2010
 " width="477" height="261" border="0">