Posts by The Pink Whisk:
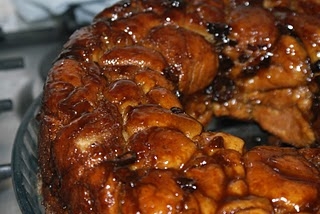
On the third day of Christmas The Pink Whisk sent to me……Christmas Monkey Bread
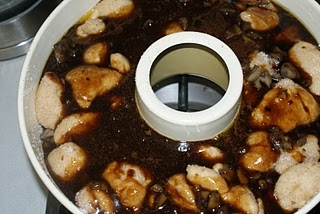
December 3rd, 2010It’s Monkey Bread time….but this time with a Christmas twist – I couldn’t resist. This is my entry into the Merchant Gourmet Christmas Chestnut Challenge! (If you don’t want the Christmas twist the original version is here.)
Ingredients:
For the dough
500g Strong White Flour
2 tsp Mixed Spice
1 1/2 tsp Salt
55g Butter
2 Eggs beaten
2 tbsp Honey
15g Dried Yeast (3 tsp)
175ml Milk
For the sugar coat
150g Caster Sugar
2 tsp Mixed Spice
For the Sauce
200g Butter
100g Dark Brown Sugar
Plus 1 x regular sized jar of ready made mincemeat
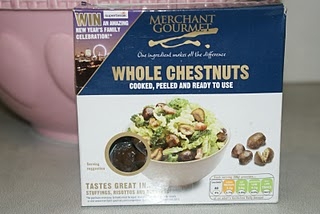
1 x 100g pack of Merchant Gourmet Whole Chestnuts you can find stockists through their website – Merchant Gourmet but most major supermarkets sell them at this time of year.
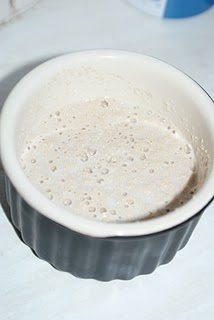
Begin by making the dough. Warm the milk so it is tepid.In a small dish mix 2 tbsp of the milk with the yeast and mix together.
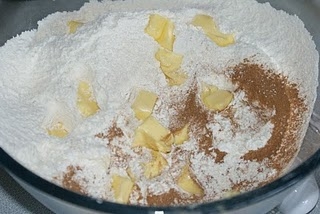
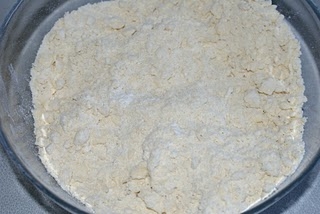
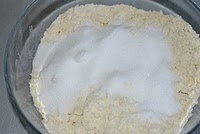
Into a large bowl sift the flour, salt and mixed spice and combine.Add the butter in small pieces and rub into the flour.
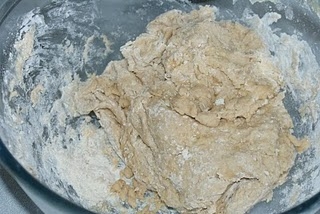
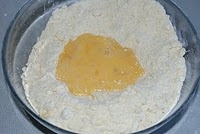
Make a well in the centre and add the eggs, honey yeast and just enough milk to make a dough, it should be soft and not too sticky. I only had to add 125ml of the remaining milk but this will depend on how wet or dry your mix is.
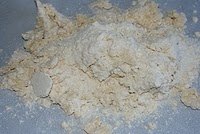
Tip your dough out onto your work surface and knead. You shouldn’t need any extra flour and it will stick a little to begin with but keep going and it will come together nicely.
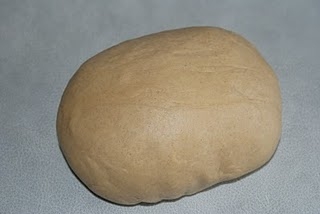
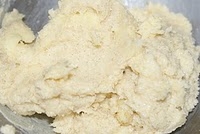
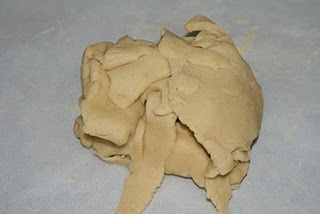
After ten minutes kneading your dough will look something like this.
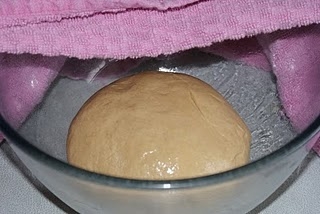
Place the dough into an oiled bowl, cover with a clean tea towel and set aside to rise in a warmish draught free spot. This should take about 1 1/2hours but will depend on where you have put it.
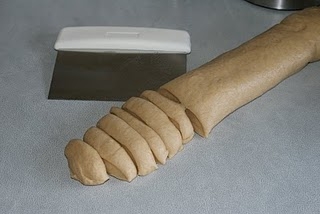
Once doubled in size tip it out onto your work top, give it a quick knead to knock it back and shape into a long fat sausage. Cut into approx 1cm thick slices.
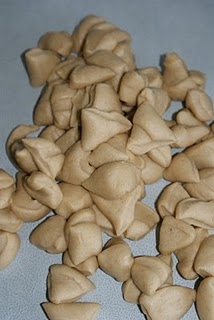
Chop each slice into three or four random shaped pieces, no need for precision here.
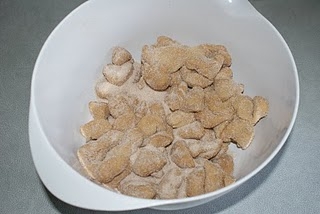
In a large bowl mix together your sugar topping combining the caster sugar and mixed spice, now put all your monkey bits into the bowl and give it a good mix up to coat them all well. Some may stick together but just separate them as you mix.
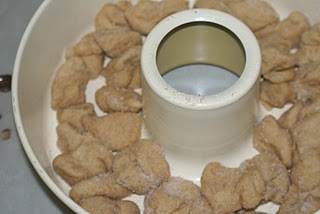
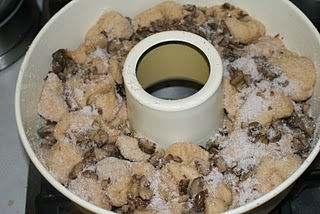
Take half the monkey bits and spread them around the base of the pan. If you don’t have a monkey bread tin use a large round cake tin and place an empty metal tin (from baked beans or similar) in the middle to hold the shape.
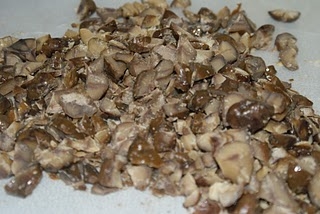
Chop the chestnuts quite roughly and sprinkle then in a good layer on top of the pieces.
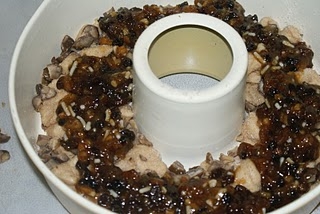
Spoon dollops of mincemeat on creating another layer until you have used the whole jar.
Finally top with the last of the monkey pieces.
Place in a warm spot covered with a tea towel to rise again for approx one hour until the monkey bits are all puffed up.
Preheat the oven to 200c/180c Fan/375F/Gas Mark 5.
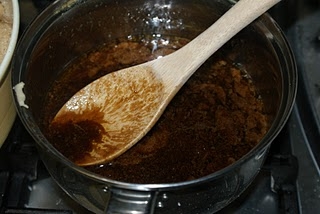
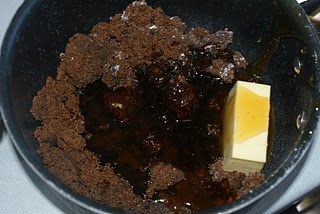
Make up the sauce combining the sugar and the butter in a pan and heating gently till melted.
Pour the sauce over the monkey bread in the tin.
Bake in the oven for 35-40 minutes, covering halfway through baking with a layer of foil to stop the top browning too much. Allow to cool for five minutes in the tin before inverting onto a large serving plate.
Monkey Bread with a Christmas Twist
Ruth Clemens, Baker Extraordinaire
Finalist on BBC2 The Great British Bake Off
On the second day of Christmas The Pink Whisk sent to me….Snowman Cookie Lollies
December 2nd, 2010So cute, last year I sent these to all the children in the family instead of a christmas card. This batch are off to the School Fair to raise some money for the PTA.
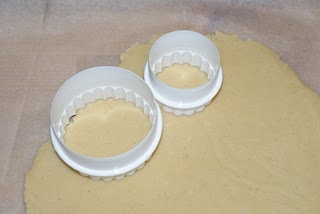
Make up the cookie dough as per the instructions here Sugar Cookies and roll out slightly thicker this time to about 7mm thick and chill the sheets of dough.
You will also need:
1 x quantity Sugar Cookie Dough – recipe here
1 x pack of Wilton Lollipop Sticks
Ready to roll icing, white and gel food colours
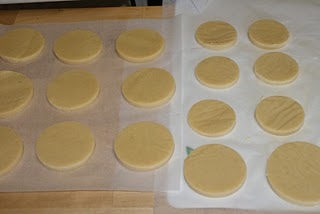
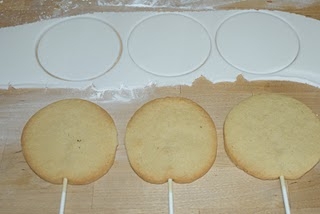
Using circular cutters cut out the snowman cookies using a variety of sizes.
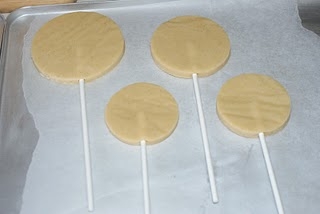
When you have them all cut out insert a lollipop stick through the dough about half way up the cookie.
Preheat the oven to 160c Fan/180c/Gas Mark 4.
Place on a baking sheet lined with greaseproof paper or Bake-O-Glide and chill again in the fridge for half an hour.
Bake in the oven for 8-10 minutes for the little snowmen and 12-15 for the large ones.
Remove from the oven when baked and light golden brown around the edges.
Allow to cool for five minutes on the tray before transferring to a wire rack to cool completely.
Once all your snowmen are baked and completely cooled it’s time to get going with the roll out icing.
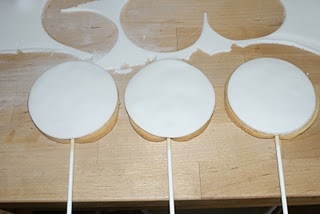
Roll out a sheet of white fondant, making sure you dust the work surface well with icing sugar to stop it sticking, using the cutters that you used for the cookies cut out the snowmen’s faces.
With a paintbrush brush the cookie with a small amount of water and place the white fondant on top, pressing down gently to get it to stick. Repeat with all the snowmen.
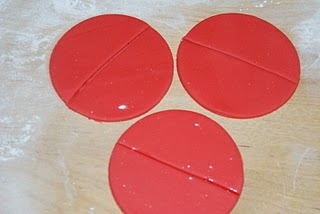
Next onto the bobble hats. Roll out any colour you like for the hats and cut out with the circle cutters again. Cut each circle into half.
Brush the back of the hat with the paintbrush dipped in water, remember you only need a tiny bit to dampen it. Place on the snowman’s face as a hat.
Cut a long thin strip to form the brim of the hat and cut to size.
Brush the back with water and stick in place. Create markings on the brim with the back of a knife.
Roll a small ball of fondant and stick in place as a bobble.
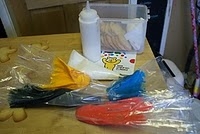
Take a small amount of fondant and colour it orange with gel colour paste, if you’re using the ready coloured packet of icing combine some of the red and some of the yellow to form orange.
Shape small pieces into carrot noses and using a little bit of water stick into place as a nose.
Finally you will need to roll a million tiny balls of black sugarpaste as pieces of coal for the eyes and the mouth.
Okay, not really a million but it does feel like it.
Stick them in place with a little dab of water from the paintbrush.
Allow to set overnight so the bits don’t fall off when they shouldn’t!
Cookies will keep for up to two weeks in an airtight container.
Super Cutie Snowman Cookie Lollies
Ruth Clemens, Baker Extraordinaire
Finalist on BBC2 The Great British Bake Off
On the first day of Christmas The Pink Whisk sent to me…..Lebkuchen
December 1st, 2010Happy Christmas Pink Whiskers! Today is the start of The Pink Whisk’s Twelve Days of Christmas. One Christmassy baking idea each day for the next twelve days – a great way to kick start your Christmas Baking! Hopefully you’ll enjoy the recipes, so put your Christmas hat on and get baking.
Ruth
xx
On the first day of Christmas The Pink Whisk sent to me (yes you have to sing it!) Lebkuchen
Ingredients:
85ml honey
115g dark brown sugar
30g butter
225g plain flour, sifted
1 tsp cinnamon
1/2 tsp ground ginger
1/4 tsp ground nutmeg
1/4 tsp bicarbonate of soda
1 egg, beaten
50g ground almonds
To ice:
25g icing sugar sifted
2 tsp water
Makes 24 biscuits.
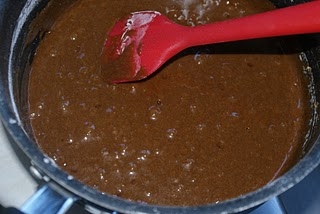
In a large pan place the honey, sugar and butter. It does need to be a large pan as we will be making the dough in it. Heat over a gentle flame until the butter and sugar have melted. Remove from the heat.
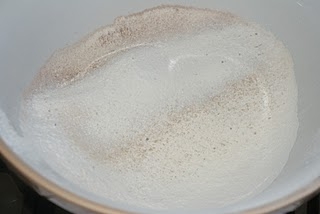
Sift together the flour, spices and bicarbonate of soda.
Beat the egg in a small dish. (Don’t mix it in a mug – I have lost count of the amount of times I have sipped egg thinking it was my cup of tea!)
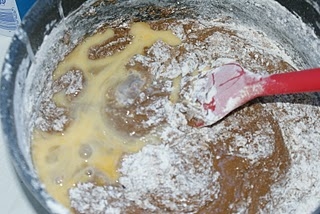
Add one half of the flour mixture and half of the egg to the pan and mix well.
Repeat with the remaining flour and egg.
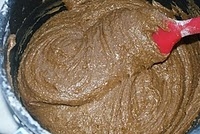
Finally add in the ground almonds and mix till thoroughly combined.
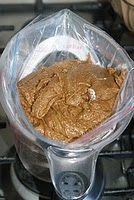
The dough now needs to be chilled, it is very sticky and will seem along way away from being a biscuit dough but don’t worry.
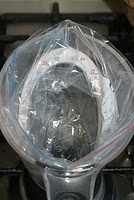
Place it in a plastic bag, an easy way of doing this is to fold a bag over the inside of a large jug and tip the dough in.
Chill overnight in the fridge, in fact you can leave this dough to develop it’s flavours in the fridge for up to three days.
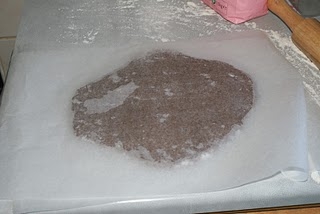
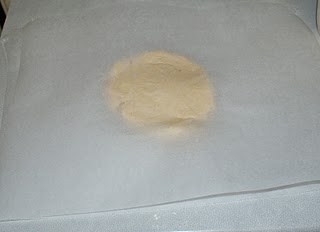
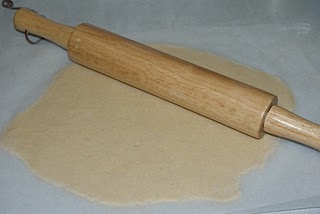
The following day remove the dough from the fridge and roll out between two sheets of greaseproof paper to approx 5mm thick.
Preheat the oven to 160c Fan/180c/Gas Mark 4.
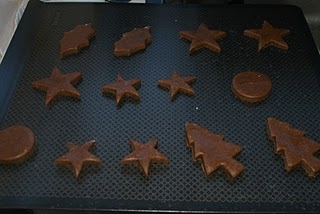
Crack out the christmas cutters, hooray!, and cut out your biscuits. Lay them spaced well apart on a greased or lined baking tray. The biscuits will spread on baking so I have found that 1″ cutters are the best to use.
(There is only one baking tray I have that doesn’t need greasing and is super non-stick, it’s the baking tray in the Tefal Airbake range, for all the others I use the reusable sheets of bake o-glide – even I can’t stick anything to bake-o-glide – I’ve put the links at the end of the post if you’re interested xx)
Bake in the oven for 7-9 minutes until golden brown. Allow to cool for five minutes on the tray to firm up a little before carefully transferring to a cooling rack.
Mix up a really watery icing glaze combining your sifted icing sugar with the water.
Line up the lebkuchen on a wire rack, I cover the work top in a layer of cling film to make cleaning up much easier later on!
Using a pastry brush glaze the tops of the biscuits by brushing on a thin layer of icing. Apply a second coat and leave to dry.
The biscuits will keep for up to three weeks in an airtight container – that’s if you can resist eating them.
Tefal Airbake Cookie Sheet – John LewisBake-O-Glide – John Lewis
Stunningly delicious Lebkuchen
 Ruth Clemens, Baker Extraordinaire
Finalist on BBC2 The Great British Bake Off
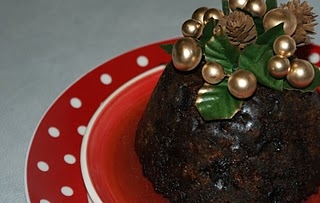
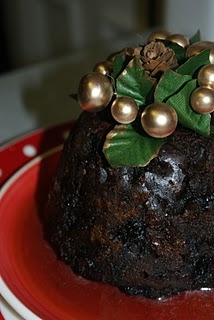
Grandma’s Christmas Pudding
November 17th, 2010
Okay, so here goes… I’ve never made a Christmas pudding before, quite frankly my Grandma makes the best puds in the stratosphere and the thought of a pressure cooker (and having to chisel pudding from my kitchen ceiling) fills me with dread!
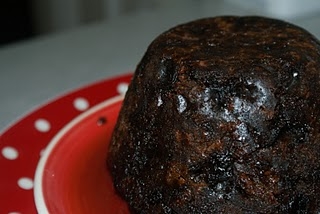
But, I’m a brave baker, no pressure cooker here and six puds later (practise, practise, practise) here’s your guide to Grandma’s Christmas Pudding.
Traditionally Christmas Puddings and Cakes are made on Stir Up Sunday – the last Sunday before Advent. That’s this Sunday 21st November. Instead of being at home, stirring-up with the best of you I’m taking part in a panel of foodies manning the Sainsburys Baking Hotline! For one day only you can call
![]()
with all your baking queries between 11am and 4pm – you might even get through to me! Other panel members include Dan Lepard, Kate and Liz from the Sainsburys Try Team, Lucy Chahil, Netmums Food Editor and Sarah Randall, Food Director at Sainsburys Magazine.
You can see more about the hotline and the panel members here.
Ingredients:
130g currants
140g sultanas
130g raisins
50g ground almonds
2 tsp mixed cake spice
50g plain flour
pinch of salt
110g breadcrumbs (approx 3 slices blitzed in a food processor)
110g soft light brown sugar
110g suet
Zest of one lemon
2 tbsps treacle
2 eggs, large
2 tbsps brandy, rum or other liquor of your choice
Will make one large pudding in a basin with 1 litre capacity or you can split the mixture into smaller pudding basins as you wish.
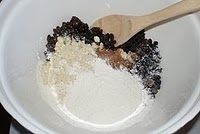
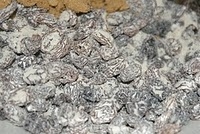
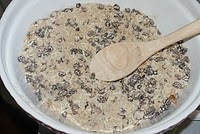
Into a large bowl place the raisins, sultanas, currants, ground almonds, plain flour, cake spice and pinch of salt, mix well.
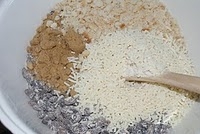
Add your breadcrumbs (easiest way to get these is to blitz approx 3 slices in a food processor), suet, brown sugar and lemon zest – give it another good stir up!
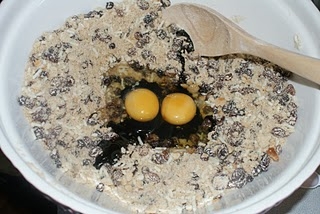
Make a small well in the centre, add your two eggs, the treacle and the brandy or rum if using. Grandma uses rum. If you would prefer it without the booze simply replace with the same quantity of milk.
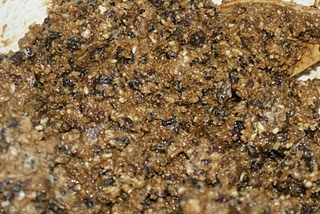
Stir up until all the ingredients are fully combined, you should have a soft clinging mixture. If your mixture appears to be too dry you can add a dash of milk to loosen.
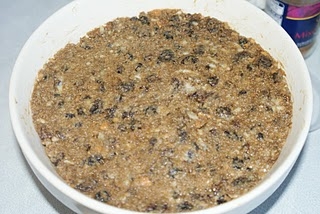
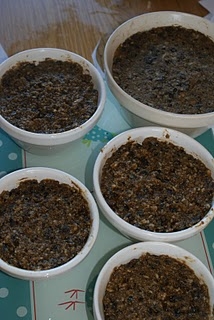
Grease your pudding basin with butter. Cut a small disc of baking paper to fit the bottom of the basin and pop it in. Add the mixture to the pudding dish and press down the top with the back of a spoon to level.
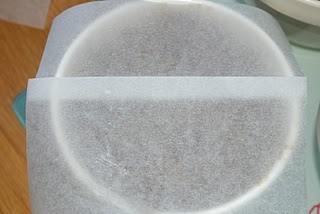
Cut a square of baking paper larger than the top of the basin, fold a pleat in it (as in the picture) and lay it over the top of the pudding.
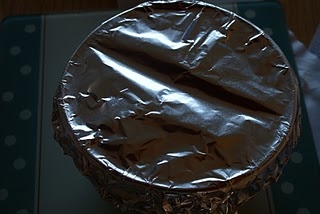
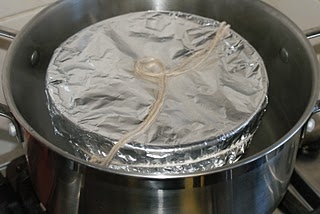
Add an additional two squares of foil on top the paper and tie securely with kitchen string.
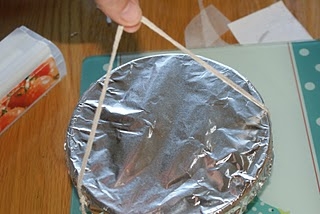
You can also add a handle so it is easier to lift out when cooked.
Now for the steaming part – one large, 1litre pudding needs to steam for 8 hours, two medium 500ml puds for 6 hours each and tidgy puds, 400ml will need 4 hours. To do this you have three choices (that’s completely discounting the pressure cooker option – I’m not even going to go there!)
1. Place the pud in a large saucepan, fill 2/3rds up the outside of the pudding basin with hot water and heat until the water boils. Place the lid on the saucepan and allow to steam for the length of time indicated above. You will need to keep topping up the water every now and then. This option also turns your house into a handy sauna, guaranteed to please everyone when they come home from school and work and condensation is practically running down the walls. (Well I did make six!)
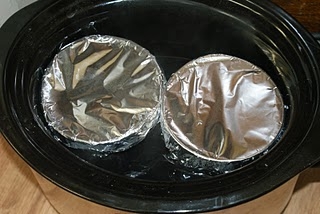
2. You can steam them in a slow cooker if you have one. Place the pud in the bowl of the slow cooker and fill around the pud with hot water, place the lid on, turn the slow cooker on to high and leave to cook. You will need to add an additional two hours onto the baking time for each pud if using this method, however the water needs a lot less topping up, just once in fact and didn’t fill the house with steam. Thanks to Lou, from Bake Off for this fabulous tip off!
3. Last option is to stand the puds in a large roasting tin, fill the in with water and place in the oven at 170C/Gas Mark 4 to steam, again it will need to be topped up with water now and then.
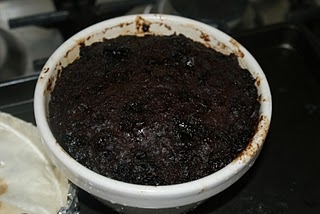
When the puddings are cooked remove from the water and allow to cool completely.
To remove them from the basins run a knife carefully around the pudding to loosen and tip out.
Wrap again in clean baking paper followed by a layer of foil. Now allow to mature until Christmas in a cool dry place, a pantry or cupboard is ideal.
Now then when it’s Christmas you want a bit of flambe action going on with this here pud. To flambe successfully you need to reheat the pud by steaming for a further hour. Heat some brandy in a small saucepan gently and then set it alight in the pan. Take a ladle full of brandy (a metal ladle obviously) and pour over the pud and serve. I tried to get a photo of my flambe which was brilliantly impressive but I couldn’t capture it so you’ll have to take my word for it!
Ruth Clemens, Baker Extraordinaire
Finalist on BBC2 The Great British Bake Off
Recipe for Sugar Cookies – Children in Need
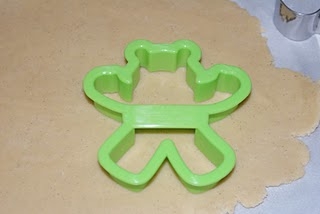
November 11th, 2010I’m sure many of you will be baking to raise funds for Children in Need so here’s my how to for the perfect Pudsey Bear Sugar Cookies. Children in Need is Friday 19th November 2010 – you can find out more here.
ASDA stores are giving away Pudsey Bear cutters to children this week, so please ask in your local store and get baking for Children in Need.
This post is also dedicated to two of the reasons I bake – introducing Dylan and Finlay.
This afternoon I am headed into school to talk to their classes on instructional writing and how I write recipes – wish me luck!
Ingredients:
Cookies
225g butter
225g caster sugar
1 egg, large
1 tbsp vanilla bean paste
375g plain flour, sifted
Royal Icing
500g icing sugar
1 tablespoon of Merriwhite
90ml water
or 1 packet of Silver spoon Royal Icing Sugar
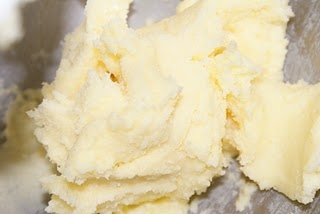
Cream together the butter and sugar until light and fluffy.
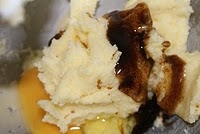
Add the egg and the vanilla bean paste and mix well. I use vanilla bean paste because I like the vanilla seeds through the cookie, if you can’t get hold of it use the seeds from one vanilla bean pod or 2 tsp vanilla extract.
Add the sifted flour and thoroughly mix to a dough.
Split the dough in half.
Take two sheets of baking paper and lay one on your worksurface. On top place one half of the cookie dough. Top with the second sheet of baking paper.
Now roll out the dough, between the two sheets to approx 4mm thick.
Place the rolled out dough, still in the baking parchment, in the fridge to chill for half an hour.
Repeat with the second piece of cookie dough.
Preheat the oven to 160c Fan/180c/Gas Mark 4.
Once the dough is nicely chillled it will be much easier to cut out perfect cookies.
Cut out your cookies and place on a greased or lined baking sheet, chill again for a further 15 minutes or until they are completely hard again. The chilling stops the cookies from spreading and will help them keep their shape.
Keep re-rolling the scraps and chilling again between two sheets of baking paper until you have used up all the dough.
Bake in the oven for approximately 12 minutes until the cookies are golden brown on the edges. Baking times will vary depending on the size of cutter you are using, times here are based on a 2 1/2″ cookie.
Remove from the oven and allow to cool for a couple of minutes on the tray before transferring to a wire rack to cool completely.
For the decoration mix up some royal icing to a thick pipeable consistency. I use Merriwhite powder which replaces the egg white and it can be bought from online sugarcraft shops. Alternatively Dr Oetker sell sachets of egg white powder on the baking aisle but they can be difficult to get hold of. Trusty failsafe is to buy a packet of Silver Spoon royal icing sugar and mix it up following the instructions on the packet.
Add a couple of spoons to a piping bag fitted with a small round nozzle and pipe the outlines of Pudsey’s bandana.
Colour one spoonful each of royal icing red, blue and yellow and add the spots to the bandana.
Colour a couple of spoonfuls black, using a gel paste colour and add in Pudsey’s features.
Take a couple of spoonfuls of white royal icing and add a tablespoon of water to make it a runny consistency – use to fill the bandana outline you piped earlier – squeezy bottles make this much easier but are not essential. You will only need a couple of drops of this per bear. Encourage the icing around the spots using a cocktail stick.
Leave to dry.
Then show your spots, sell lots and raise a fortune for Children in Need!
Ruth Clemens, Baker Extraordinaire
Finalist on BBC2 The Great British Bake Off
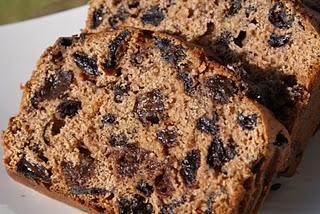
Berry Tea Loaf
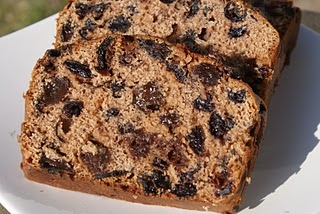
November 8th, 2010A super quick recipe if you’re organised and soak the fruit the night before, just do it when you’re brewing up. I created this when I had an urge to bake tea loaf, but went to the cupboard to find I’d used most of my dried fruit for the vat of boozy fruit I’ve got on the go. I have to say dried cherries and blueberries in a tea loaf are just lovely – a nice tangy bite to them, definitely a good invention.
Ingredients:
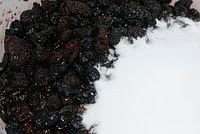
290ml strong black tea340g mixed dried fruit – sultanas, cranberries, cherries and blueberries (if you want a traditional tea loaf just use sultanas and raisins)115g caster sugar225g self raising flour1 large egg, beaten
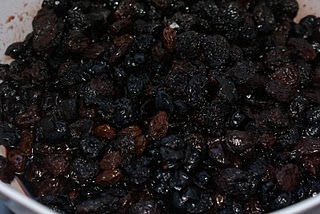
Preheat the oven to 170c/150c Fan/Gas Mark 3.Soak the fruit overnight in the tea. I do this late evening before I go to bed, usually when it’s my turn to brew up.
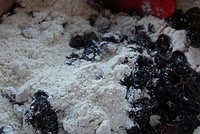
The following morning stir through the sugar followed by the beaten egg.
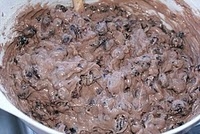
Finally sift over the flour and stir till thoroughly mixed.
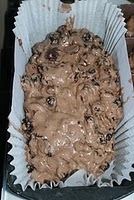
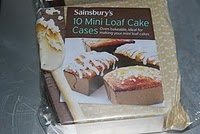
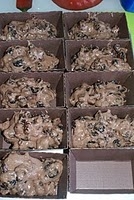
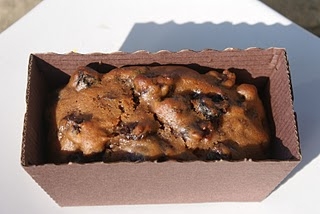
Add the mixture to a lined 2lb loaf tin. I also tried out these dinky little loaf cases from Sainsburys.
Bake in the oven for approx one hour to one hour 15 minutes, cover with a loose sheet of baking paper if the top is starting to brown too quickly. The loaf is done when a skewer inserted into the cake comes out clean. If you are using mini loaf cases they take about 40 minutes to cook.
Remove from the oven and allow to cool.
Delicious any time of the day – but definitely best with a cuppa!
Mini Loaf Cake Cases – Sainsbury’s
Ruth Clemens, Baker Extraordinaire
Finalist on BBC2 The Great British Bake Off
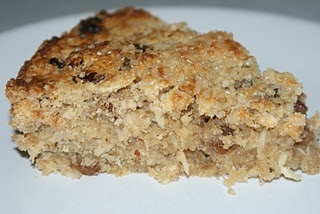
Blue Peter Apple Cake
November 3rd, 2010
This is the recipe for a cake that I started making in my early teens, I used to make it for family occasions around this time of year when we were lucky enough to have apple trees in the back garden. I can’t take the credit for this recipe it is purely down to Blue Peter from the days when you had to scribble down the ingredients from the television screen.I never did get a Blue Peter badge – but maybe it’s not too late!
Ingredients:150g Demerara sugar plus 2 tbsp for sprinkling2 Weetabix1 egg, beaten200g self raising flour50g wholemeal flour3tsp cinnamon2 cooking apples (approx 300g)75g sultanas150g butter, diced and softened
Preheat the oven to 220c/200c Fan/Gas Mark 8. Hot, hot, hot!
Grease a cake tin to bake this in, I like to use a 9” tin but this is a really forgiving recipe so use your favourite tin.
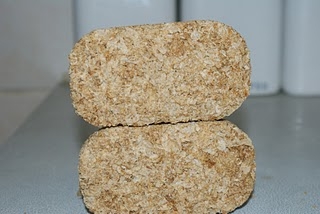
Here’s the magic ingredients…..Weetabix, trust me this is Blue Peter, it works!
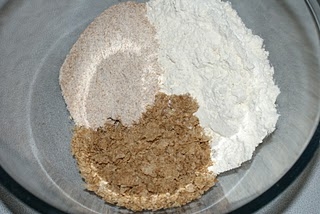
Take the two Weetabix and using your hands scrunch them up into little bits. Place them in a bowl along with the selfraising, wholemeal flour and cinnamon. Mix together well.
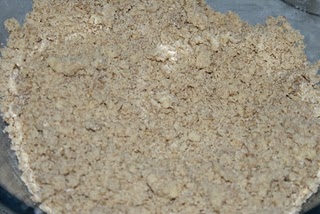
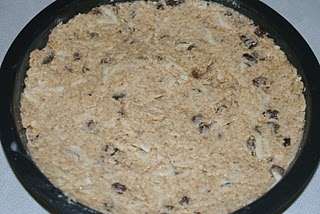
Add the diced butter and rub into the mixture using your fingertips or a pastry blender. It only needs to be roughly rubbed in as you can see in the picture.
Stir through the Demerara sugar.
Grate the cooking apples and add to the bowl.
Next add the sultanas and beaten egg and stir the whole lot together to make a really stiff cake mix, almost bordering on a dough.
Place the mixture into the greased tin and press the top with a back of a spoon to level.
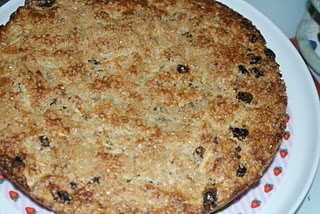
Sprinkle on a further two tablespoons of Demerara sugar and bake in the oven for 20 -30 minutes until the top is lovely golden brown. If you are using a smaller tin it will take longer to bake.
Remove from the oven and allow to cool slightly.
It is gorgeous warm eaten straight out of the tin but equally good cold, serve with cream, custard or eat it on it’s own by the slice.
Now where’s my Blue Peter badge?
Ruth Clemens, Baker Extraordinaire
Finalist on BBC2 The Great British Bake Off
Chocolate and Lime Tart
October 30th, 2010
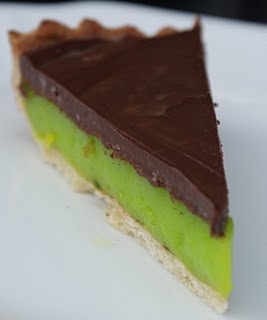
Inspired by sweeties, I love chocolate limes I thought I’d turn this into a sweet tart – it was a success, I think the OH ate half this in one go!
Ingredients:Sweet Pastry175g plain flour120g butter, cold diced30g caster sugar1 large egg, beaten
Lime Filling120ml lime juice240ml water270g caster sugar50g cornflour3 egg yolks2 tbsp butter
Grated zest of one limeGreen food colouring if desired.
Chocolate Ganache100ml single cream100g dark chocolate
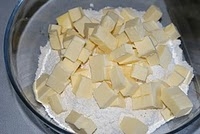
Prepare the sweet pastry first. Sift the flour into a large bowl. Add the diced cold butter and rub in to the flour using your fingers or a pastry blender.
You only need to do this fairly roughly and it is fine to still have small blobs of butter throughout the mixture.
Stir through the caster sugar and then add the beaten egg, bring together roughly with a knife.
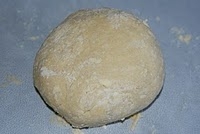
Tip the whole lot out onto your worksurface and and knead it lightly till it comes together and forms a ball.
Place the pastry in a plastic bag or clingfilm and then chill in the fridge for 30 minutes.
Preheat the oven to 190c/170c fan/Gas Mark 5.
Remove the pastry from the fridge and roll out to about 4mm thick, into a large enough piece to line your tart tin.
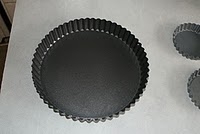
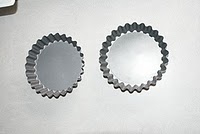
The quantities given here will make one 8” tart or 4 miniature tarts. (Links to the equipment can be found at the end of the post).
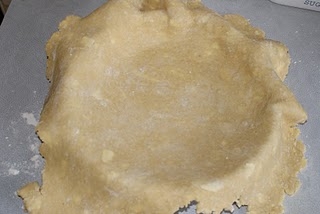
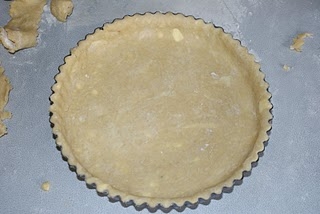
Lay the pastry over the tart tin and press it in gently using your fingers taking care not to stretch the pastry too much.
Trim off the excess pastry using a sharp knife or by rolling your rolling pin over the top of the tart tin.
Put this back in the fridge to chill for 30 minutes or until completely firm.
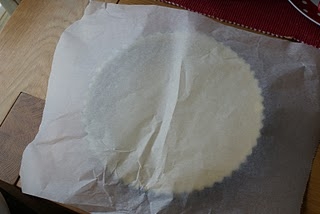
Remove from the fridge and prick the base of the pastry with a fork. Take a piece of baking paper 3-4 inches larger than the diameter of the tart.
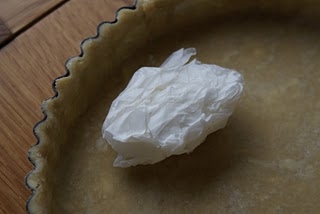
Scrunch it up into a ball.
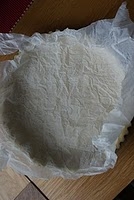
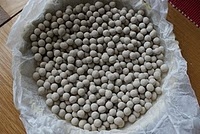
Then unscrunch it. Lay it into the pastry shell. The scrunching softens the baking paper and helps it to shape into the pastry tart. Fill with ceramic baking beans.
You can use dried rice of beans for this job, but ceramic baking beans are designed to distribute the heat evenly and support the shape of the pastry far better.
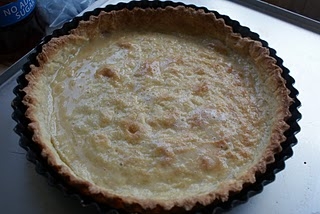
Bake in the oven for 15 minutes, after this time take out of the oven, remove the baking beans and baking paper. Return to the oven for a further 8 minutes until the base is completely cooked.
Allow to cool completely.
When your beautiful pastry shell is cooled we can get on with the lime filling. I use lime juice directly from a bottle which is easy to get from most supermarkets these days but use fresh limes if you prefer.
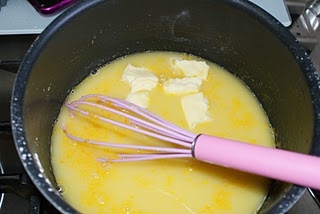
Place the water, lime juice, sugar, cornflour and egg yolks in a pan and using a whisk mix together thoroughly.
Add in the butter and place over a medium heat stirring constantly.
As the mixture heats up it will begin to thicken –keep stirring! When it starts to bubble cook for approx a further three minutes until it is nice and thick.
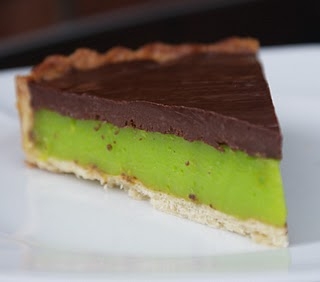
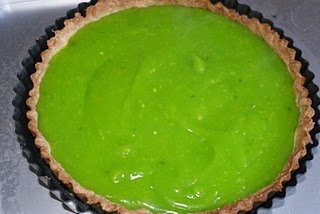
Remove from the heat and add in the lime zest and add green food colouring if you wish. The mixture is disappointingly yellow, like lemon curd so for me the colouring was a must. Although I have to admit maybe I went a bit overboard with it and it was a very vibrant green – so much so that the children refused to eat it!
Place the lime mixture into the cooled pastry shell and spread out roughly with a back of a spoon. Set to one side to cool completely.
When the lime layer is cold it’s time for the chocolate layer. Make a basic chocolate ganache using 100ml cream and 100g dark chocolate.
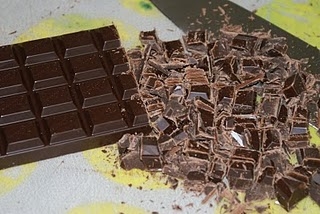
Chop the chocolate into small pieces ( I like to use Bournville as it works well in baking, don’t use G&B’s for ganache – it splits on me every time)
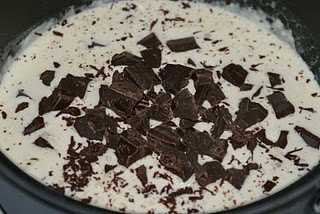
Place the cream in a pan and heat until almost boiling. Remove from the heat and add the chocolate.
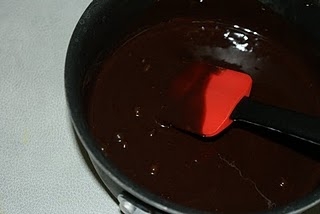
Allow to stand for a couple of minutes and then stir until the chocolate is completely melted and combined with the cream for a beautiful ganache.
Pour over the top of the tart and allow to set in the fridge.
Equipment Links –
Pastry Blender – Cook In StyleTala – Ceramic Baking Beans – Sainsbury’s
Loose based Tart Tin – Sainsbury’s
4pk Tartlet Tins – Sainsburys
Ruth Clemens, Baker Extraordinaire
Finalist on BBC2 The Great British Bake Off
Jam Jam Jam Jam!
October 20th, 2010A couple of weeks ago Edd (from Bake Off) and I attended a jam making session hosted by Stoves and the WI in London. Jam is something I’ve only started doing properly this year, it always seemed the height of domesticity to me, which is why I never gave it a go! Time on my hands and hoards of natures finest (and free) blackberries and damsons pushed me into it.
The session came at absolutely the right time, we had a ball being taught how to make jam properly. Since then I’ve kept jamming and think we now have enough stashed in the garage to see us through till 2023!
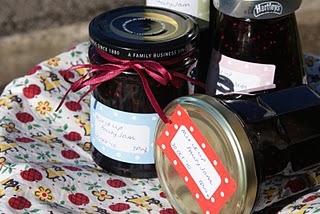
 Here’s a very proud me with my jam!
The session was to tie in with the WI Real Jam Festival 20-21 November being held at Denman College, Oxfordshire. If you’re a master jam maker and would like to enter the competition you can find all the details here WI Real Jam Festival
So time to share with you the jam tips I learnt with my mix it up fruity jam.
Ingredients:
1kg mixed berries
(I’m using a mixture of fruits that were hiding in the freezer – cherries, blackberries, redcurrants, blackcurrants)1kg granulated sugar100ml apple juice
You will also need:
a large preserving pan, I don’t have one so I use my big stew pot, it needs to be really big!jam thermometer3 or 4 jam jars (I’m reusing old jars)
Place the sugar into an ovenproof bowl and place into a cold oven.
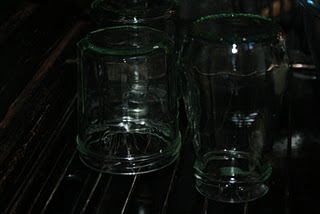
Remove the lids from the jam jars and place upside down onto the shelf in the oven alongside the sugar.
Turn the oven on to 130c/Gas Mark 1.
The reason behind placing them in a cold oven is that if you were to put them straight into a hot oven they may crack so let them heat up gently.
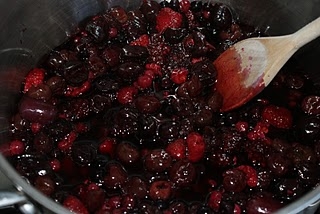
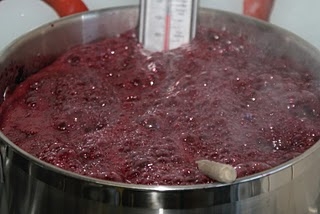
Place the fruit into your large pan, add the apple juice and over a low heat simmer until soft (approx 15-20 minutes). The apple juice contains a good level of pectin which will help with setting and avoids the need for special jam sugar or the addition of commercial pectin. This bit of simmering is important to soften the skins of the fruits if you don’t get them soft at this stage when you add the sugar it’s game over and the skins will go like leather.
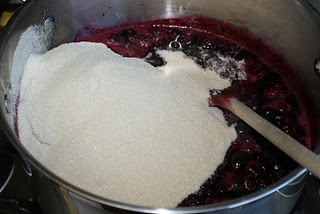
When you’re sure the skins of the fruit are soft enough add the warmed sugar and stir until completely dissolved. When the sugar is dissolved you won’t be able to feel it on the bottom of the pan when you stir and if you lift out the spoon to check, there will be no sugar granules visible.
Turn up the heat and boil on a rolling boil until the setting point is reached (106c). Stirring occasionally to make sure nothing sticks to the bottom of the pan.
Turn off the heat and remove any frothy scum from the surface of the jam with a spoon.
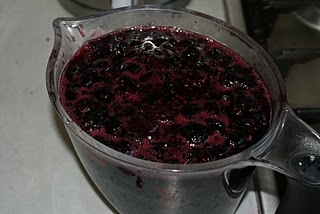
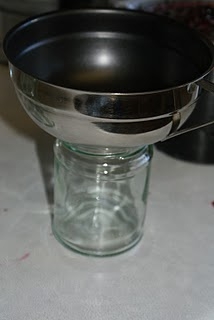
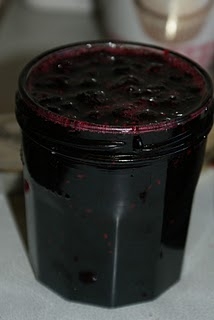
Remove the jars from the oven, being careful because they are hot and fill with jam. You need to fill them right to the very top. I find the best way is to ladle it into a jug and use a jam funnel – I’m a bit messy at the best of times and this gets all the jam in the jar!
Remove any air bubbles from the surface of the jam using a teaspoon and finally secure the lids and allow to cool.
It’s difficult to accurately predict how many jars your jam will fill as a lot will depend on the fruits you are using and the cooking time needed always have an extra jar handy in case you end up with more jam than you anticipated!
If you’re into jamming or want to invest in a some jam making supplies here are some useful links:
Jam Thermometer – Cook in Style
Jam Funnel – Cook in Style
Set of 6 Preserving Jars – John Lewis
Preserving Starter Set – John Lewis
…and let me know if you’re entering the competition too!
Mix it up Fruity Jam

Ruth Clemens, Baker Extraordinaire
Finalist on BBC2 The Great British Bake Off
Free-From Chocolate Crinkles
October 16th, 2010I’ve done another spot of guest blogging – you can find the Free-From Chocolate Crinkles on Hello! Magazine Blogs – ‘Free From’ Kitchen
Although the recipe is designed to be gluten and dairy free you don’t have to need to be on a free-from diet to try them!
Ruth Clemens, Baker Extraordinaire
Finalist on BBC2 The Great British Bake Off
