Posts by The Pink Whisk:
Christmas Cake – Boozy Fruit Part 2
October 13th, 2010
So you’ve been lovingly stirring your boozy fruit for the past few weeks and enjoying inhaling the fumes as you do so! Now it’s time to turn that jar of loveliness into this years Christmas Cake. If you missed the Boozy Fruit post you can find it here, get going with it now, even a weeks soaking is going to create some Christmas Magic!
Ingredients:
225g butter, softened
150g soft brown sugar
75g dark brown sugar
2 tbsps treacle
2 tsps mixed cake spice
285g plain flour
5 large eggs, beaten
1 x Boozy Fruit already prepared.
150ml brandy for feeding.
This recipe will make an 8″ Christmas Cake, if you prefer you can bake two 4″ cakes.
Preheat oven to a low 150c Fan/170c/Gas Mark 3.
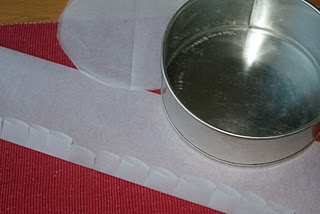
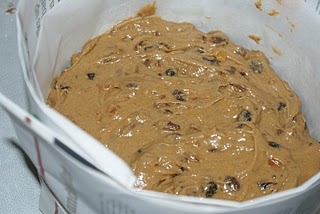
Double line an 8” tin with baking paper.
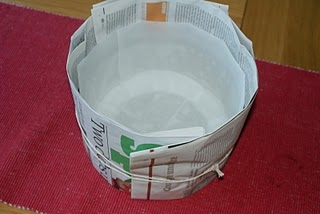
Wrap a thick layer of newspaper around the outside of the tin and secure with string. If you have children in your house this might be an epic adventure especially as it’s just been conker season!
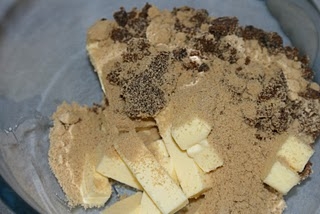
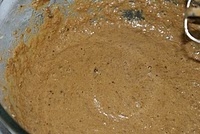
Start by creaming together the butter and the sugars.
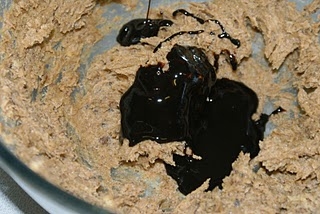
Add the treacle and beat until combined.
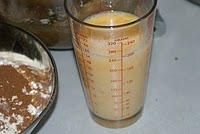
Add the beaten eggs a little at a time, mixing well after each addition.
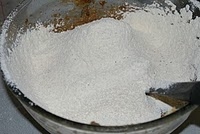
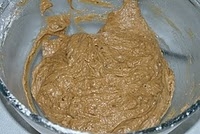
After the eggs are fully incorporated sift over the flour and cake spice and fold into the mixture.
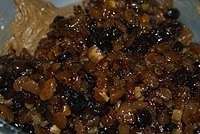
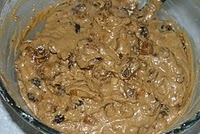
Finally add the boozy fruit you lovingly prepared a few weeks ago and mix until the fruit is distributed evenly.
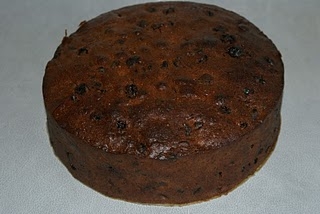
Add the mixture to the prepared tin and bake in the oven for approx 2 hours. Check after one hour and if the top is browning too quickly add a loose sheet of baking paper to the top. (If you’re making 4″ cakes they will need to be baked for approx 1 hour)
The cake is ready when the top is a dark golden brown and when inserted a skewer comes out clean.
Remove from the oven and allow to cool completely in the tin.
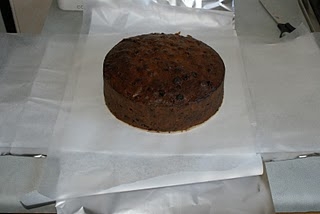
Once the cake is cold remove it from the tin removing the baking paper from the sides of the cake but keeping the base disc in place, this will help keep in moisture as the cake is fed in the run up to Christmas.
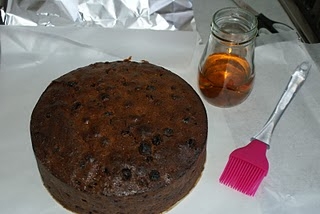
On your worksurface lay out two large pieces of foil, one horizontally and one vertically. On top of that place two large sheets of baking paper. Finally position the cake in the middle.
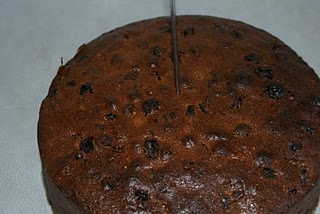
Using a skewer pierce 30-40 holes in the top of the cake, only ¾’s of the depth of the cake though so that the brandy doesn’t run straight through!
I like to put the feeding brandy into a jam jar, that way it’s to hand whenever it’s time to feed the cake.
Using a pastry brush, brush over the entire top of the cake with the brandy. You are looking to add 1 or 2 teaspoons of brandy in each feed.
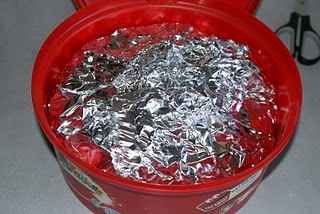
Once fed, gather up the baking paper and seal in the cake, repeating with the foil layer. No place the whole lot in a suitable container, I use an old Christmas sweetie tin which is just the perfect size!
Place the container into a cupboard or the pantry, it needs to be out of direct sunlight somewhere dry but don’t forget about it. Feed it every 3-4 days for the next few weeks or until the cake won’t absorb anymore.
Christmas cake – done! (well for now, I’ll be back at the end of November with some easy decorating ideas and maybe a tricky one too!)
Ruth Clemens, Baker Extraordinaire
Finalist on BBC2 The Great British Bake Off
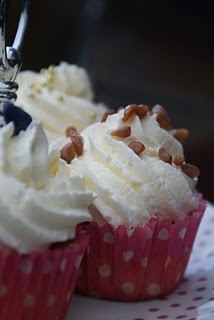
Perfect Vanilla Cupcakes and Meringue Buttercream Frosting
October 8th, 2010
I’ve spent ages trying to find the right recipe to make delicious vanilla cupcakes – light and moist with nicely risen domed tops – no volcano effects here. Something like this should be simple to do and it is – as long as you use the right recipe.
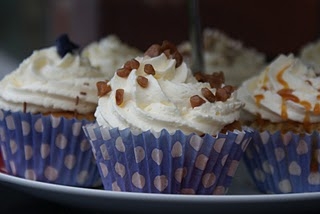
This post also includes the recipe for the absolute best cupcake topping in the world – meringue buttercream frosting – I can eat this straight off the spoon! It’s definitely worth the effort and once you’ve tried it you’ll never go back to ‘normal’ buttercream!
Vanilla Cupcakes
Makes:12
Ingredients:100g butter, softened 225g caster sugar
100ml milk
210g plain flour
2tsp baking powder
3 eggs
2tsp vanilla extract or 1 tbsp vanilla bean paste.
Preheat the oven to 160c Fan/180c/Gas mark 4.
Cream together the butter and sugar.
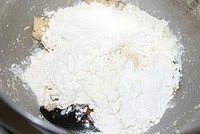
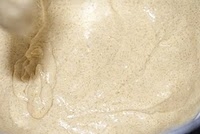
Add in the vanilla, eggs, milk, flour and baking powder and mix till fully combined.
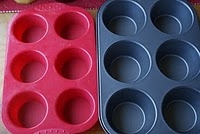
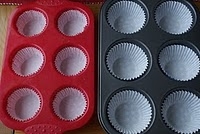
See it was easy, once you have the magic recipe! Now you have some choices – what kind of cupcake look you’re after. I have two different types of tins. One is silicone which holds the cupcake case tight for a straighter cupcake and the other is a large metal tray which gives a more open cupcake. You will see in the pictures what I mean:-
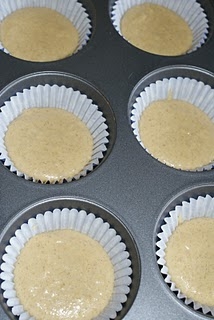
Add the paper cases to your tray and spoon the mixture into the cake cases 2/3rds full.
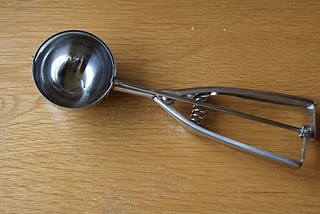
I like to use a metal sprung ice cream scoop which gets the mixture into the cases really neatly. It also makes it far easier to get equal amounts into each.
I have added some links to the equipment I use to the bottom of the page in case you’re looking to invest in any of them!
Into the oven they go, middle shelf for 18 – 20minutes until the tops are golden brown and the cakes are risen.
So now comes the troubleshooting bit, if your cakes have the volcano effect and have erupted on the top it is an indication that the oven is too hot. Oven thermostats are notorious for being incorrect. I use a removable thermostat which I use to preheat the oven (that’s nothing to do with the fact that during a vicious cleaning blitz I ‘cleaned’ the temperature numbers off the dial!) If you invest in one thing, this would be what I recommend. Test your oven – you’ll probably be surprised.
Remove from the trays and allow to cool thoroughly on a wire cooling rack.
Meringue Buttercream
This is to die for! Seriously you need to taste it to believe it! It’s a bit of a faff and you do need a sugar thermometer – but so so worth it!
Makes: Enough to pipe swirls onto 24 large cupcakes.
Ingredients:
5 large egg whites
50g caster sugar
250g caster sugar
100ml water
500g butter, softened
You will also need a sugar thermometer and electric mixer, preferably a stand mixer which makes life a lot easier but if you don’t have one an electric mixer will work fine.
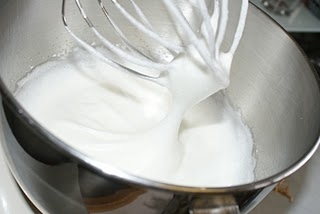
In a large clean bowl place the egg whites, using the electric mixer whip the egg whites. When they reach the soft peak stage ie. foamy but won’t hold their own shape add in the 50g sugar a spoonful at a time. Continue whipping until they reach the firm peak stage – they will hold the peaks when you take out the mixer. Leave to one side.
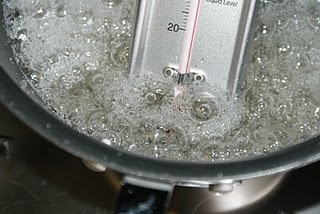
In a pan place the 250g caster sugar and 100ml water. Heat over a low heat swilling the pan around gently to encourage the sugar to melt to a syrup. When the sugar has melted and the syrup has turned clear turn the heat up to medium. Boil the sugar syrup to 121c, this will take about ten minutes.
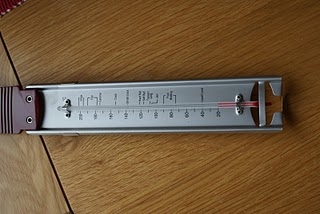
I used to use a digital thermometer but as I have now ruined two of the blighters by dropping them in to whatever it is I am heating up I have now switched to one of these.
When the syrup reaches temperature remove from the heat. Turn the mixer back on, at a slow slow speed, in the whipped egg whites and pour the sugar syrup in gently in a steady stream. Please be very careful it is very very hot!
When the sugar syrup is fully combined keep the mixer running whilst the meringue mixture cools. This will be about 8 minutes.
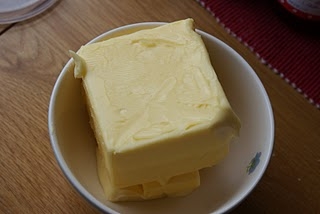
When the bowl is cool to the touch you can start adding the butter.
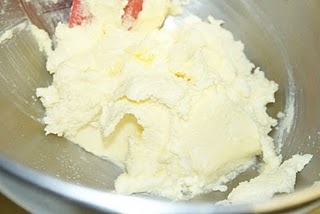
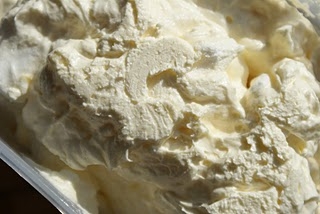
I pinch off small pieces and throw them into the meringue. You need to do this slowly, a bit at a time. As you get about half way through adding the butter the mixture will have lost volume and will be slightly liquidy but don’t worry, keep adding the butter, still with the mixer running. When all the butter is added whip until the buttercream looks like whipped double cream.
At this stage you can add flavouring if you wish – 2 tsp vanilla extract, 2tsp lemon oil, whatever takes your fancy but it is just as good plain!
Spread on the top of your cupcakes with a knife, or pipe swirls if you so wish! A how to pipe frosting onto cupcakes is here.
This buttercream doesn’t keep well and certainly doesn’t like it in the fridge so use it straight away. The theory behind the sugar syrup is that it cooks the egg white sufficiently for it to be safe and any harmful bacteria killed off. That said, it’s really not worth the risk of giving it to the very elderly or pregnant women.
Equipment Links:
Sugar Thermometer – John Lewis
Oven Thermometer – John Lewis
Tala Cupcake Piping Set – John Lewis
Silicone Cupcake Tray – Sainsburys
Sainsburys
Vanilla Cupcakes and Meringue Buttercream
Ruth Clemens, Baker Extraordinaire
Finalist on BBC2 The Great British Bake Off
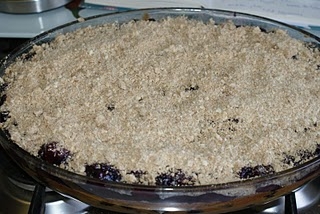
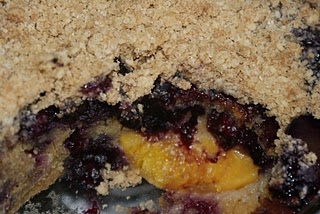
Peach and Blueberry Boy Bait
October 4th, 2010Guaranteed to catch boys, men, whatever you’re after catching!
Ingredients:
Cake
230g butter
250g plain flour
100g caster sugar
165g soft brown sugar
2 tsp baking powder
1 tsp salt
3 large eggs, separated
240ml whole milk
225g fresh blueberries
1 x 225g tin of sliced peaches, drained weight
Jam
210g fresh blueberries
1 x 225g tin of sliced peaches, drained weight
65g caster sugar
1 ½ tbsp plain flour
1 ½ tsp lemon juice
Crumble
110g self raising flour
70g butter
85g brown sugar
½ tsp cinnamon
2 tbsp Demerara sugar
Preheat the oven to 180c/160c Fan/ Gas Mark 4. Will serve a hungry family so half quantities if there are only a couple of you!
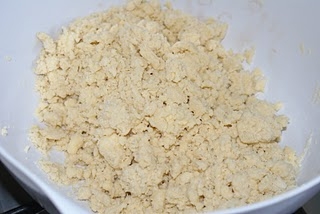
So, to start, place the flour in a large mixing bowl and rub in the butter using your fingertips or a pastry blender. The mixture will be quite thick and pasty!
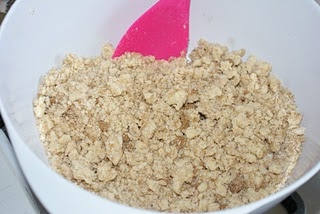
Stir in the sugars and mix well.
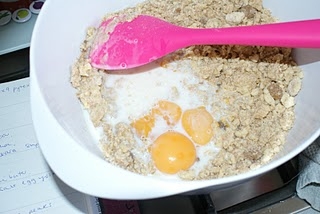
Add in the baking powder, salt, egg yolks and milk and give it another good mix.
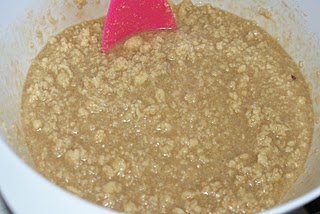
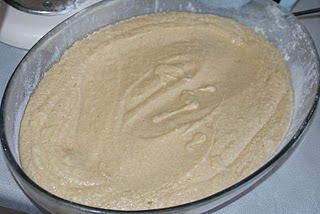
At this stage it will look something like this gloopy mess – don’t worry!
Can I just add here – my Mum bought me the fab pink spoon – isn’t she lovely!
Put the three egg whites into another clean large bowl and with an electric mixer whip until they are at the soft peak stage. They will gently hold their shape when they are ready.
Now with the electric mixer whizz up the cake batter to give it a much more even texture – whisk for about two minutes until the worst of the lumps are gone.
Add one third of the beaten egg whites and stir in with a metal spoon. A metal spoon is best for cutting through the mixture and combining the egg whites without knocking too much air out of them. Add another third and repeat until all the egg white is combined with the cake mixture.
Grease and flour a shallow pyrex or casserole dish, I’m using one that measures 12” x 9” but any with a 2 litre capacity will be fine.
Add the cake mixture to the prepared dish.
Remove any stalks and leaves from the blueberries, if washing them now you will need to make sure they are dried thoroughly.
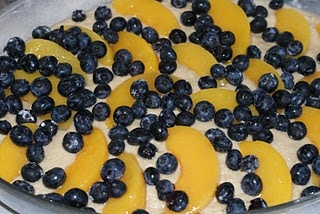
Scatter the blueberries and the drained peaches on the top of the cake mixture.
Now this needs to go into the oven for 45-50 minutes, when done it will be golden brown on top and slightly springy to the touch.
Whilst we’re waiting for it to bake we can make the jammy layer for on top.
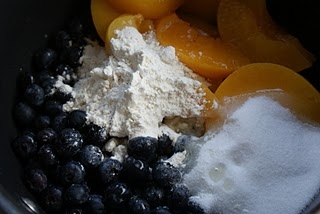
Put all the ingredients in a pan. The lemon juice quantity is approx the juice of half a lemon.
Heat over a low heat, stirring occasionally, for about 7 minutes. You can mash down the fruit as it cooks but not too much – chunky is good! Just watch it doesn’t catch on the bottom of the pan.
For the crumble topping rub in the butter to the flour using a pastry blender or your fingertips, stir through the sugar and cinnamon.
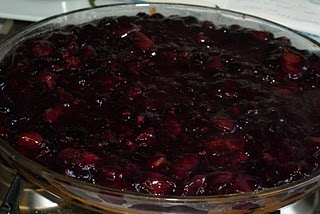
When the cake is done remove it from the oven and top with the peach and blueberry jammy mix you have made.
On top of the jammy layer place the crumble mixture and top that with the final 2 tbsps Demerara sugar.
Pop it back into the oven for another 15 minutes until the crumble is golden brown.
Best served with custard…and let me know how it goes down with the boys!

Ruth Clemens, Baker Extraordinaire
Finalist on BBC2 The Great British Bake Off
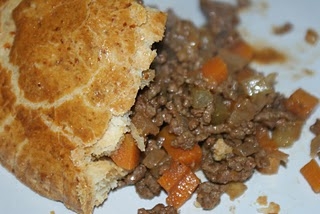
Minced Beef Pie with Cheesy Crust
October 1st, 2010This is such a great family pie and was also a hit on The Great British Bake Off – no soggy bottoms here!
Ingredients:
Pastry225g plain flour75g butter, cold diced75g Lancashire cheese1 egg yolk4-6tbsp cold water
Filling250g minced beef2 carrots, diced1 stick of celery, diced1 onion, dicedSplash of ale2tbsp tomato puree2tbsp Worcestershire sauce
1 egg beaten for egg wash
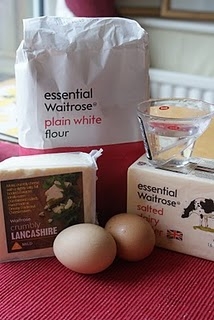
Pastry first! Here are the ingredients.
It looks like this post is sponsored by Waitrose, it isn’t but one opened in our village last week – hence all the Waitrose stuff. I won’t be shopping there all the time otherwise I might go bankrupt!
I make pastry in the food processor, it’s easy, that’s why! It can be made by hand just as easily but it takes a bit longer and when the boys are asking for this and that I need all the time I can get my hands on.
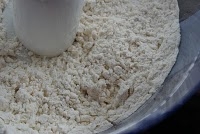
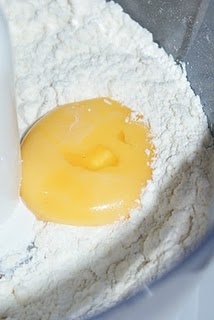
So, into the food processor goes the flour.
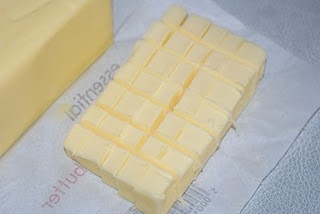
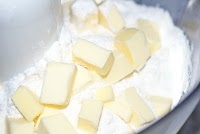
Dice the butter into small cubes, you need to be using it directly out of the fridge so that it is cold.
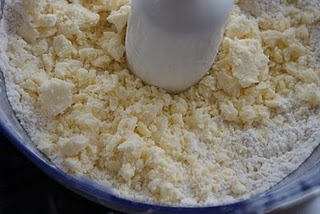
Add the butter to the food processor and blitz it for 30 seconds so that it resembles fine breadcrumbs.
Crumble in the cheese and give it a quick whizz to combine.
Now add in the egg yolk and another quick pulse.
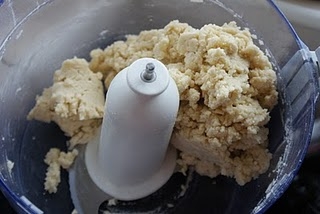
Then using the chute to add the water, add it a tablespoon at a time pausing after the fourth, usually I need to add another tablespoon but depending on your mixture you may need six in total. You will see that the pastry starts to come together and the sound that the food processor makes changes. (I am thinking I am a bit sad to know that!)
As soon as it comes together stop the food processor.
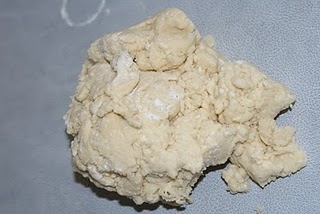
Tip out the pastry onto your work surface, press it together lightly, you don’t need to knead it together just press lightly.
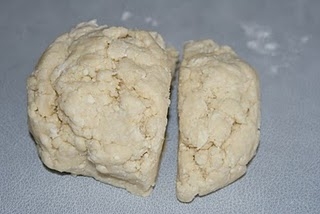
Cut it into two dividing it into 2/3rds and 1/3rd.
Wrap them in clingfilm and then chill them in the fridge for an hour.
Preheat the oven to 200c/180c Fan/ Gas Mark 6.
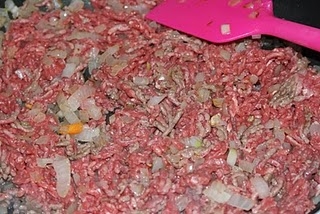
In the meantime we can get on with the filling. Fry the diced onion in a pan until nicely softened.
Add the minced beef and cook until browned.
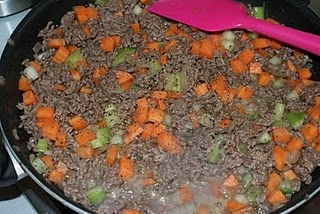
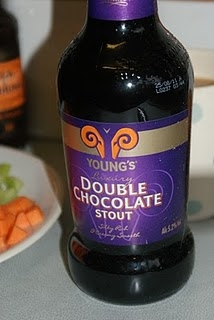
Once browned add the diced celery and carrot and stir to combine. Season with salt and pepper, add a splash of ale. I measured my ‘splash’ – it was about 100ml.
I am using a chocolate stout but any kind of real type ale will work.
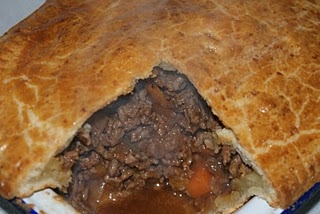
Add in the tomato puree and Worcestershire sauce. Give it a good stir to combine it all and then let it simmer for about 15 minutes. This will cook through the diced veg and also reduce the liquid.
If after this time it is still fairly liquid you can stir through a tablespoon of plain flour to help the juice thicken.
Filling is now complete so back to the pastry.
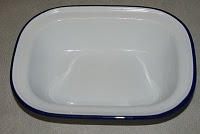
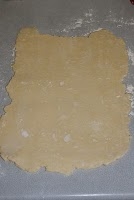
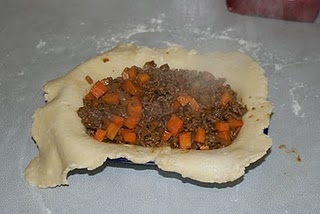
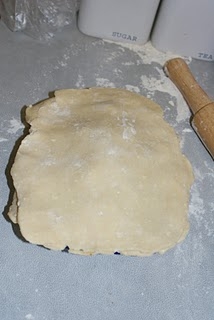
Take the pastry from the fridge and on a lightly floured surface roll out the larger piece of pastry to fit your pie dish. I like a deep pie and use an enamel pie dish (Lakeland to the rescue again – seriously I should have shares in that shop!) measuring 25 x 15cm.
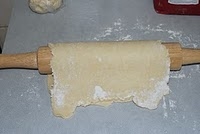
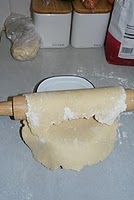
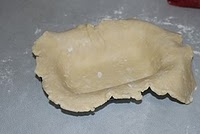
A nifty trick is to flip the pastry over your rolling pin and then place it over the dish. Press it gently into the tin allowing the excess to hang over the edges.
Fill the pie with your filling.
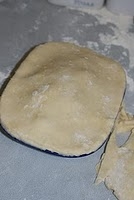
Roll out the remaining 1/3rd of pastry, slightly wet the edge of the pie pastry and place this piece on the top of your pie. Use your fingers to gently press the edges together.
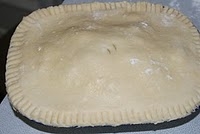
Using a sharp knife trim off the excess pastry. To crimp the edge of the pie press down with the back of a fork.
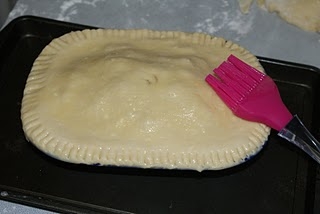
Brush the top of the pie with egg wash
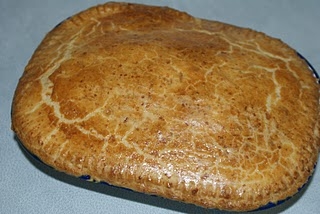
and then bake in the oven for 25 minutes until golden brown and delicious!
Minced Beef and Onion Pie with Cheesy Crust

Ruth Clemens, Baker Extraordinaire
Finalist on BBC2 The Great British Bake Off
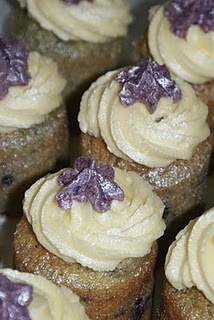
Mint Ginger and Blackberry Miniature Cakes
September 27th, 2010
Here are the miniature cakes that I made for The Great British Bake Off Final – despite Mary not liking them I do and I’m sure you will too!
Ingredients:Cakes200g butter200g caster sugar4 eggs 200g self raising flour20g fresh mint30g fresh root ginger150g fresh blackberries
Buttercream125g softened butter250g sifted icing sugar1tbsp milk1tsp vanilla extract50g blackberries
This recipe will make you 12 buns if you make them in the large style paper cases and if you use the individual cake pans like I did it will make 8.
Preheat the oven to 180c/160c Fan/ Gas Mark 4.
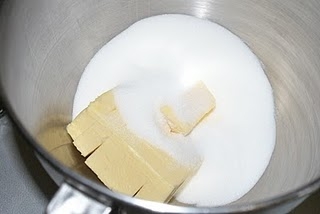
Cream together the butter and sugar using an electric mixer. As always a wooden spoon will work just as well but you will need a good bit of elbow grease!
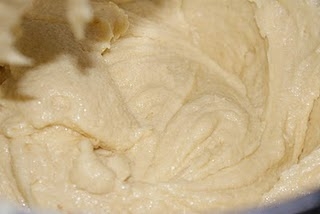
Once the butter and sugar are nicely creamed add in the eggs and the flour a little at a time and mix to a lovely cake mixture.
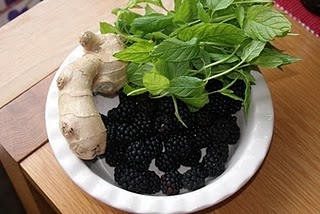
Time to prepare the maverick ingredients!
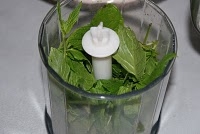
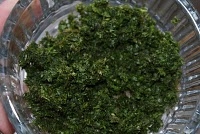
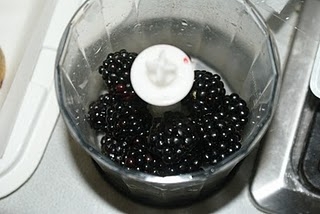
The mint needs to be washed and any manky leaves removed. You will need to chop this finely or to blitz it up in a little chopper attachment like the one I have for my stick blender.
I use the stalks as well as the leaves as long as they are young and tender, if the stalks are woody you will need more leaves. To ensure that it is all blitzed up nice and finely you have to keep poking the mixture down or shake it about well. Please make sure your fingers are well away from any blades! Set this to one side and on to the ginger root.
You will need about a 2” piece of ginger root but I find the best thing to do is cut off a chunk and weigh it. I weigh an amount a couple of grams more than the recipe calls for and then peel it.
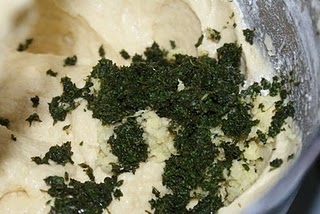
Grate the ginger and add it to the cake mixture with the finely chopped mint.
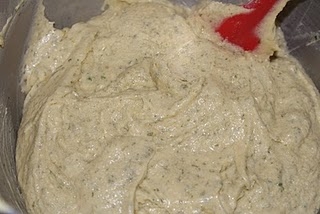
Mix gently so that it is evenly combined.
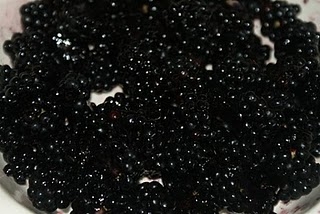
Now prepare the blackberries, as they come in all shapes and sizes you will need to decide what to do with them. If they are small in size you won’t need to do anything to them but for the really big ones I like to chop them in half.
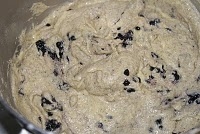
Add these to the cake mixture but don’t use the electric mixer at this stage it will just pulverise the lovely blackberries to nothing! Fold them in gently with a spatula or spoon.
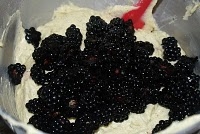
The mixture looks a little bit curdly at this stage – this is due to the acidity of the blackberries but don’t worry it will turn out just fine!
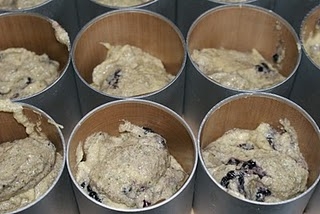
Add the cake mixture to the miniature cake pans or your muffin cases and fill till 2/3rds full.
The miniature cake pans do seem expensive to buy, but if you’re serious about caking they are a brilliant investment. I buy a lot of my caking equipment from a fabulous shop online called Blue Ribbons Sugarcraft Centre, they are very helpful and send orders out very quickly too. You can find the Silverwood Miniature Cake Pans here – Blue Ribbons – Miniature Cake Pans
(I should just add a quick note here to say I am not sponsored by them, the recommendation purely comes from me to you, I have also never actually been inside the shop but find them the absolute best place to order online from.)
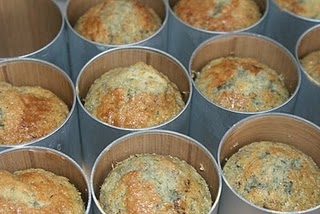
Bake time depends on the size of your cakes, muffin paper cases will take approx 18 minutes, the larger individual moulds take approx 26-30 minutes. Keep your eye on them, when they are done they will be golden brown on top and when inserted into the cake a skewer will come out clean (bar any blackberry juice you’ve hit on the way in!)
Allow to cool in the tin for five minutes before transferring to a cooling rack to cool completely.
When cooled it’s time for the buttercream topping.
Using an electric mixer combine 125g softened butter, 250g icing sugar, one tablespoon of milk and 1 tsp vanilla extract. Beat until lovely and smooth. Remove 1/3rd of the buttercream into a small bowl and set to one side.
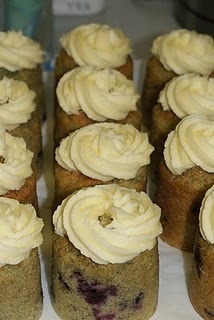
Add the vanilla buttercream to a piping bag filled with a star shaped nozzle – you can see my perfect piping tutorial here – How to pipe beautiful buttercream swirls
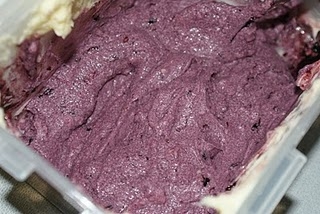
With the 1/3rd of buttercream we’re going to turn it into a blackberry buttercream. Take 50g blackberries and mash into a puree or blitz in the little blender.
Add this to the buttercream you set aside and mix well.
Add this to another piping bag with a star nozzle – you’re now ready to decorate (I love this bit!)
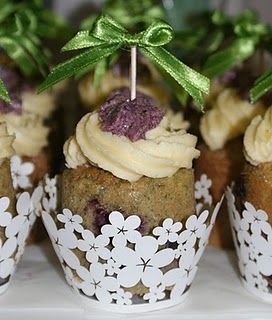
Pipe one swirl of vanilla buttercream on top of the cakes
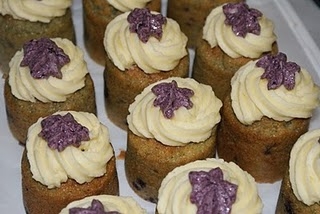
Top with a quick dot of blackberry buttercream – beautiful! If you don’t want to pipe on the buttercream or don’t have the equipment for it you can just spread on a layer with a small palette knife.
In the programme I then sprayed the little cakes with PME Edible Pearl Lustre Spray for a bit of shimmer and sparkle – who doesn’t love a bit of girly pizzazz on their cakes?
The Lustre spray can be bought in many cake decorating shops, hobby craft and also here from Blue Ribbons
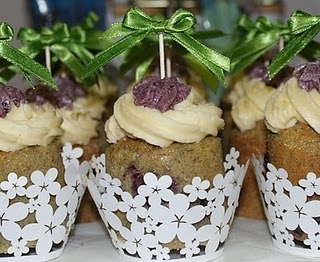
Last few steps now to exquisite miniature cakes – add in the bow toppers from this little tutorial – Ribbon Bow Cupcake Toppers – A How To, add them to cup cake wrappers and serve – delicious!
I bought the cupcake wrappers in Hobbycraft but I can’t find a link to them in their shop – these are the ones I used but any cupcake wrappers you like will fit the bill. The Blossom ones pictured can be bought here
Mint Ginger and Blackberry Cakes

Ruth Clemens, Baker Extraordinaire
Finalist on BBC2 The Great British Bake Off
Ribbon Bow Cupcake Toppers – A How To…
September 27th, 2010Thought I would just do a quick post on how to make your own lovely cupcake toppers. I used these little bows on sticks for my miniature cakes in The Great British Bake Off.
I’ve always been a crafty kind of person, taught to me by my lovely Mum! (Some of you may know her from UKScrappers?) When I was younger she taught me how to tie bows with a single length of ribbon, and it’s like riding a bike – you never forget how!
You can buy ready made off the shelf cupcake toppers in all sorts of themes but I often saw them and thought how easy it could be to make your own. In the past I have printed off footballs onto pieces of card and attached them to cocktail sticks for my boys – the list of ideas is endless – just use your imagination to come up with something that fits your theme!
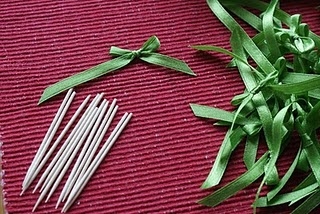
For the ribbon bow toppers you will need cocktail sticks, ribbon and glue.
For the bows, I tied little green ones in ribbon to match the cakes.
Cut one sharp point off the cocktail sticks with scissors – careful the little pieces will fly all over!
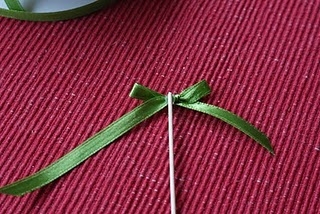
Use a hot glue gun to attach the bows to the sticks – it dries very quickly but UHU or the like will work if you have more patience than me!
Attach a ribbon bow to each side of the stick so that they are double facing. Remove any straggly bits of glue, trim off the tails of the bows neatly and then place on the top of your cupcakes for a really glamorous cupcake!
 Ruth Clemens, Baker Extraordinaire
Finalist on BBC2 The Great British Bake Off
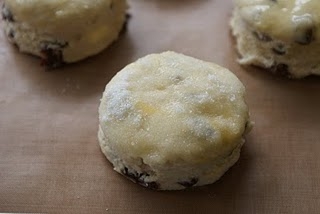
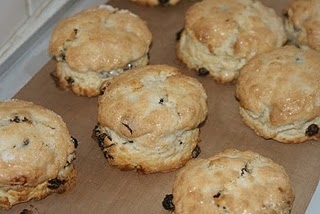
Sugar Crusted Fruit Scones
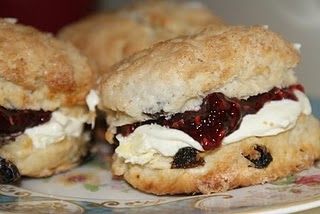
September 23rd, 2010So many of you have requested my recipes from The Great British Bake Off – so here’s the first – Sugar Crusted Fruit Scones, more recipes to follow but you’ll have to be patient! xx
Ingredients:
225g self raising flour
Pinch of salt
50g butter
25g caster sugar
120ml milk
75g sultanas
1 egg for eggwash
Caster sugar for sugar crust
Clotted cream and raspberry jam to serve
Preheat the oven to 220c/200c Fan/425F/Gas Mark 7.
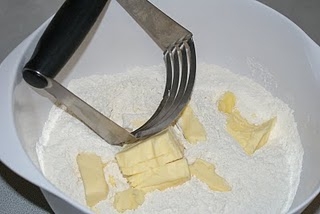
Place the flour and salt in a large bowl. Cube the butter and work into the flour using a pastry blender or your fingertips until the mixture resembles fine breadcrumbs.
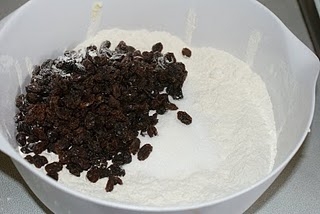
Add in the sugar and sultanas and mix well.
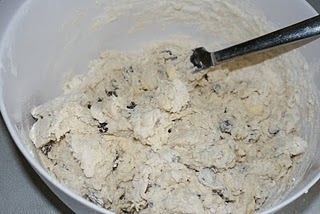
Make a well in the centre and add all of the milk. Mix together roughly to a dough using a table knife.
There are a couple of secrets to the perfect scone and the first is to not handle the mixture too much. Bringing the dough together with a knife will stop you manhandling it!
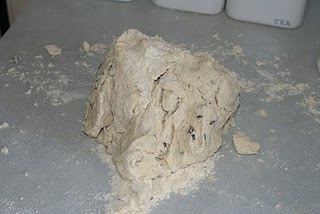
Tip out this rough dough onto your work surface and using your hands bring together lightly into a more consistent dough.
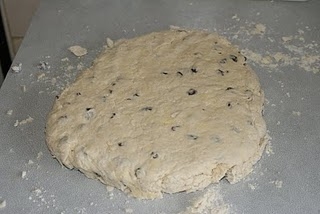
Instead of using a rolling pin and battering the life and lightness out of your dough pat it down into a rectangular shape about 1″ thick.
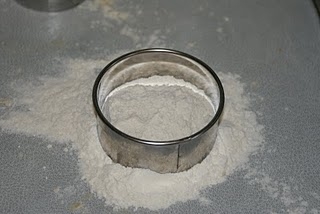
Make a small pile of flour on the worksurface by the side of your dough and put your cutter into it wriggling it about a bit. I use a 2″ plain cutter – I like my scones to be of a decent size – no piddling little measures here!
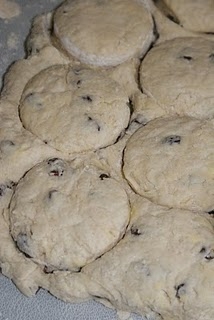
Cut out the scones using only a downward press – DO NOT TWIST THE CUTTER – did you get that? Twisting the cutter when forming the scones seals the sides together and they won’t rise. Flour the cutter between each on the little pile of flour as before.
Prepare a baking tray by greasing or use a non-stick liner.
Crack an egg into a shallow bowl and whisk to make the egg wash, add a splash of milk if desired.
Fill another shallow bowl with caster sugar.
Take each scone in turn and dip top down into the bowl of egg wash and then into the bowl of sugar coating the top of each. Place onto the baking tray spaced well apart.
Bake them in the oven for 12-14 minutes.
Remove from the oven and allow to cool on a wire rack.
In the oven the egg wash and sugar with have formed the most delicious sugar crust.
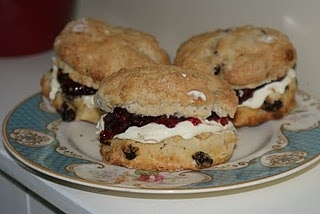
When cooled split and fill with lashings of clotted cream and raspberry jam. Best eaten the same day but you probably won’t have any trouble there!
Sugar Crusted Fruit Scones – My Way x
 Ruth Clemens, Baker Extraordinaire
Finalist on BBC2 The Great British Bake Off
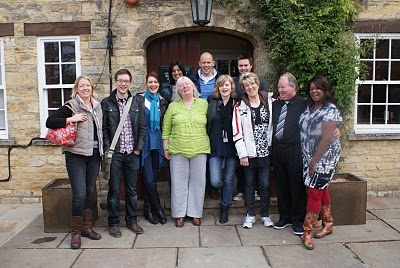
The Great British Bake Off and Me x
September 21st, 2010
To say it’s been an experience and a half would be an understatement – I have truly had the time of my life! I have had the opportunity to meet and work with nine very talented bakers from all over the country who I am proud to call my good friends and without whom I would never have survived the turmoils of filming. Working with Mel and Sue was hilariously wonderful and of course Mary Berry and Paul Hollywood were fabulous characters to get to know.
The programme has given me an unbelievable confidence boost and a belief in myself that I think was probably missing before. I have learnt I am transformed into a different person when I bake, the hobby I dearly love is something I am good at even though I never really knew it. It has made me brave enough to set up The Pink Whisk and to share a piece of me with all you lovely lot!

I have had my share of disasters, criticisms and plenty of tears (mine) along the way, it’s really not as plain sailing as it appears. At times I was completely ground down by exhaustion and baking failures but somehow I managed to regroup and go again and I have been so glad I did. The support from my friends and family throughout the bake off was the key to this and I couldn’t have done it without them. I have made some of the best friends in the other contestants that you can’t even begin to imagine. They are the loveliest people you could ever wish to meet.
Along the way I have taken criticism for appearing arrogant, something to prove and having a ‘chip on my shoulder’. It hurts, but yes I have something to prove, to myself – not to anyone else. If you try hard at something it will pay the dividends. I am confident and able when I bake, because it’s my ‘thing’. I spent a long time searching for that.
I have learnt that I can’t do things well first time around (I’m sure my Mum used to tell me that – but did I listen?) I’m a practise practise practise kind of girl! Also I’m the living proof that if you put your mind to it you can do anything in the world you choose. Never in a million years did I think I would get through the auditions let alone come second. Every step of the way I kept waiting for someone to say ‘sorry Ruth we’ve made a mistake, you can’t bake, what are you doing here?’ I’m pleased to say it didn’t happen and I am so absolutely thrilled to finish a nationwide competition second!

Thank you all for your messages, comments and support throughout the series, it’s meant the world to me and has been great reassurance that most of you out there do actually ‘get’ me!
So, to the winner – Edd. He is a truly fabulous baker, his technical knowledge is second to none and his passion for baking comes through in everything he does but so much more than that – he is a genuine, warm caring lovely lovely guy. He will be an unbelievable success and will take the baking world by storm, it has been such a privilege to be there with him for the start of his journey – please raise your glasses with me in a toast – Congratulations to Edd, Britain’s Greatest Amateur Baker!
Okay, enough already with my emotional ramblings, you’ve put up with more than your fair share!
Off to write up the Mint Ginger and Blackberry cake post to share with you shortly.
Lots of Love Ruth xx
 Ruth Clemens, Baker Extraordinaire
Finalist on BBC2 The Great British Bake Off
Boozy Christmas Fruit
September 17th, 2010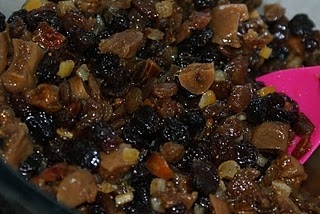
Well I’m sure you all know that the key to a super duper Christmas cake is to make it early and feed it with brandy or the like every week until Christmas but I came across the idea of starting this extra early and soaking the fruit for the cake in advance – for six weeks in fact. The principle comes from the Bourke Street Bakery which is a book I truly love and was convinced to buy by the bake off gang, it’s been adapted to suit my favourite Christmas cake mix. This quantity will ultimately make an 8″ Christmas Cake.
Ingredients:
55g caster sugar
55ml water
170ml brandy
175g dried figs
200g raisins
200g sultanas
100g dates
55g mixed peel
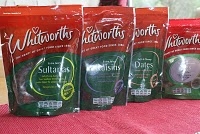
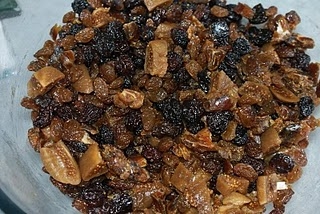
Start by chopping the dried figs and dates into chunks.Place all the dried fruit in a large bowl and mix.
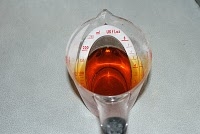
In a pan, heat the water and caster sugar stirring to dissolve the sugar to create a sugar syrup. Set to one side and allow to cool slightly.
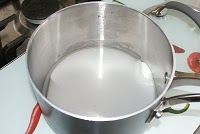
When cooled pour in the brandy.
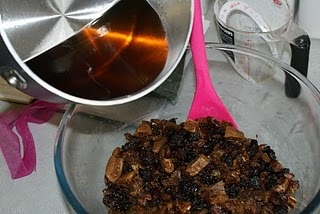
Pour the liquid all over the dried fruit.
Place the whole lot in an airtight container.
For one week you will need to stir this daily, think of it as a little pet. No don’t, it’s not half as naughty as my cats.
Find a place for it to live in and after the first week you will only need to stir it once a week. At the end of six weeks I’ll be back singing the joys of Christmas with a recipe to turn your syrupy boozy fruit mixture into the most fabulous Christmas cake.
Now no more bah humbug, add the fruits to your shopping list now.
 Ruth Clemens, Baker Extraordinaire
Finalist BBC2’s The Great British Bake Off
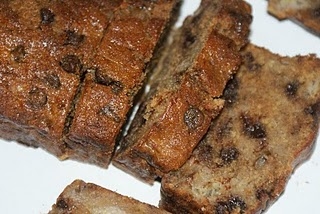
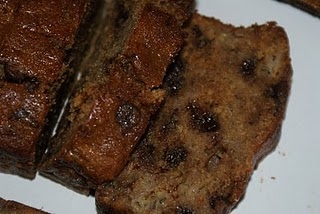
Chocolate & Banana Loaf Cake
September 14th, 2010
Another of my really simple cakes – it’s definitely a firm favourite in our house and uses up the bananas I bought because the children begged for them and they’ve gone brown in the fruit bowl because no-one’s eaten them.
Ingredients:
250g plain flour
2tsp baking powder
125g butter
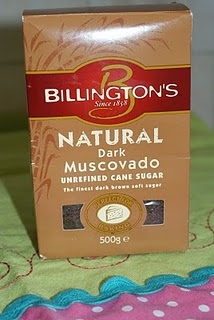
225g dark muscovado sugar
5 bananas – super ripe
1tsp vanilla extract
2 large eggs
200g dark chocolate chips
Preheat the oven to 180c/160c Fan/Gas Mark 4.
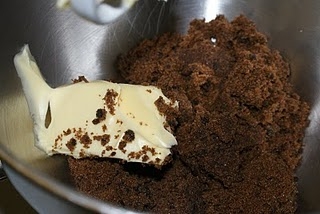
Cream together the butter and sugar.
You need to use really dark muscovado sugar for the best taste.
Beat in the two large eggs followed by the flour and baking powder.
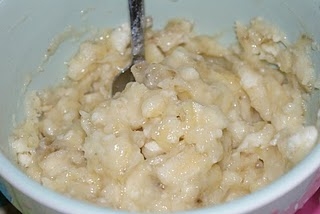
Place the bananas in a bowl and break them down with a fork. You don’t want mushy puree here just mash until still slighty chunky.
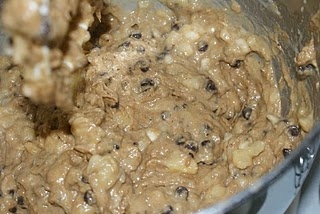
Add the banana to the mixture followed by the chocolate chips.
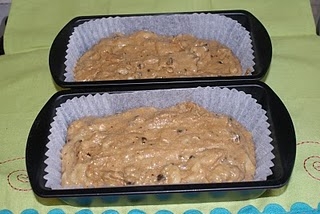
Grease and line two 2lb loaf tins and divide the mixture between the two.
Bake in the oven for 35 minutes. After this time cover them with foil to stop the tops from browning too much and return to the oven for a further 20 minutes.
Remove from the oven and allow to cool before serving.

Ruth Clemens, Baker Extraordinaire
Finalist BBC2’s The Great British Bake Off
 " width="477" height="261" border="0">
.JPG)
