Posts by The Pink Whisk:
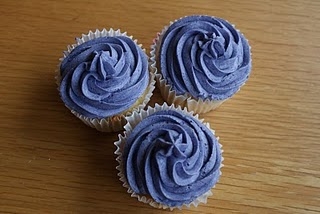
How to pipe swirls on cupcakes…my guest post
September 14th, 2010I’ve done a guest post for the lovely Thrifty Mrs over on her blog A Thrifty Mrs – so if you want a tutorial on piping beautiful buttercream swirls on cupcakes head over to her fabulous blog here AThrifty Mrs
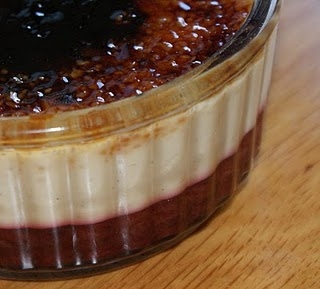
Jammy Damson Brulee
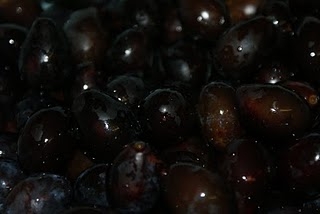
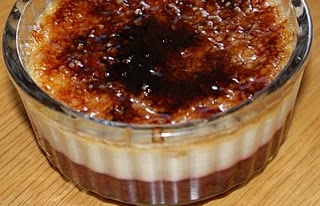
September 11th, 2010At this time of year you just can’t beat nature and all the lovely fruit it gives us for free! I’ve been lucky enough to get my hands on a huge amount of Damsons. After our jam stocks have surged enough see us through the next five years I thought I’d better find something else to use them for. Inspired by a lovely lady Catherine @ShrpshirePrune on twitter we have Jammy Damson Brulee. This recipe is easy but does span over a couple of days, if you plan ahead it’s definitely worth your while.
PS. If you don’t have damsons you can replace this with any kind of fruit compote, you can even buy it in jars!
Ingredients:
1kg damsons
1kg sugar
Brulee
5 medium egg yolks
25g sugar
1tbsp vanilla bean paste
400ml double cream
200ml single cream
50g demerara sugar
So time to prepare the damsons. If you’re using another fruit compote skip straight to the brulee bit!
Wash the damsons well discarding any bruised ones and remove all stalks.
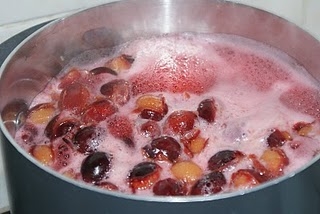
Put them into a large pan and add enough water to just cover.
Over a medium heat simmer for 10 minutes.
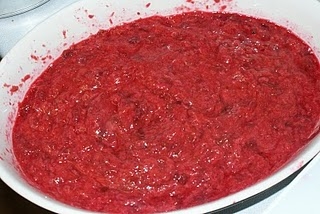
Remove the fruits with a slotted spoon and transfer to a shallow dish. Now comes the boring bit, scoot through the mixture with a spoon removing all the stones, you’ll be there a while.
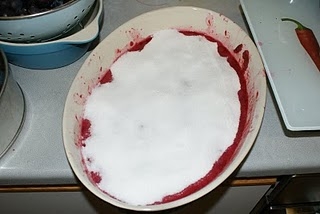
When all the stones have been removed pour over 500g of the sugar. Cover with clingfilm and leave overnight.
(Yes, it looks like its about to take a dive off the worktop I know but my kitchen is so tidgy tiny it belongs in a dolls house and it’s just how I work!)
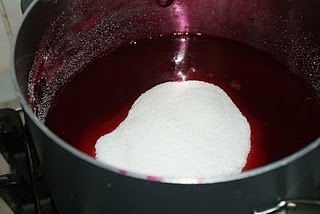
Add the remaining 500g sugar to the juice in the pan and heat whilst stirring to dissolve the sugar. Boil for 10 minutes. Cover and leave overnight.
The next day, add the fruit back to the pan of juice, heat and simmer for 30 minutes.
Again with a slotted spoon remove the fruity pulp and set to one side for use in the brulees.
If you bring the juice back to the boil again and boil rapidly for 15 minutes it will turn into a lovely Damson jelly which you can jar for use on your toast!
Back to the brulee – you can do these in small ramekins or in one large dish. Small ramekins it should make 6 or as one large you will need a 1.5ltr dish.
Preheat the oven to 160c/140c Fan/325F/Gas Mark 3.
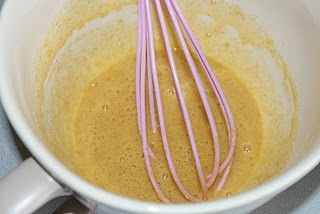
In an bowl place your egg yolks, caster sugar and vanilla bean paste. Whisk till lovely and mixed.
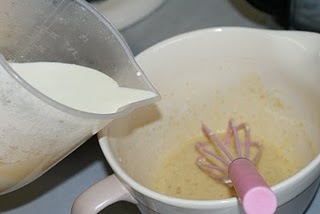
In a pan put both the double and single cream and heat until nearly boiling. Remove from the heat and whilst whisking the egg yolks pour in the cream in a steady stream until fully combined.
Spoon a layer of jammy damsons into the base of each ramekin, about 1/2″ deep.
(Okay, I forgot to take pictures for a little bit here so you’ll have to use your imagination – what did I think I was a baker? Actually if we could just take a moment here to think about my poor poor camera who at one time was in lovely pristine condition – then I became a blogger and it’s covered in all sorts!)
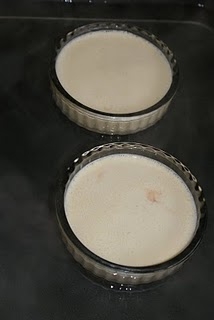
Pour the custard mix onto the jammy damsons, gently so as not to disturb your jammy layer. Fill each ramekin just below the top.
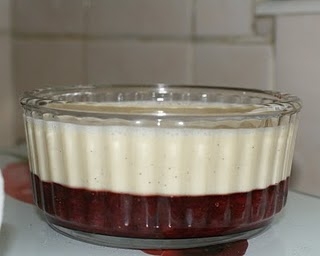
Fill a roasting tray half full of hot water. Add the ramekins carefully to the roasting tray.
Carefully (are you getting this – I’ve said carefully twice now, I don’t want you getting burnt x) put the roasting tray into the oven. Bake for 25 minutes until just the custard is just setting. If you’re making one large jammy damson brulee it will need to bake for 45 minutes.
Remove from the oven and set aside to cool.
When cool cover with clingfilm and place in the fridge overnight. Now you have to be patient to make the best brulee!
The following day remove from the fridge and top each with a layer of demerara sugar.
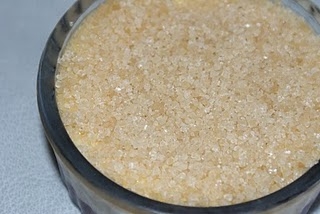
Any kind will do but I do like to use Amber Sugar as it’s taste is fab for brulee (you can get it in Waitrose).
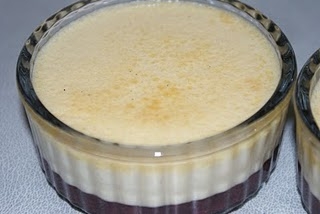
Now if you’re a kitchen gadget freak like me you can use your cooks blow torch to heat the sugar on the top to caramelise it. If not preheat your grill to high and place them under it for 5 minutes to caramelise. If using the grill you will need to keep your eye on it as it can burn quite easily.
Now a Mary Berry tip is to put the brulees back into the fridge for a couple of hours just to slightly soften the top which makes for easier eating! No longer than a couple of hours though as it will turn to sludgy mush – yuck!

Ruth Clemens, Baker Extraordinaire
Contestant on BBC2’s The Great British Bake Off
Maple & Pecan Bread for National Breakfast Week (and a great giveaway!)
September 6th, 2010 Did you know it’s National Breakfast Week? Kellogg’s are running a campaign to get the country eating breakfast – not necessarily cereal – just making sure you eat something to start your day. Breakfast is heralded as the most important meal of the day but amzingly one in five grownups and one is six children don’t bother.
I have to tell you now I’m the one in five, I’m not a breakfast fan and gave up eating breakfast years ago. Yes, I’m a naughty girl, but you knew that anyway and I do insist the children have breakfast – a case of do as I say, not as I do.
Watch the Make Time for Breakfast ad here – it’s actually quite funny!!
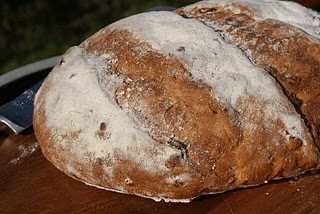
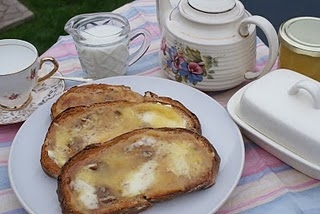
If I had to choose I would eat Maple and Pecan Bread toasted with Lemon Curd? Do you fancy some? Here’s the recipe….ooh and make sure you read to the end…you could win this!
 Oh and yes I know it’s not really baking but it’s a fabulous hamper packed with cereals, a teapot and teacups too (my other fetish)!
Ingredients:
290ml milk
225g strong plain flour
225g Doves Farm Malthouse Bread Flour
1tsp salt
15g fresh yeast
2 tbsp maple syrup
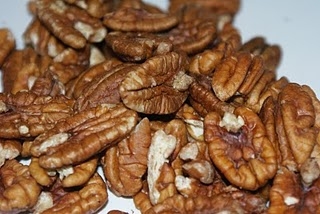
80g pecan nuts, chopped
As always, this Mixer Mummy is going to make it in the electric mixer, but you can do it by hand too – you just need big muscles!
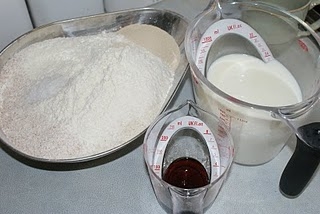
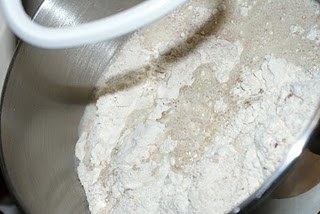
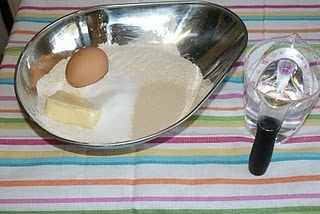
Add all ingredients to the bowl of your mixer with the exception of the pecans which you need to leave to one side for now.
If you’re using an electric mixer use the dough hook attachment, mix the dough together well. Let the machine knead it for you for a full five minutes.
If you want to do it by hand put all the dry ingredients in a large bowl, make a well in the centre and pour in the liquid. Combine to a dough and then knead for a full 10 minutes.
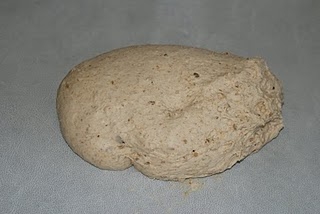
Tip it out onto the worktop
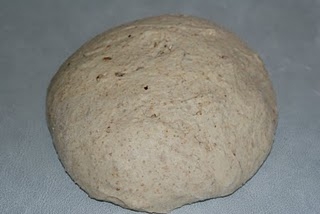
Knead by hand for a further 2-3 minutes (my weakling arms can manage this). You are aiming for a soft but not sticky dough that springs back when you poke it. If your dough is very sticky then you can flour the worktop but if it isn’t then stay well away from the bag of flour. Incorporating more flour at this stage can toughen the bread and you don’t want that.
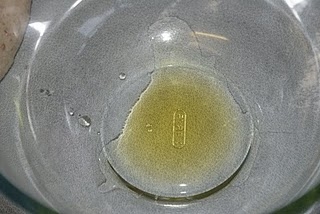
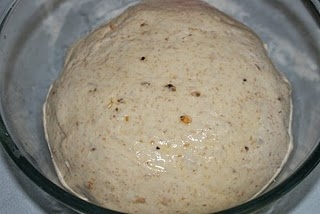
When you are happy that the dough is springy pop a small amount of oil into a large bowl.
Drop in the ball of dough and turn to coat it in the oil.
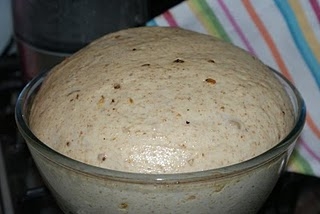
I don’t like to cover savoury bread while its rising, I like the ‘crust’ that forms on the top of the dough and it adds flavour when it is reworked into the dough when you knock it back, but this is an entirely personal choice if you prefer it covered use a clean teatowel or clingfilm and then set aside the bowl in a warm draught free spot to rise for 1 hour or until doubled in size.
Chop the pecans into nice chunky pieces.
Turn out the dough onto your worksurface, again you shouldn’t need to use flour.
Knock back the dough by poking it down with your fingers and fists.
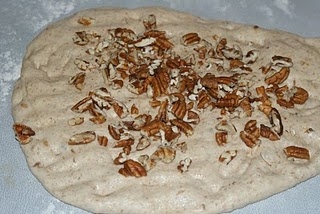
Sprinkle on the chopped pecans and roll up the dough roughly.
Knead for a couple of minutes to disperse the pecans thoroughly.
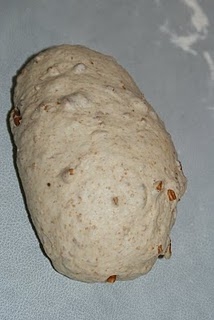
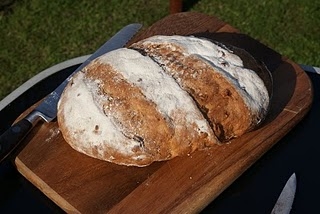
Shape the dough into a rough loaf shape. I like to form by hand and use a tray but you can use a tin.
If free-forming its really important to give the dough a ‘spine’ otherwise it will spread out rather than rise upwards.
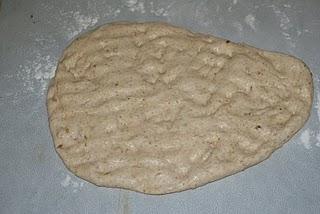
To do this I flatten out the dough into a large flat rectangle using my hands. As if wrapping a parcel fold two opposite sides into the middle. Then fold in the other two edges to the middle, repeat until you can’t fold in any more.
Imagine lots of dough edges meeting in the middle of the loaf. Flip the loaf over so it is right side up. Tighten up the loaf by ‘tucking in’ the dough underneath itself using your hands.
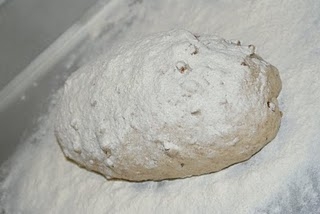
Place the loaf onto a well floured baking tray.
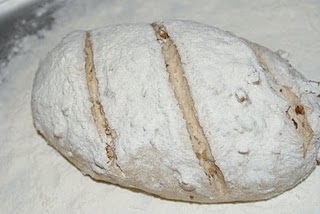
Flour the top well and then make three diagonal slits across the top.
You will need an extremely sharp knife for this, I use a craft knife. You don’t want to drag your knife across the dough. If using a sharp kitchen knife draw the blade across the top in a slashing motion, don’t dig in the tip of the knife.
Cover the loaf with a tea towel and leave to rise for 45-minutes to 1 hour until doubled in size. Preheat the oven to 200c/375F/Gas Mark 5.
Once lovely and risen put it straight into the hot oven for 25 minutes.
Remove from the oven and cool on a wire rack.
When completely cooled slice yourself a great big chunk, toast and serve with Lemon Curd (of course my lemon curd recipe is here).
And now for the Grrrrrreat Giveaway (that was supposed to be Tony the Tiger could you tell?) How about this…
To win this fabulous Kellogg’s breakfast hamper complete with cereals, bowls, teapot and teacups all you have to do is tell me – what’s your favourite breakfast?
Add your comment below and a winner will be chosen at random at 4pm on Friday 10th September.
Sorry only open to UK residents and if you have any trouble posting a comment email it to me instead!

Ruth Clemens, Baker Extraordinaire
Contestant on BBC2’s The Great British Bake Off
Tony the Tiger Fan
Chocolate Orange Panettone
September 4th, 2010
Panettone isn’t difficult to make but it does take a while – not actual work mind just a lot of waiting about! I find it’s best to do it at the weekend when you’ve nothing planned but pottering around the house.
I should add a little note here that I did these for The Great British Bake Off – I was nervous about doing them because my cousins other half is Italian and I didn’t want to let the side down – fortunately she was very proud of me – phew!
Ingredients:
Base Batter
20g fresh yeast/10g fast action dried yeast
115ml water
4tsp sugar
140g strong flour
30g butter
1 beaten egg
Fruit mixture
55g butter melted
55g caster sugar
1 egg
2 egg yolks
1 tsp vanilla essence
2tsp clear honey
Pinch salt
Zest of 1 orange
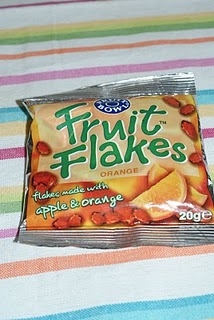
1 small packet of Orange Fruit Flakes
200g Bournville
115g strong flour
Take all the ingredients for the base batter and whack them in the mixer, mix with an electric hand mixer or beat the living daylights out of it with a wooden spoon.
It will make you a lovely thick batter. Set this to one side covered with a tea towel and leave to rise for 45minutes.
In the meantime you can mix up your fruit mixture.
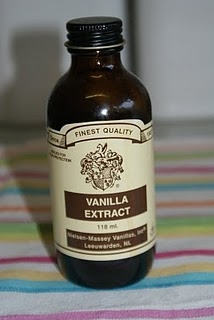
Secrets here are:- 1. A really good quality vanilla extract
2. My secret ingredient – Fruit flakes!
In developing this recipe I tried loads of different ways to get the orange flavour injection and then I came across these – (I must admit they were in my cupboard for the children’s lunch boxes) Somehow these little gems stay a little bit liquid when the panettone is baked – yum!
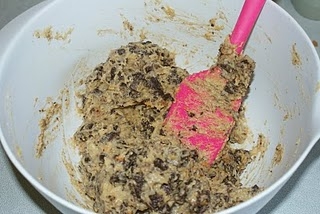
Place all the fruit mix ingredients into a large bowl and mix it all together by hand – the smell will be delicious! Leave this to one side.
See see! I have a new pink spatula!
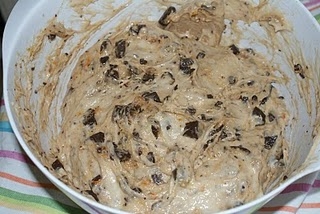
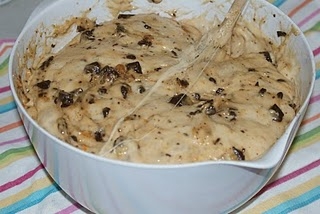
After the rising time is up on the batter incorporate the fruit mixture using a wooden spoon. Keep going this stage is a bit tough on the old arm muscles if you’re a weakling like me!
Once nice and thoroughly mixed cover it with the tea towel again, pop it somewhere draught free and leave it to rise again for another 45 minutes.
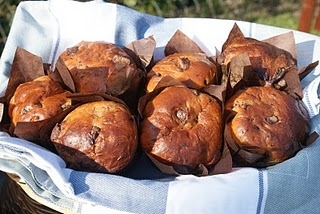
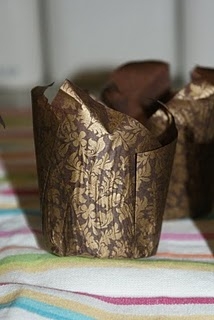
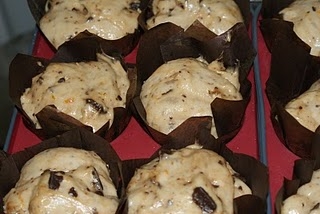
After the mixture has risen you need to put it into paper cases. Trying to track down real panettone cases at a reasonable price was nigh on impossible. You can use regular cupcake cases but I like to use these tulip cases.
You can get them online in loads of places including Funky Muffin here
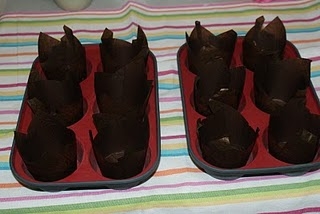
I put them in silicone muffin trays to make them stand up.
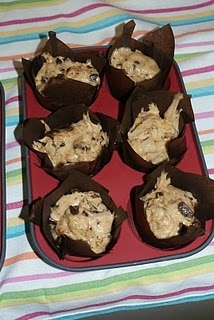
Now comes the tricky bit – getting the batter into the tulip cases – it’s a bit like wrestling ferrets. Fill the cases 2/3rd full, adding the batter a spoonful at a time.
Once you’ve got them all filled up set them aside to rise again – another 45mins. Turn the oven on now to preheat 190c/170c Fan/ 375F/Gas Mark 5.
When they have puffed up and the tops are much smoother they are ready for the oven.
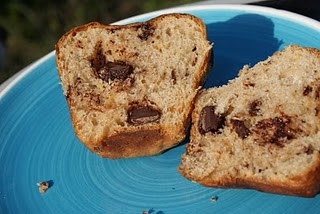
Bake in the oven for 18-25 minutes until golden brown on top and when inserted a skewer comes out clean (save for any melted choc).
Chocolate and Orange Panettone

Ruth Clemens, Baker Extraordinaire
Caramel Cake
August 29th, 2010Caramel Cake with Crushed Daim Bars
Ingredients:
Cake
300g butter
180g dark muscovado sugar
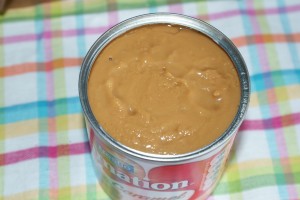
1/2 397g tin Carnation Caramel (Dulche de Leche)
6 eggs
320g self raising flour
Filling
125g butter
250g Icing Sugar
1 spoonful of Caramel (from the tin)
Icing
250g Icing Sugar
1 spoonful of Caramel (from the tin)
10ml water
2 Daim Bars
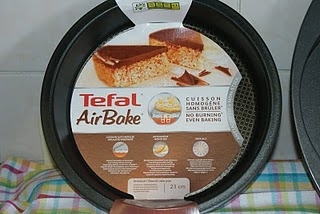
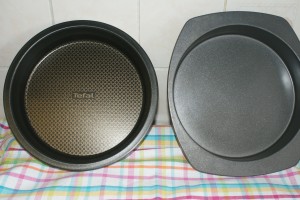
I thought I would use this cake to test out my new tin. A Tefal AirBake cake tin. We used some of the range on The Great British Bake Off and because I’m a swine for buying tins, in all shapes and sizes I wanted to put it to the test at home.
You will need two 8″ or 9″ tins. I am comparing the Tefal AirBake to a trusty tin I already have.
The AirBake range comes in all sorts of sizes and they do handy loaf tins, tart pans and baking sheets too. Their main selling point is that they ensure no burning and even baking….well lets see, back to the cake in hand.
Grease both the cake tins (I have to admit here to cheating with my old tin, I lined the base too knowing that I wouldn’t get the cake out of the tin whole if I didn’t! The Tefal wasn’t going to get the same failsafe treatment!
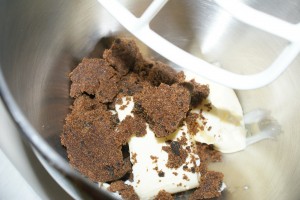
Cream together the butter and dark sugar.
When thoroughly creamed add in half the tin of caramel and mix again.
Beat the eggs together and mix slowly into the butter/sugar/caramel mix adding a spoonful of flour at any sign of curdling.
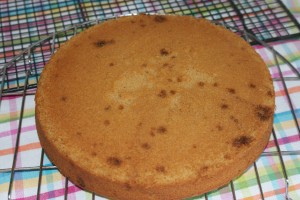
Add in the remaining flour and mix together. Split the cake mix between the two tins.
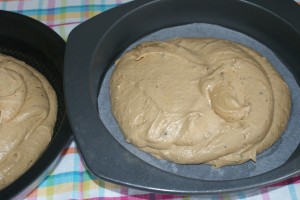
Level the top of the mixture and bake in the oven for 25-30 minutes at 160c Fan/180c/Gas Mark 4 until golden brown and cooked through.
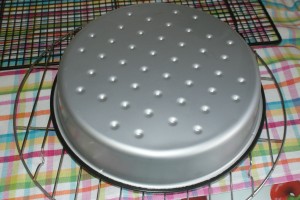
Remove from the oven and allow to cool for a couple of minutes. Now is the moment of truth – the AirBake cake has baked beautifully but will it release from the tin?
First signs are promising….
Ta Da! Straight out of the tin and only a tiny tiny bit came away with the tin. Okay then, I’m impressed!
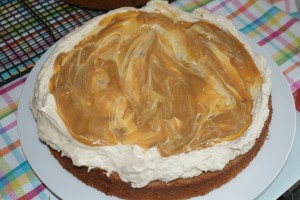
Allow both cakes to cool completely and then make the filling. Mix together the softened butter and icing sugar, when fully combined add in one spoonful of caramel from the remainder in the tin. Spread all over the top of one of the cakes. On top of the butter cream add another couple of spoonfuls of caramel and spread it out nicely.
Place the second cake on top and now mix up the icing – icing sugar, water and the remaining caramel in the tin.
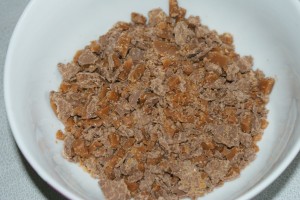
Place the two Daim bars in a sandwich bag and bash them up until they’re lots of little bits.
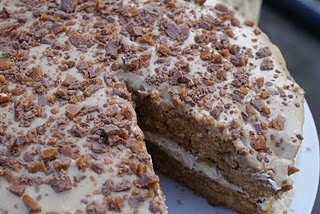
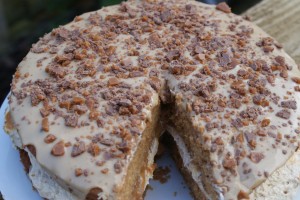
Pour the icing over the top of the cake and top with the crushed Daim pieces.
Caramel Cake with Crushed Daim Bars
I would thoroughly recommend the Tefal AirBake range – I am off to buy some more (shhhh! don’t tell my OH!).
You can buy the full range from the official Tefal shop Home and Cook
Marble Cake and a lesson in cake making!
August 27th, 2010
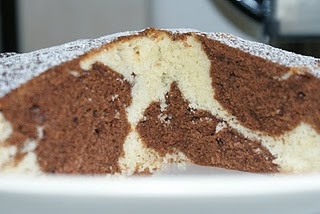
Sometimes you just can’t beat the old favourites – Marble Cake is exactly that, it’s not complicated or difficult just delicious!
Ingredients:
200g butter
200g caster sugar
150g self raising flour
50g plain flour
4 eggs
3 tbsp cocoa powder
Preheat the oven to 180c/160cFan/350F/Gas Mark 4
Grease and line an 8″ round cake tin.
Cream together the butter and sugar
I thought I’d use this post to give you the low down on fail safe cake making.
The idea of creaming the butter and sugar is to start off getting some light airy fairyness into your cake and forms the base of most sponge cakes. However it is not just a case of mixing the two together. They best implement for the job is an electric mixer, not only does it save your arms from aching it helps incorporate air very quickly.
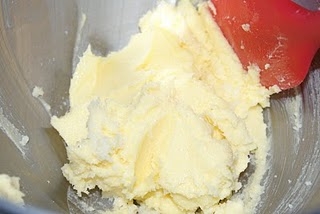
This is butter and sugar in a what you may think is creamed state
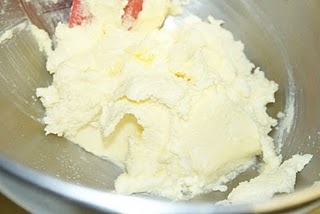
However, if you carry on mixing the butter and sugar will go very pale and fluffy like this…
This is exactly how you want it, plenty of air incorporated for super fluffy yummy sponge and much paler than before.
Okay so over with the lecture let’s carry on with the recipe.
Beat the eggs together well (another important step – Mrs Beeton says ‘one egg beaten well is worth two not beaten’ and she’s right – wizzle up those eggs well with a fork).
Next step is to add the eggs to the creamed butter and sugar but don’t add them all at once, little by little is how to play the game. When you have added about half the eggs add a spoonful of your flour. This will stop the mixture from curdling. Once a cake mix has curdled it is very difficult to pull it back, a good beat will sort out the texture but the mixture will not be very stable and can give varied results when you bake it.
Continue adding the egg little by little followed by a spoonful of flour.
Once all the eggs are combined with the butter add the remaining flour to the mixture and mix. Mix till combined but don’t beat it hell for leather or the cake will be tough and have a poor texture.
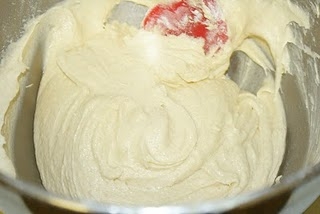
Okay dokey so now we have a lovely cake mixture. Separate your cake mix into two halves each in a bowl of their own.
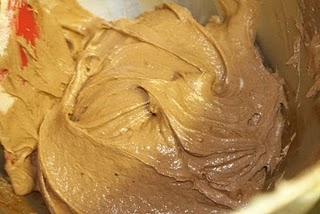
To one bowl add the cocoa powder and mix well.
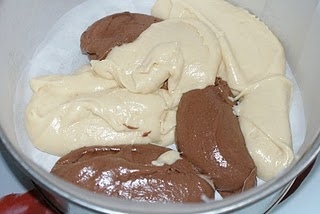
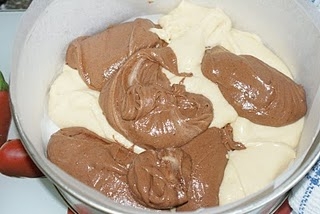
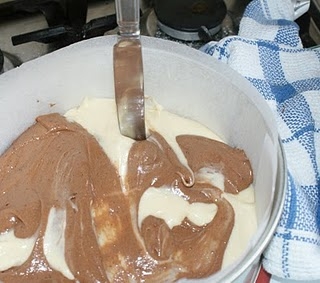
Now you have a chocolate cake mix and a plain cake mix. Spoon large dollops of each type of cake mix into the tin like so
Keep adding cake mix in large dollops randomly.
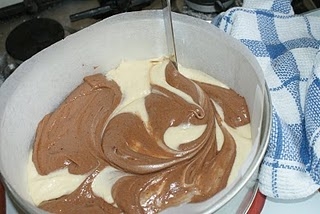
Once all the mix is in the tin smooth the surface with the back of a spoon.
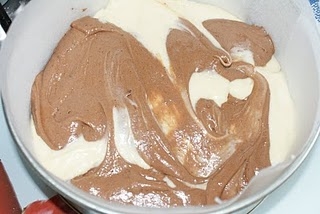
To create the marble swirl effect insert a table knife into the mixture in an upright fashion. Swirl it around the tin in a decreasing circular motion. You won’t need to go mad, just enough to create the swirly marbly effect.
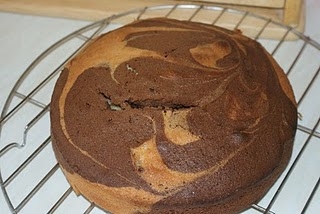
Now into the oven for 25-30 minutes until the cake it springy to the touch and comes away from the sides of the tin slightly.
Cool in the tin for 5 minutes before turning out onto a wire rack to cool completely.
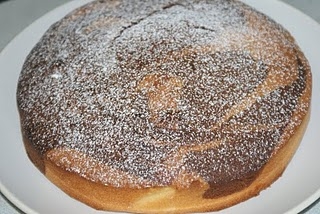
Dust with icing sugar and serve.
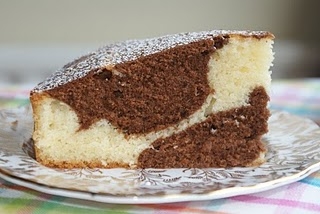
Marble Cake – a good old favourite

Ruth Clemens, Baker Extraordinaire
Contestant on BBC2’s The Great British Bake Off
Toffee Pecan Ring – August Bake It! Club
August 25th, 2010This recipe comes from Amy Lane’s August Bake It! Club. Since filming for The Great British Bake Off finished I have really missed baking with a whole bunch of great people. This is the next best thing – Amy Lane’s Bake It! Club – you can check out her fab blog Cooking, Cakes & Children here and join the Bake It! Club gang.
Ingredients:
For the dough
75g butter diced
450g self raising flour
50g caster sugar
2 eggs
150ml milk
For the filling
25g butter, melted
75g pecans, chopped
2tbsp brown sugar
50g dark chocolate chips
1 packet of Rolos
1tbsp milk to glaze
Additional 20g dark chocolate melted to drizzle
Preheat the oven to 180c/160c Fan/350F/Gas Mark 5.
Prepare a 10″ round baking tin by greasing well.
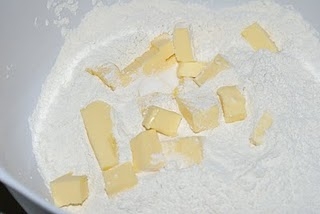
Put the self raising flour into a bowl and add the diced butter. Rub the butter into the flour until the mix resembles fine breadcrumbs either with your fingertips or a pastry blender.
Stir through the sugar.
Beat the two eggs well and combine with the milk.
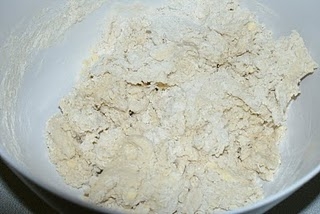
Make a well in the centre of the flour mixture and pour in the eggs/milk cautiously mix to a dough – you make not need all the liquid.
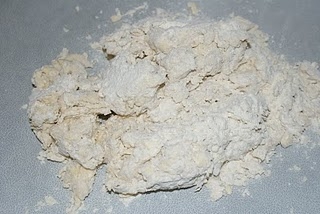
Mix well to form a soft but not too sticky dough. It is best to mix it with a knife until it just comes together.
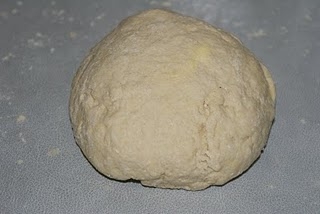
Tip it out onto your work surface and knead lightly until it comes together into a soft but not sticky dough.
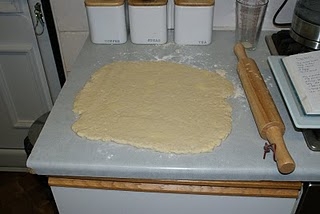
Lightly flour your work surface and roll out into a large rectangle approx 40cm x 30cm.
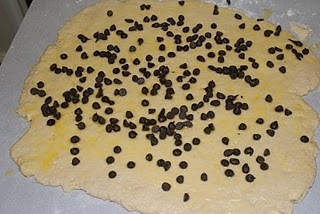
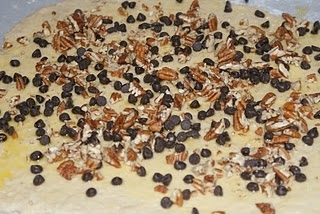
Brush the top of the dough with the melted butter and then scatter on the chocolate chips.
Followed by the chopped pecans
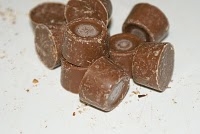
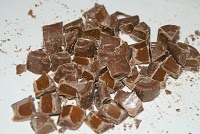
Cut all the Rolos into quarters, it helps if your Rolos are cold from the fridge.
Sprinkle on the Rolo quarters and brown sugar.
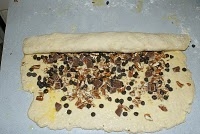
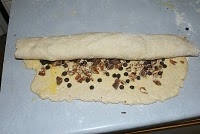
Now start to roll up the long edge of the dough, keep rolling until you have a big fat sausage of dough.
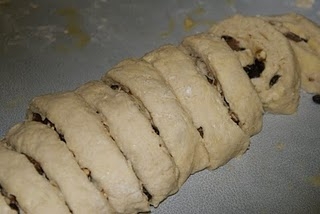
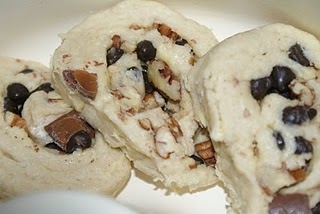
Chop the dough sausage into 12-14 slices about 2cm each thick.
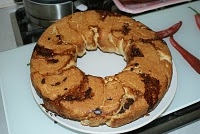
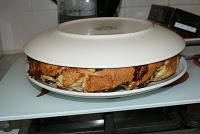
Lay the slices in a circle around the edge of the baking tin, overlapping them as you go. I am using my Monkey Bread pan (you can see the recipe for Monkey Bread here) but a round cake pan works just as well.
Brush the top with milk to glaze and bob it into the oven for 20 -25 minutes until lovely and golden.
When cooked remove from the oven and allow to cool for a couple of minutes. Invert onto a dinner plate and then flip it over again onto another plate and then allow to cool.
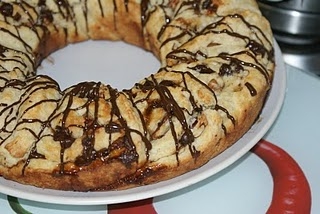
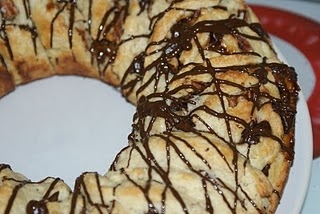
Melt the 20g of dark chocolate and then add to a piping bag or sandwich bag, snip a tiny piece off the corner and drizzle the melted chocolate all over the ring. Allow the chocolate to set and then serve.
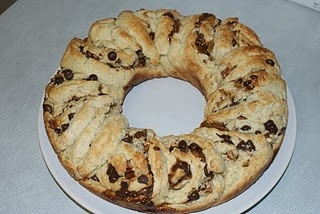
Toffee Pecan Ring – Amy Lane’s August Bake It! Club Ruth Clemens, Baker ExtraordinaireContestant on BBC2’s The Great British Bake Off
Super Zingy Lemon Cake – Fit for the Queen!
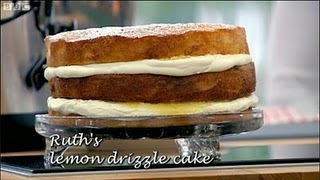
August 24th, 2010You may have seen the first episode of The Great British Bake Off where I managed to concoct a Super Zingy Lemon Cake – fit for the Queen.
I have had many requests for this recipe but haven’t managed to do a step by step for you but never fear the recipe is printed in the current issue of BBC Good Food Magazine and is also online on the BBC (how cool is that!)
You will need to make the Super Zingy Lemon Curd which can be found here on The Pink Whisk and then follow this link to the BBC, in the meantime I will get my finger out and make you one to follow step by step!
 Ruth Clemens, Baker ExtraordinaireContestant on BBC2’s The Great British Bake Off
Ruth’s Chocolate Truffles – as seen on The Great British Bake Off
August 21st, 2010
I love making truffles and love giving them to everyone too, they’re a great crowd pleaser and they disappear as fast as lightening!
After a lot of trial and error I think I can give you the lowdown on the easiest way to make truffles
Ingredients:
300g plain or milk chocolate
200ml double cream
2 tbsp liqueur
To decorate:
200g plain or milk chocolate
plus white chocolate for drizzling, edible glitter or edible stars (these are optional but give the truffles a bit of pizzazz!)
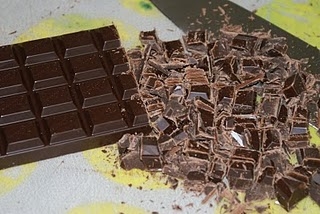
Start off by chopping up your 300g chocolate into small pieces. You can use any plain or milk chocolate you like but my advice is to avoid Green & Black’s 70% cocoa solids bars. I used these on The Great British Bake Off in episode one and no word of a lie I had to make the ganache for the truffles six times before I finally switched to Lindt. The G&B’s seized my ganache time after time. Equally I like using Sainsbury’s Basics chocolate, at around 25p a bar it’s a bargain.If I had to advise you on what to use I would say go for Bournville, at 49% cocoa solids it’s a good middle of the range chocolate to use.
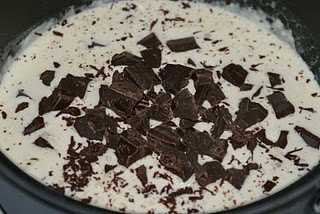
Okay so now you’ve chopped up all that lovely chocolate put the double cream into a pan and heat over a medium heat until the cream is just about to boil and bubbles appear at the edges of the cream. Turn off and remove from the heat.Tip in your chopped chocolate and allow the mixture to sit for a couple of minutes.
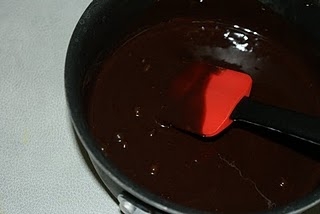
After the time is up stir the mixture, the chocolate will have already started to melt into the cream. Stir until you have a lovely glossy consistency. Add in 2 tbsps of your favourite liqueur and mix well. I like cherry brandy or Tia Maria, but the truffles do taste just as good without any.
You now need to pour the ganache into a bowl to cool. If you’re in a hurry and want to speed up setting time pour it into a large shallow tray. Cover the top of the ganache with clingfilm.When cool, move to the fridge to set. This will take a couple of hours.Prepare for the next step, you will need a sheet of greaseproof paper and a wire cooling rack. Cut the greaseproof paper slightly larger than the wire rack. Place the paper on your worksurface and the wire rack to one side for now.
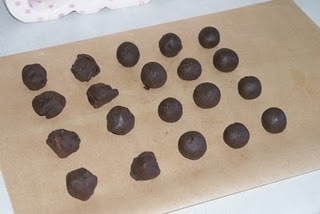
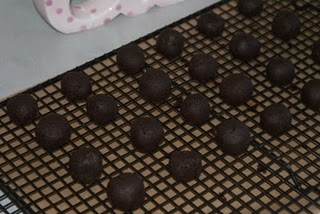
When your ganache is nicely set take it out of the fridge and scoop out blobs with a spoon. You need pieces about the size of a large marble. Shape very roughly as in the picture on the left and set onto the paper.
When you have scooped out all the ganache, go back to the first blob you made and roll it between your hands to make a neat ball as on the right of the picture.
Your hands will end up in a bit of a mess but just keep washing them inbetween rolling. Sometimes the ganache starts to get a bit warm and can be difficult to work with, a quick trip back in the fridge will sort it out. Similarly if your ganache balls are getting a bit melty pop them in the fridge in between stages. Transfer all the truffle balls onto the wire rack.
Sometimes I will pop the whole wire rack in the chest freezer just to firm them up for a couple of minutes if needs be.
Okay, so now you have all your ganache rolled into large marble size truffles sitting on the wire rack.
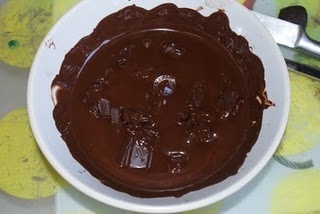
There should be visible lumps of unmelted chocolate in there, now stir off the heat until they all dissolve. This is a very ‘amateur’ way of tempering your chocolate without the need for thermometers and complicated instruction and should ensure nice glossy chocolate – it works well for me!
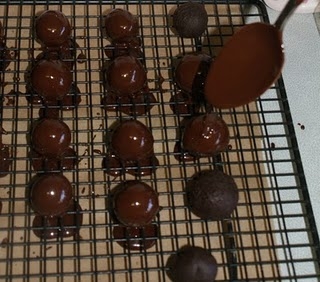
Take a spoonful of melted chocolate and pour it off the spoon onto the truffle moving the spoon in a circular motion to encourage the chocolate to completely cover the ganache truffle. Hold the spoon about 1” above the truffle you don’t want the spoon to touch the truffle ball. I find this is a much neater way of covering truffles than dipping them into the chocolate, plus your covering chocolate will stay pure chocolate right to the last bit!
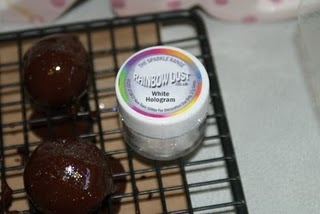
If you’re using edible glitter or stars sprinkle them on to the truffles before the chocolate sets.
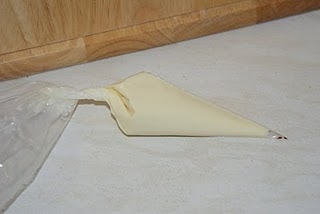
For white chocolate drizzly stripes melt 50g white chocolate and place it into a small piping bag or plastic sandwich bag. Snip off the end and drizzle over the truffles.
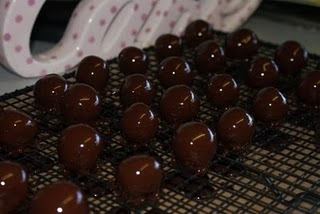
All that’s left to do is put them to one side to set, in the fridge will speed things along nicely.
Remove the wire rack from the top of the greaseproof paper.
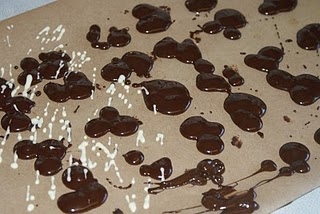
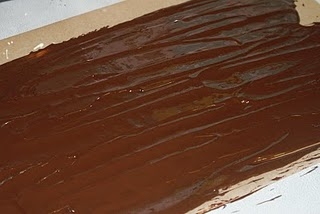
There will be chocolate on the greaseproof paper that has dripped through the rack. Spread it out into a sheet using a knife or spatula. Leave this to set. You can then break this sheet of chocolate up into pieces ready to melt down and use another day or have a go at making chocolate curls – you could even just eat it – waste not want not!
Ruth’s Chocolate Truffles – as seen on The Great British Bake Off Ruth Clemens, Baker ExtraordinaireContestant on BBC2’s The Great British Bake Off
Chocolate and Peanut Butter Bars
August 15th, 2010
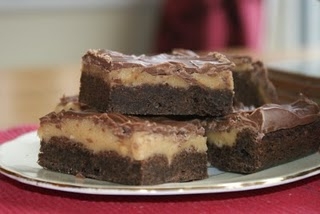
In my last post I promised you a treat and here it is, Chocolate Peanut Butter Bars – delicious straight from the fridge -I dare you to only eat one!
Ingredients:
Cookie Dough
180g dark brown sugar
125g butter
1 egg
200g plain flour
20g malted drink powder (Ovaltine)
50g cocoa powder
3/4tsp salt
2/4tsp bicarbonate of soda
Peanut Butter Filling
250g icing sugar
4 tbsp peanut butter (crunchy or smooth whichever you prefer)
25g butter
100g marshmallows
200g milk chocolate
Preheat the oven to 180c/160c Fan/350F/Gas Mark 4
Begin by making the cookie dough base. Its really easy…let’s see…
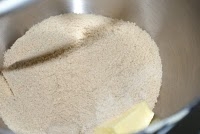
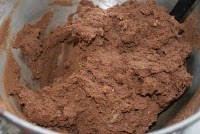
Chuck all your ingredients in a bowl and mix really well with an electric mixer.
Ta da lovely cookie dough mixture. If you feel like it you can give up at this point and just make cookies instead – shape them into small balls and place on a baking tray, pop them in a medium oven for about ten minutes.
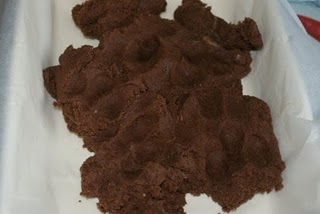
If you’ve not given in and are sticking with me find yourself a baking pan approx 20 x 30cm. Line it with greaseproof paper and tip the cookie mix in. (There’s a lot of chucking and tipping in this post – stick with it the kamakazee approach works!)
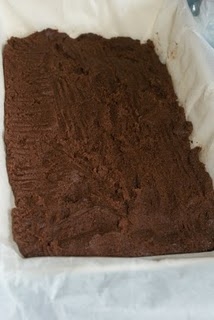
Spread it out evenly(ish) in the base of the pan using the back of a spoon.
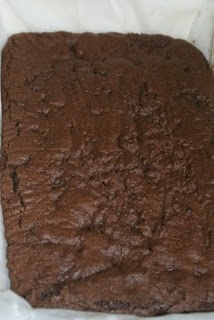
Ok so mine isn’t that even – I did say even(ish)!
Pop it in the oven for 12-15 minutes until puffy and cooked through.
Remove from the oven and allow to cool.
Meanwhile you can get on with making the peanut butter layer.
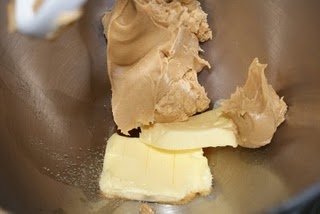
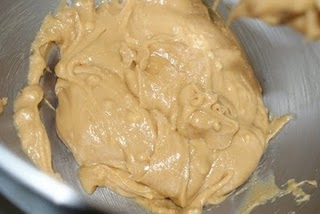
Cream together the butter and peanut butter.
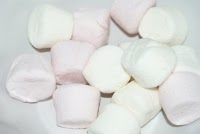
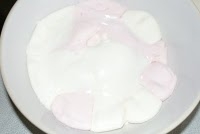
Pop the marshmallows into a bowl and microwave on high for 30 seconds. The marshmallows should be all melty and look something like this
Add the gooey marshmallow to the peanut mixture and beat well. Now add in the icing sugar and enough water to make a spreadable consistency.
This will probably be about 4-6tbps.
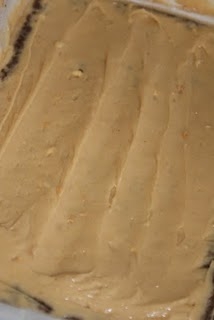
Now spread this layer over the top of the cookie mixture and put it into the fridge to chill.
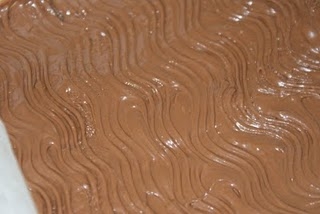
Melt the milk chocolate and pour over the chilled cookie/peanut combo.
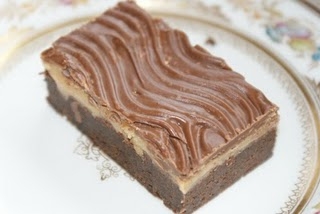
Spread it evenly across the top for a flat finish or wiggle a fork across the top like I have (because as already proved I don’t do even).
Return to the fridge to chill. Cut into squares and serve.
Best served straight out of the fridge!
Chocolate and Peanut Butter Bars  Ruth Clemens, Baker ExtraordinaireContestant on BBC2’s The Great British Bake Off
