Posts by The Pink Whisk:
- Caster sugar, dark brown sugar, nibbed sugar, 10kg icing sugar but no granulated for our brews.
- Greaseproof paper, baking parchment, paper icing cones, rice paper but no paper for the children to draw on.
- After Eight mints, turkish delight and posh expensive, high cocoa solid, bars of chocolates all earmarked for baking but no Milky Ways in the Sweetie tin.
- Bottles of rosewater, raspberry syrup, orange flower water, rosehip syrup but no squash for drinks.
- Baking powder by the truck load but no washing powder. (No clean clothes either but that’s another story!)
- In the freezer are bags of cherries, blackberries, raspberries, excess frostings kept for another time no room left for the pizzas I could have bought.
- Bags of Strong white flour, rye flour, wholemeal flour, dried yeast, loaf tins galore but no bread for sandwiches.
- Blocks of butter, salted and unsalted, lard and a bit of trex but no Utterly Butterly for the no bread sandwiches I was going to make for lunch.
- I could make you a grand sweet treat feast with the contents of my cupboards but ask me to make tea and we have nothing!
A bit more giddiness to share with you!
August 14th, 2010I will make this short and sweet as I’m sure you’ve all really had enough about me banging on about exciting adverts and things but I promise I will bring you some more baking tomorrow to repent!
I managed to get my hands on The Great British Book of Baking today by Linda Collister and Penguin

…..and I’m in it! I have two of my recipes in the book both with photos of me! (Granted in one of them I look like a bag lady who has just been dragged through a hedge backwards but we’ll glance over that quickly)
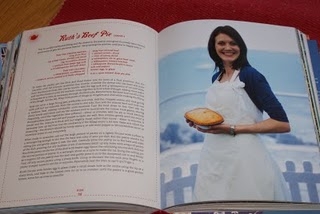
You can get the book from Waterstones here – not only does it have a couple of my great recipes in it also features recipes from the other contestants and plenty more loveliness besides.
Okay enough giddiness and exclamation marks now, cease and desist. Off to type you up some bakey treaty post for tomorrow in recompense.
Rosie Fairycakes with Crystallised Rose Petals
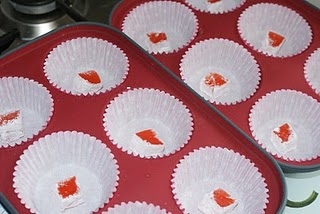
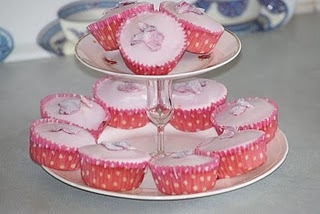
August 12th, 2010Beautiful rose flavoured fairycakes hiding a Turkish delight jewel and topped with purely gorgeous crystallised rose petals.
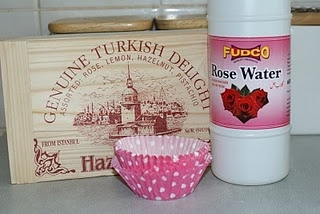
These cakes were inspired by a lovely meal out in London with friends at a Turkish Restaurant. The rosewater you can get in most baking sections in the larger supermarkets but I got this bargain big bottle from the Polish section in Tescos for less than £1. The cost of the Turkish delight was a different matter but we’ll say no more about that!
Ingredients:
Cakes
150g butter
150g sugar
100g self raising flour
50g plain flour
3 eggs
2 tbsp rose water
6 large pieces of rose Turkish delight
Icing
250g icing sugar, sifted
4 tbsp rose water
Crystallised petals
rose petals
egg white
caster sugar
Makes 12.
Prepare the rose petals first. You will need to do these the day before you want to use them.
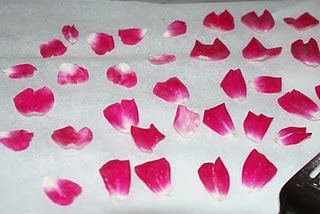
Collect some pretty rose petals from the garden (or indeed a friends garden if you’re not too green fingered like me). I used some pretty deep pink miniature roses from my Mum’s garden.
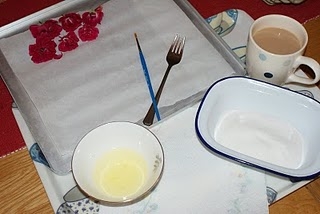
Set yourself up with a tray or plate lined with greaseproof paper, one egg white in a bowl, a shallow container of caster sugar, a teaspoon, a fork and a paintbrush.
Cup of tea is optional but will keep you going whilst you work.
Separate the petals that you want to crystallise removing any bruised ones and dispatching the odd bug that might be hiding in them.
With the fork whisk up the egg white a little bit so it loosens and is a little bit frothy.
With the paintbrush paint each side of the petal with a little egg white.
You can then pick them up with the paintbrush and drop them into the container of caster sugar.
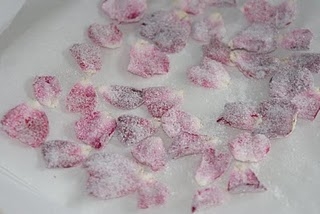
Using the spoon cover the petal with sugar and wizzle the sugar container back and forth. (Yes, wizzle is a technical term). Just make sure that the petal is coated with sugar. Leave it in there for a bit and paint and coat some more.
When you have five or six in the sugar fish them out with the spoon tapping off the excess sugar and place them carefully onto the greaseproof paper.
Continue until you have coated and sugared all the petals, now leave overnight to dry out.
The following day they will have crisped up a bit and are ready to use, and looking lovely I might add!
Now to make the fairy cakes. Prepare the bun tins adding a paper case to each.
Preheat the oven to 180c/160c Fan/350F/Gas Mark 4.
Cut the pieces of Turkish delight into halves and add one piece to each paper case.
Cream together the butter and sugar.
Add in the eggs, flour and rosewater and mix well.
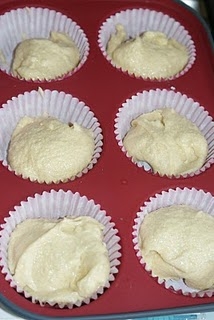
Add the cake mix to the paper cases covering the Turkish delight. Fill each case half full.
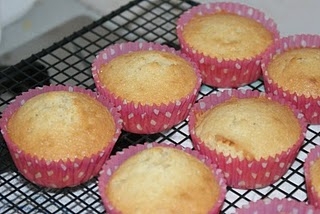
Bake in the oven for 18-20 minutes.
Remove from the oven and cool on a wire rack.
To make the icing sift the icing sugar, add 4tbsp rose water and mix well. Add a little pink food colouring if desired. Place a spoonful of icing on each fairy cake when cooled and spread evenly using the back of the spoon. Select a couple of your beautiful petals and place in the centre of the icing. Leave to set.
Rosie Fairycakes with Crystallised Rose Petals
 Ruth Clemens, Baker Extraordinaire
My Exciting News (and television debut)!!
August 11th, 2010The life and times of this manic mummy has just got seriously exciting.
My little secret is that I am one of the ten amateur bakers taking part in the new BBC2 series ‘The Great British Bake Off’ hosted by Sue Perkins and Mel Giedroyc with the fabulous judges Mary Berry and Paul Hollywood.
The series starts next Tuesday 17th August 8pm on BBC2 and runs for six weeks. But as from here my lips are sealed – you’ll have to watch to find out how I do!
You can see the advert here http://www.bbc.co.uk/programmes/p009bz8g (I’m the girlie in the turqouise cardigan with a flower in my hair!)
 Ruth Clemens, Baker Extraordinaire
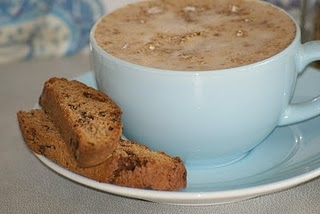
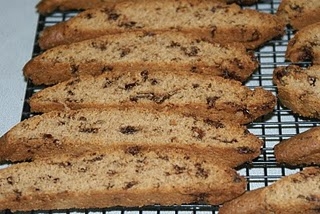
Chocolate & Chai Biscotti
August 8th, 2010
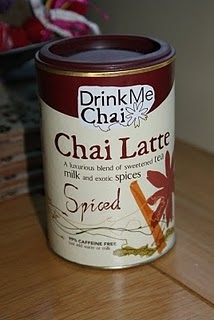
I think the world has been keeping a secret from me – Chai tea! Have you tried it? A chai latte has become my favourite treat. I think its one of the most delicious new things I have tried in ages. It’s a black tea beautifully flavoured with cinnamon and spices and luckily you can pick up this mix in most major supermarkets. (They also do a vanilla chai latte mix which is gorgeous too.)
This biscotti recipe was crying out for a chai injection and it works brilliantly. (Actually maybe it was me that was crying out for a chai fix).
Ingredients:
350g plain flour
100g caster sugar
100g spiced chai latte powder
1 1/2tsp baking powder
1/4tsp salt
3 eggs
25g melted butter
150g milk chocolate chopped
Preheat the oven to 160c/150c Fan/325F/Gas Mark 3
Grease a large baking tray.
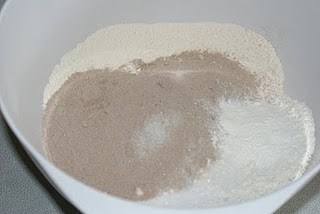
Stir together flour, sugar, latte mix, baking powder and salt.
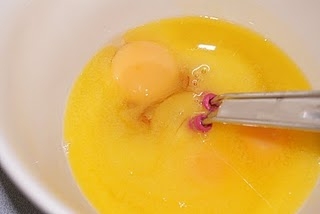
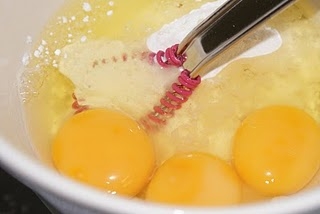
Whisk together the eggs and the melted butter. (Pink whisk optional).
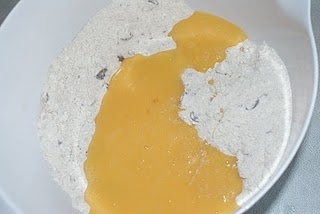
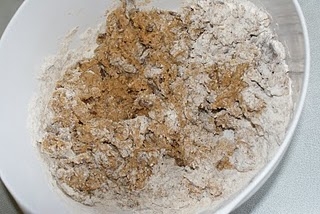
Add the chopped chocolate to the dry mix and then add in the eggs/butter mix.
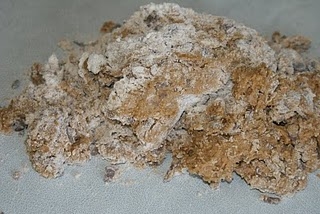
Stir altogether to create a soft, almost sticky, dough.
Now tip it all out onto your work surface.
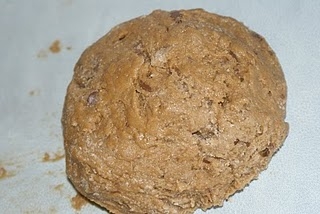
Give it a bit of a knead and bring it together into a ball of dough. Use a little bit of flour on your hands if it is sticking to you or the work top too much.
Divide the dough in half.
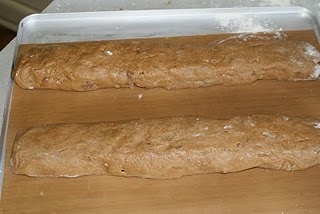
Shape each half into a log about 30cm in length and 5cm in diameter. Again, using a bit of extra flour on your hands to stop the stick!
Place both well apart on the baking tray. They will spread considerably in the oven so now you’ve put them on the tray move them a little bit further apart!
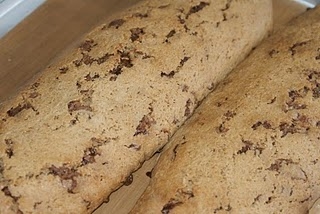
Into the oven they go for 25-30 minutes until the tops are light brown and cracked.
Cool on the tray for 15 minutes.
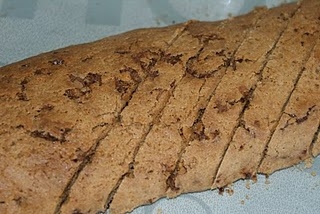
Now one at a time move onto a chopping board and with a serrated knife cut each into 1 1/2cm thick slices on the diagonal.
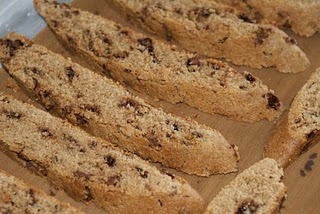
Put each slice back onto the tray and bake for 8 minutes, remove from oven, turn each biscotti over and into the oven again for 8 minutes until dried out and golden.
My friend Lea (Biscotti Queen) suggests to stand up each slice for the re-bake, you’ll need a steady hand and good dexterity to do it – I excelled in the domino effect – but stood up ,the biscotti will need only 10 minutes on the second bake. You will find Lea on twitter @bakersbunny and that lady knows her stuff.
Cool on a wire rack and store in an airtight container.
For an extra indulgent treat you could dip them into melted chocolate.
Delicious served with a steaming cappuccino.  Ruth Clemens, Baker Extraordinaire
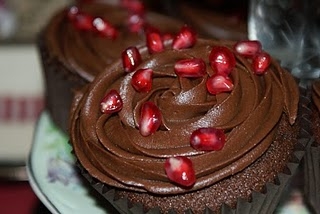
Chocolate & Pomegranate Cupcakes
August 4th, 2010
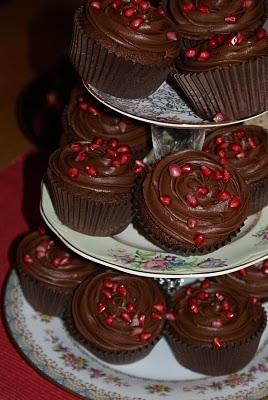
These are a delicious new take on the chocolate cupcake.
The addition of pomegranate adds a subtle fruitiness and gives the chocolate a new edge. Star of the show are the pomegranate seeds sprinkled on the tops glistening like jewels. (I’m a sucker for glitter!)
Ingredients:
Cupcakes
165g butter
300g caster sugar
3 eggs
70g self raising flour
200g plain flour
1tsp bicarbonate of soda
70g cocoa powder
300ml pomegranate juice
1tbsp vinegar (normal malt is fine)
Frosting
200g dark chocolate
200ml double cream
250g icing sugar
1 tbsp pomegranate juice
Pomegranate arils to decorate
Makes 18.
Preheat oven to 180c/160c Fan/350F/Gas Mark 4.
Cream together the butter and sugar.
Add in the eggs gradually adding in a little bit of the flour at any sign of curdling.
Sift in the flours, cocoa and bicarbonate of soda and mix in well.
Lastly mix in the pomegranate juice and the vinegar.
Fill each muffin case 2/3rds full.
Bake in the oven for 20-25 minutes.
Remove from the oven and allow to cool on a wire rack.
Meanwhile make the frosting. Chop the chocolate into small pieces and set to one side.
Heat the double cream in a pan till just under boiling point. How do you know its just under boiling point? The truthful answer is I don’t exactly know but I take it off the heat just as bubbles start to appear at the edge of the pan!
Tip the chocolate into the hot cream and allow to stand for a couple of minutes. The chocolate will have started to melt in all on it’s own.
Now give it a good stir until you have a wonderfully glossing chocolate ganache.
Finally mix in the sifted icing sugar and pomegranate juice, you may well have to give it a really good beat to get rid of any lumps. (This is where my electric mixer comes in!)
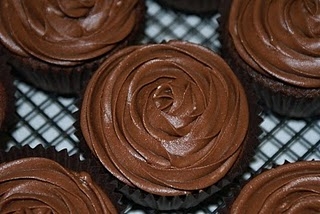
Now you have two options you can spoon the runny frosting directly onto the tops of the cakes as a glossy choccie icing or you can leave it to cool for a couple of hours to thicken up and pipe it.
I love piping the tops of cakes, I have nozzles and I have bags and I’m going to use them! The idea that piping is difficult is a myth, it’s true though that you get better with practice and it’s a heck of a lot of fun.
I will try and show you how to do the lovely ‘rose’ effect piping in the following photos but please do bear in mind that it was beyond me to pipe and photograph at the same time so… step in Mr Whisk, he’s ever so lovely but he doesn’t take a good photograph!
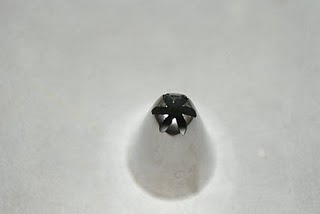
You will need a nozzle like this, alternatively any wide star shaped or plain nozzle will do.
Once the frosting has cooled and thickened give it a really good beat with a spoon. Fill your piping bag fitted with your chosen nozzle and then get ready to pipe.
Start in the centre of the cupcake and pipe in increasing circles in one continuous motion. You are almost wrapping the frosting around each previous circle. Only stop piping when you get to the outside edge.
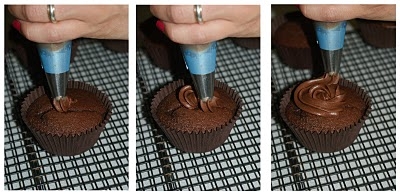
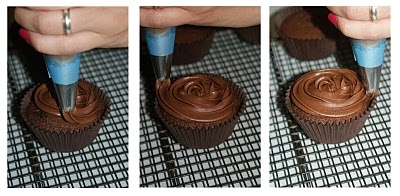 On a completely different note – whose are those old lady hands?aaargh they’re mine : (
Each one you do will get better – I promise!
Sprinkle the tops with pomegranate arils (did you know they were called that? – no neither did I!)
 Ruth Clemens, Baker Extraordinaire
The Life and Times of This Manic Mummy…
August 1st, 2010When I started the blog it was only to bring you my baking tales but I’m finding that there’s so much of this mixer girl’s life that you don’t get to hear about and so begins ‘The Life and Times of This Manic Mummy…‘ (Bakers can switch off at this point!)
In my house there is….
Time this Mummy re-prioritised her shopping list and got herself to the shops before the children decide they’ve had enough and up sticks and leave!

Ruth Clemens, Baker Extraordinaire
Black Forest Berry Brownies
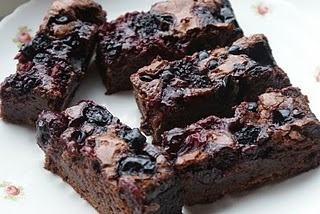
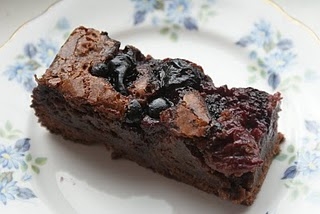
July 30th, 2010Here’s something super special and super easy to bakeBlack Forest Berry Brownies
Ingredients:
200g Dark Chocolate (Bournville works really well and won’t break the bank either)
140g Butter
225g Sugar
2tsp Vanilla Extract
2 Eggs
1 Egg Yolk
85g Plain Flour
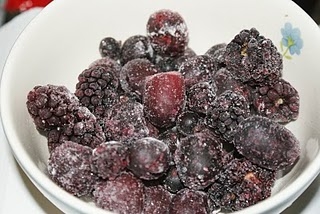
200g Frozen Black Forest Fruit Berries (Sainsburys)
You will need a baking tray with deep sides approx. 23cm x 23cm
Line it with baking paper.
Preheat the oven to 200C/180C Fan/400F/Gas Mark 6
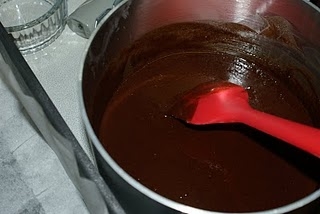
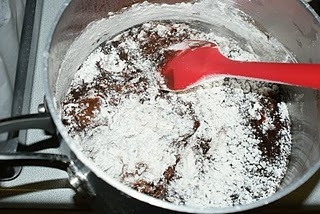
Melt the chocolate and butter in a pan over a low heat. Purists at this point would tell you you should do it in a bowl above a pan of boiling water but if you’re careful and like the quick way stick with me and chuck it in the pan.
Once its all melted remove from the heat and set aside to cool just a little bit. If you use it too hot the eggs you’re about to add are going to cook in the hot sauce so be patient.
Stir in the sugar and the mixture will go quite grainy.
Add in the beaten egg and yolk and mix to combine. Finally add in the flour and give it a good old mix up.
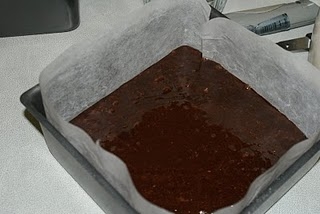
Once thoroughly combined pour the mixture into the prepared baking pan.
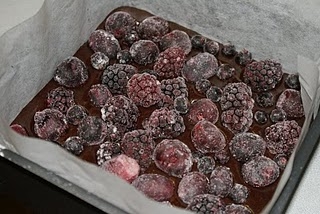
Now scatter over the top of the brownie mix all of the frozen berries.
If you can get fresh berries brilliant it will work exactly the same way but somehow late at night when I NEED to bake brownies there is not a fresh berry in sight. Sainsburys do a great range of frozen berries and the Black Forest Fruits has blackberries, blackcurrants, black grapes and black cherries. I’ve always got some in the freezer. Anyway, back to it…
Now, straight into the oven for around 35 minutes until just cooked, the middle should have just lost it’s wobble. Brownies are far better undercooked as the heat in them will carry on the cooking process as it cools and you don’t want dry horrible brownies – just make sure the wobble has just about gone!
Cool in the tin. When cold, cut into slices and serve.
 Ruth Clemens, Baker Extraordinaire
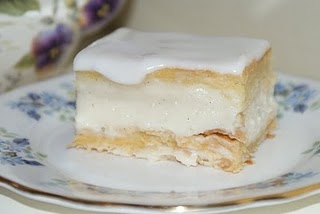
Betty’s Vanilla Custard Slices
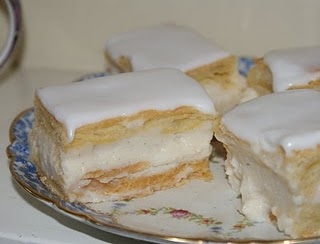
July 26th, 2010Who’s Betty I can hear you ask! She’s my lovely Nanna who taught me to make these when I was about 12. It’s what every twelve year old should be learning. Shop bought vanilla slices come nowhere near comparing.
These use homemade rough puff pastry and up until earlier this year I always used shop bought ready made stuff thinking that making my own would be some kind of ordeal. I’ll let you in on a secret – rough puff pastry is a cinch to make and super rewarding too. If you aren’t convinced or are short of time get yours from the shop – it does the trick just as well.
Ingredients:-
Rough Puff Pastry
250g Strong White Flour
Pinch of Salt
250g Butter
Juice of 1/2 lemon
5-6 tbsp cold water
Vanilla Custard
800ml Whole Milk
3 Eggs
3 tbsp Cornflour
1tbsp Vanilla Bean Paste
60g Caster Sugar
Glaze
400g Icing Sugar
60ml Water
To make the rough puff pastry add the flour and salt to the bowl of a food processor and give it a quick pulse to mix.
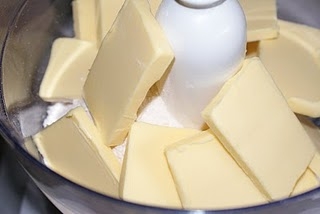
Cut the cold butter into 1/2cm slices and add to the food processor bowl.
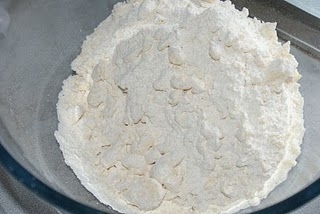
Using the pulse function whizz until the butter is broken up but still in visible lumps. Tip the mixture out into a large mixing bowl.
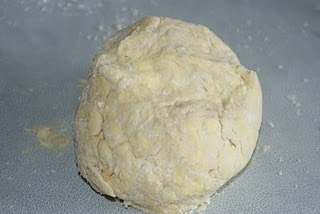
Make a well in the centre and add the juice of half a lemon and then enough super cold water to make a dough. Use the blade of a table knife to mix the dough rather than your hands as you don’t want to melt the butter.
Once the dough is into a ball wrap in clingfilm and pop it into the fridge for an hour so that the butter hardens up again.
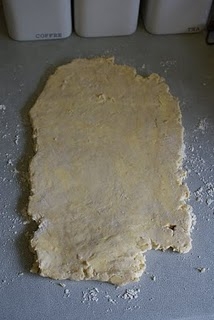
After an hour take the dough out of the fridge, lightly flour your work surface and then roll out the dough into a rectangle shape.
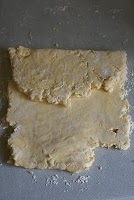
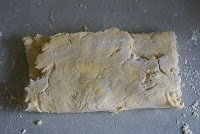
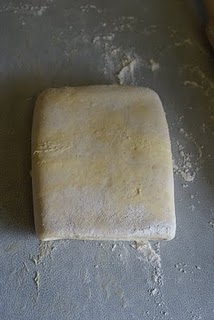
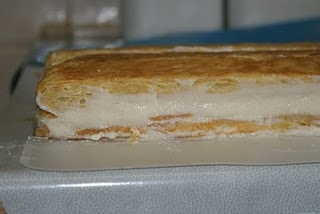
Fold into three like an envelope (see pictures below).
Turn the dough 90 degrees to the right so that the folds are now left and right. Roll again to a large rectangle and fold into three again. Turn and then repeat this step twice more, turning before each re-rolling and folding.
Each time the pastry gets smoother and more refined. Wrap again in clingfilm and allow it to chill for another hour in the fridge.
See? – It wasn’t difficult was it?
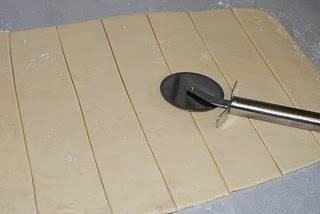
After the pastry is nicely cold again roll out on a lightly floured surface into a large rectangle about 5mm thick. Using a pizza cutter cut into approx 6cm wide slices.
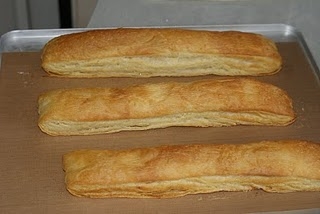
Place well spaced onto a greased or lined baking tray and bake in the oven at 200C/180C Fan/400F/Gas Mark 6 for 10-12 minutes until golden and fully cooked.
Place on a rack to cool.
Now its time to make the custard. Add all the ingredients to a pan with the exception of the sugar and give them a good stir with your whisk. I like to use vanilla bean paste because I think it gives the best flavour with the gazillion seeds it has in, but vanilla extract is okay too.
Keep stirring over a medium heat and as the custard comes up to boiling point it will start to thicken. Allow to bubble for a few minutes until it gets really thick, keeping stirring to avoid lumps. Add in the sugar and give it another good stir.
If you do end up with lumpy custard you can
1. Whisk it like mad to get rid of the lumps
2. Whizz it up in the food processor which will sort it out
3. Pass it through a seive (if you have the patience of a Saint)
4. Hope no-one notices!
Pour the super-thick custard into a bowl and allow to cool.
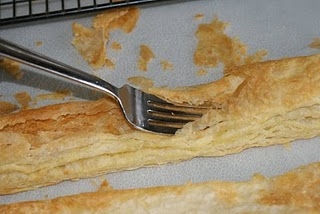
Prepare your puff pastry slices by pressing down the tops with a fork so you have a nice base for the custard to sit on. Tip off and discard the worst of the crumbs.
Pair up your pastry slices into two’s, a top and a bottom.
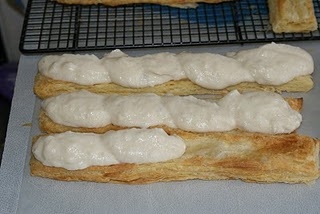
Place spoonfuls of cooled custard along the pastry bottoms. Repeat with a second layer, slightly smaller than the first. The trick is to keep the custard from oozing out.
Place the pastry tops onto the custard, being very gentle. If necessary use a knife to encourage any custard spillage back into the slice.
Mix up a thick icing using the icing sugar and water and ice the tops.
Bob them into the fridge for ten minutes just to encourage your custard to set in the right position!
My twelve year old instructions say to ‘use a saw knife to cut’, of course this would be a serrated knife. Cut gently and carefully again avoiding a custard ooze situation!
Slice into whatever size you prefer but get ready to eat the lot – these are delicious and best eaten the same day!
Betty’s Vanilla Custard Slices

Ruth Clemens, Baker Extraordinaire
Chocolate Pudding Teacups
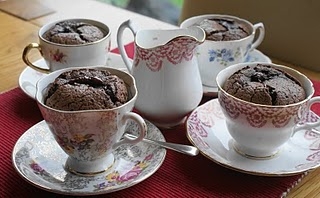
July 22nd, 2010Okay, I admit it, I’m obsessed with vintage teacups! For some girls its shoes, handbags but of late for me its lovely pretty little tea sets. I can’t pass the charity shop and leave a set looking lonely and forlorn in the window and although I drink a lot of tea I’m more of a mug kind of girl.
So its about time I came up with an idea for using them and here it is. Whilst I don’t recommend you use your expensive antique heirloom of a tea set, you can pick up some brilliant buys from your local charity shop and put these little gems back into action.
China Tea Cups were never designed to go in the oven or the dishwasher for that matter but I have thoroughly tested all sorts of tea cups to check that they can withstand the heat of the oven and because the bake time is extremely short these little lovelies can cope!
Ingredients:
115g Butter
115g Dark Chocolate – I used Maya Gold which was lovely but you can use any chocolate that takes your fancy.
3 Eggs
35g Plain Flour
150g Caster Sugar
Makes 4.
Preheat the oven to 200c/180c Fan/400F/Gas Mark 6.
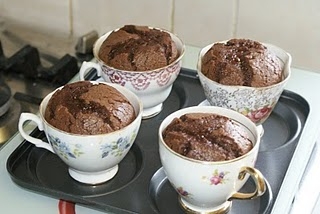
Butter the tea cups you will be using. Then place on a baking tray. I use a Yorkshire pudding tray just because it stops them sliding around.
Melt the butter and chocolate together. I do this directly in a pan over a low heat, just make sure the chocolate doesn’t burn on the bottom.
In a bowl whisk together the eggs, flour and sugar.
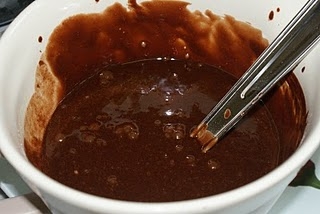
Beat in the chocolate mixture and mix till thoroughly combined.
Divide the mixture between the four tea cups and pop in the oven for 12-16minutes depending on how gooey you like the middle.
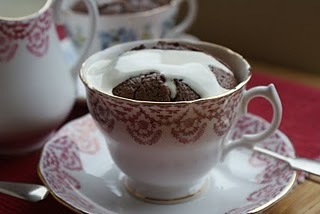
Serve whilst still warm with some lovely double cream.
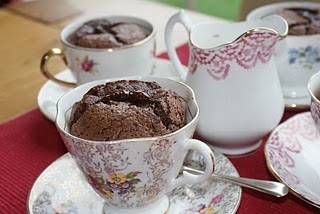
Chocolate Pudding Teacups – Simple but oh so lovely.

Ruth Clemens, Baker Extraordinaire
Monkey Bread – No Monkeys Required
July 20th, 2010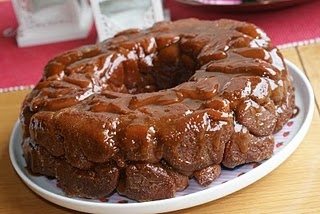
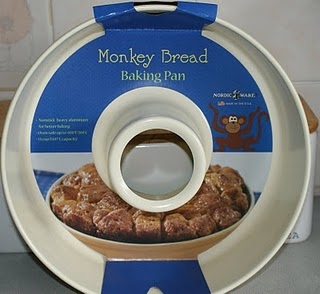
This pan happened to end up in my collection in one of those shopping moments when all sensible rationale flies out of the window. Lured by cute monkeyness and sheer curiosity the pan found its way into my shopping basket.
A bit of digging around came up with tons of rave reviews and a million different recipes – how did I not know about this? Monkey bread is a fab sweet cinnamon tear and share bread you don’t want to miss out on.
Hmm, now here’s the catch, I can’t ‘do’ bread, it turns out wrong, I have no intuitive feel for it and the thought sends me into a bit of a tizz! So sharp word with myself, get over it and keep thinking that the monkeyness might help. I’m so glad I did.
Ingredients:
For the dough
500g Strong White Flour
1 tsp Cinnamon
1 1/2 tsp Salt
55g Butter
2 Eggs beaten
2 tbsp Honey
15g Dried Yeast (3 tsp)
175ml Milk
For the sugar coat
150g Caster Sugar
2 tsp Cinnamon
For the Sauce
200g Butter
100g Dark Brown Sugar
Begin by making the dough.
Warm the milk so it is tepid.
In a small dish mix 2 tbsp of the milk with the yeast and cream together.
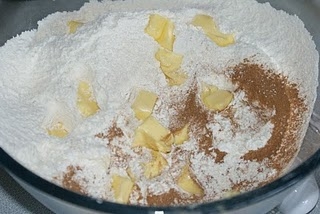
Into a large bowl sift the flour, salt and cinnamon and mix.
Add the butter in small pieces and rub into the flour.
Make a well in the centre and add the eggs, honey yeast and just enough milk to make a dough, it should be soft and not too sticky. I only had to add 125ml of the remaining milk but this will depend on how wet or dry your mix is.
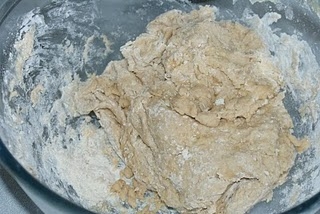
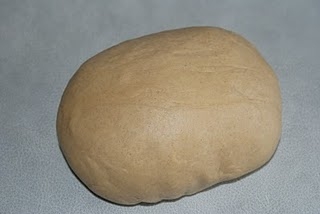
Tip your dough out onto your work surface and knead. You shouldn’t need any extra flour and it will stick a little to begin with but keep going and it will come together nicely.
After ten minutes kneading (aka the bingo wing work out!) You should have a dough that looks something like this.
So far so good.
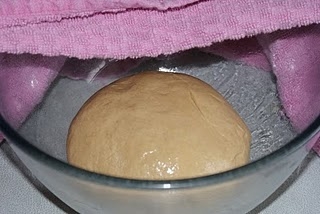
Pop it into an oiled bowl, cover with a clean tea towel and set aside to rise in a warmish draught free spot. This should take about 1 1/2hours but will depend on where you have put it.
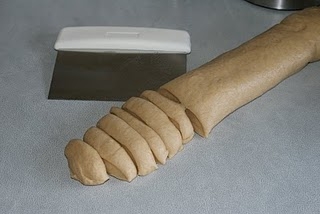
Once doubled in size tip it out onto your work top, give it a quick knead to knock it back and shape into a long fat sausage. Cut into approx 1cm thick slices.
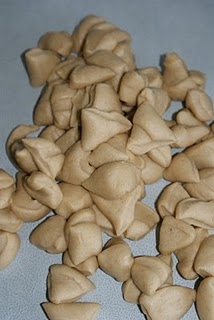
Chop each slice into three or four random shaped pieces, no need for precision here.
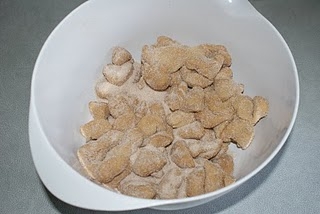
In a large bowl mix together your sugar topping combining the caster sugar and cinnamon, now put all your monkey bits into the bowl and give it a good mix up to coat them all well. Some may stick together but just separate them as you mix.
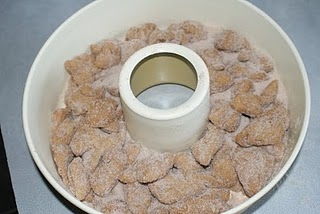
Once they are all well coated (and already looking yummy) pop them all into the monkey bread or tube pan. You don’t need to grease the pan, I have had no problems but if you’re worried a quick grease won’t do any harm.
Cover again with the tea towel, place it in a nice cosy spot for an hour or until puffy and doubled in size.
Now’s the time to preheat the oven to 200c/180c Fan/375F/Gas Mark 5.
Prepare the sauce. In a pan melt down 200g Butter and 100g Dark Brown Sugar. The butter should be melted and the sugar dissolved.
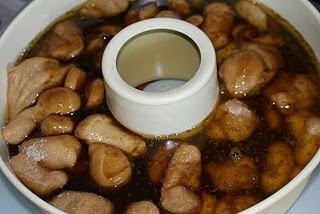
Once the monkeys have doubled in size pour over the sauce – all of it!
Now, into the oven it goes for 35-40 mins. Halfway through cooking cover with a good layer of foil to stop the top catching.
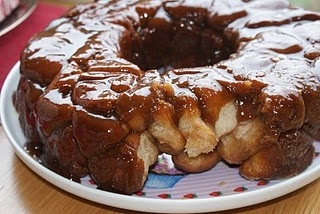
Once bake time is up remove from the oven and allow to cool in the pan for 5 mins. Invert the monkey bread onto a serving dish, you should have no trouble getting it out but a couple of gentle taps may be required to help it on its way.
I would allow this to cool for at least 15 mins before serving, the caramel sauce is a red hot burner, I know, I was extremely impatient!
Monkey Bread – The Best Tear and Share around.
 Ruth Clemens, Baker Extraordinaire
